
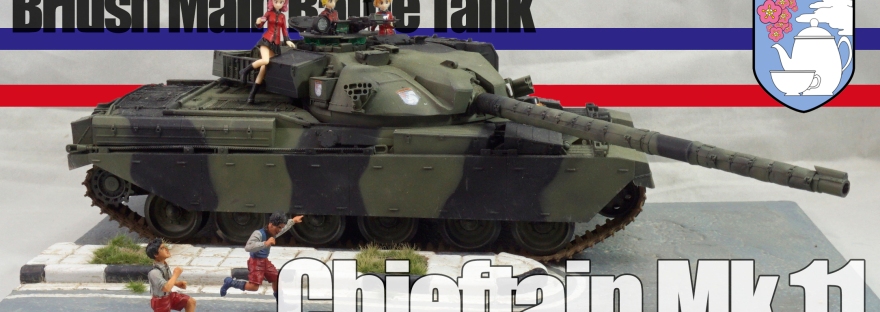

After a few personal setbacks, finally able to get this out of the table factory to mark the first finished kit of the year!
The Idea
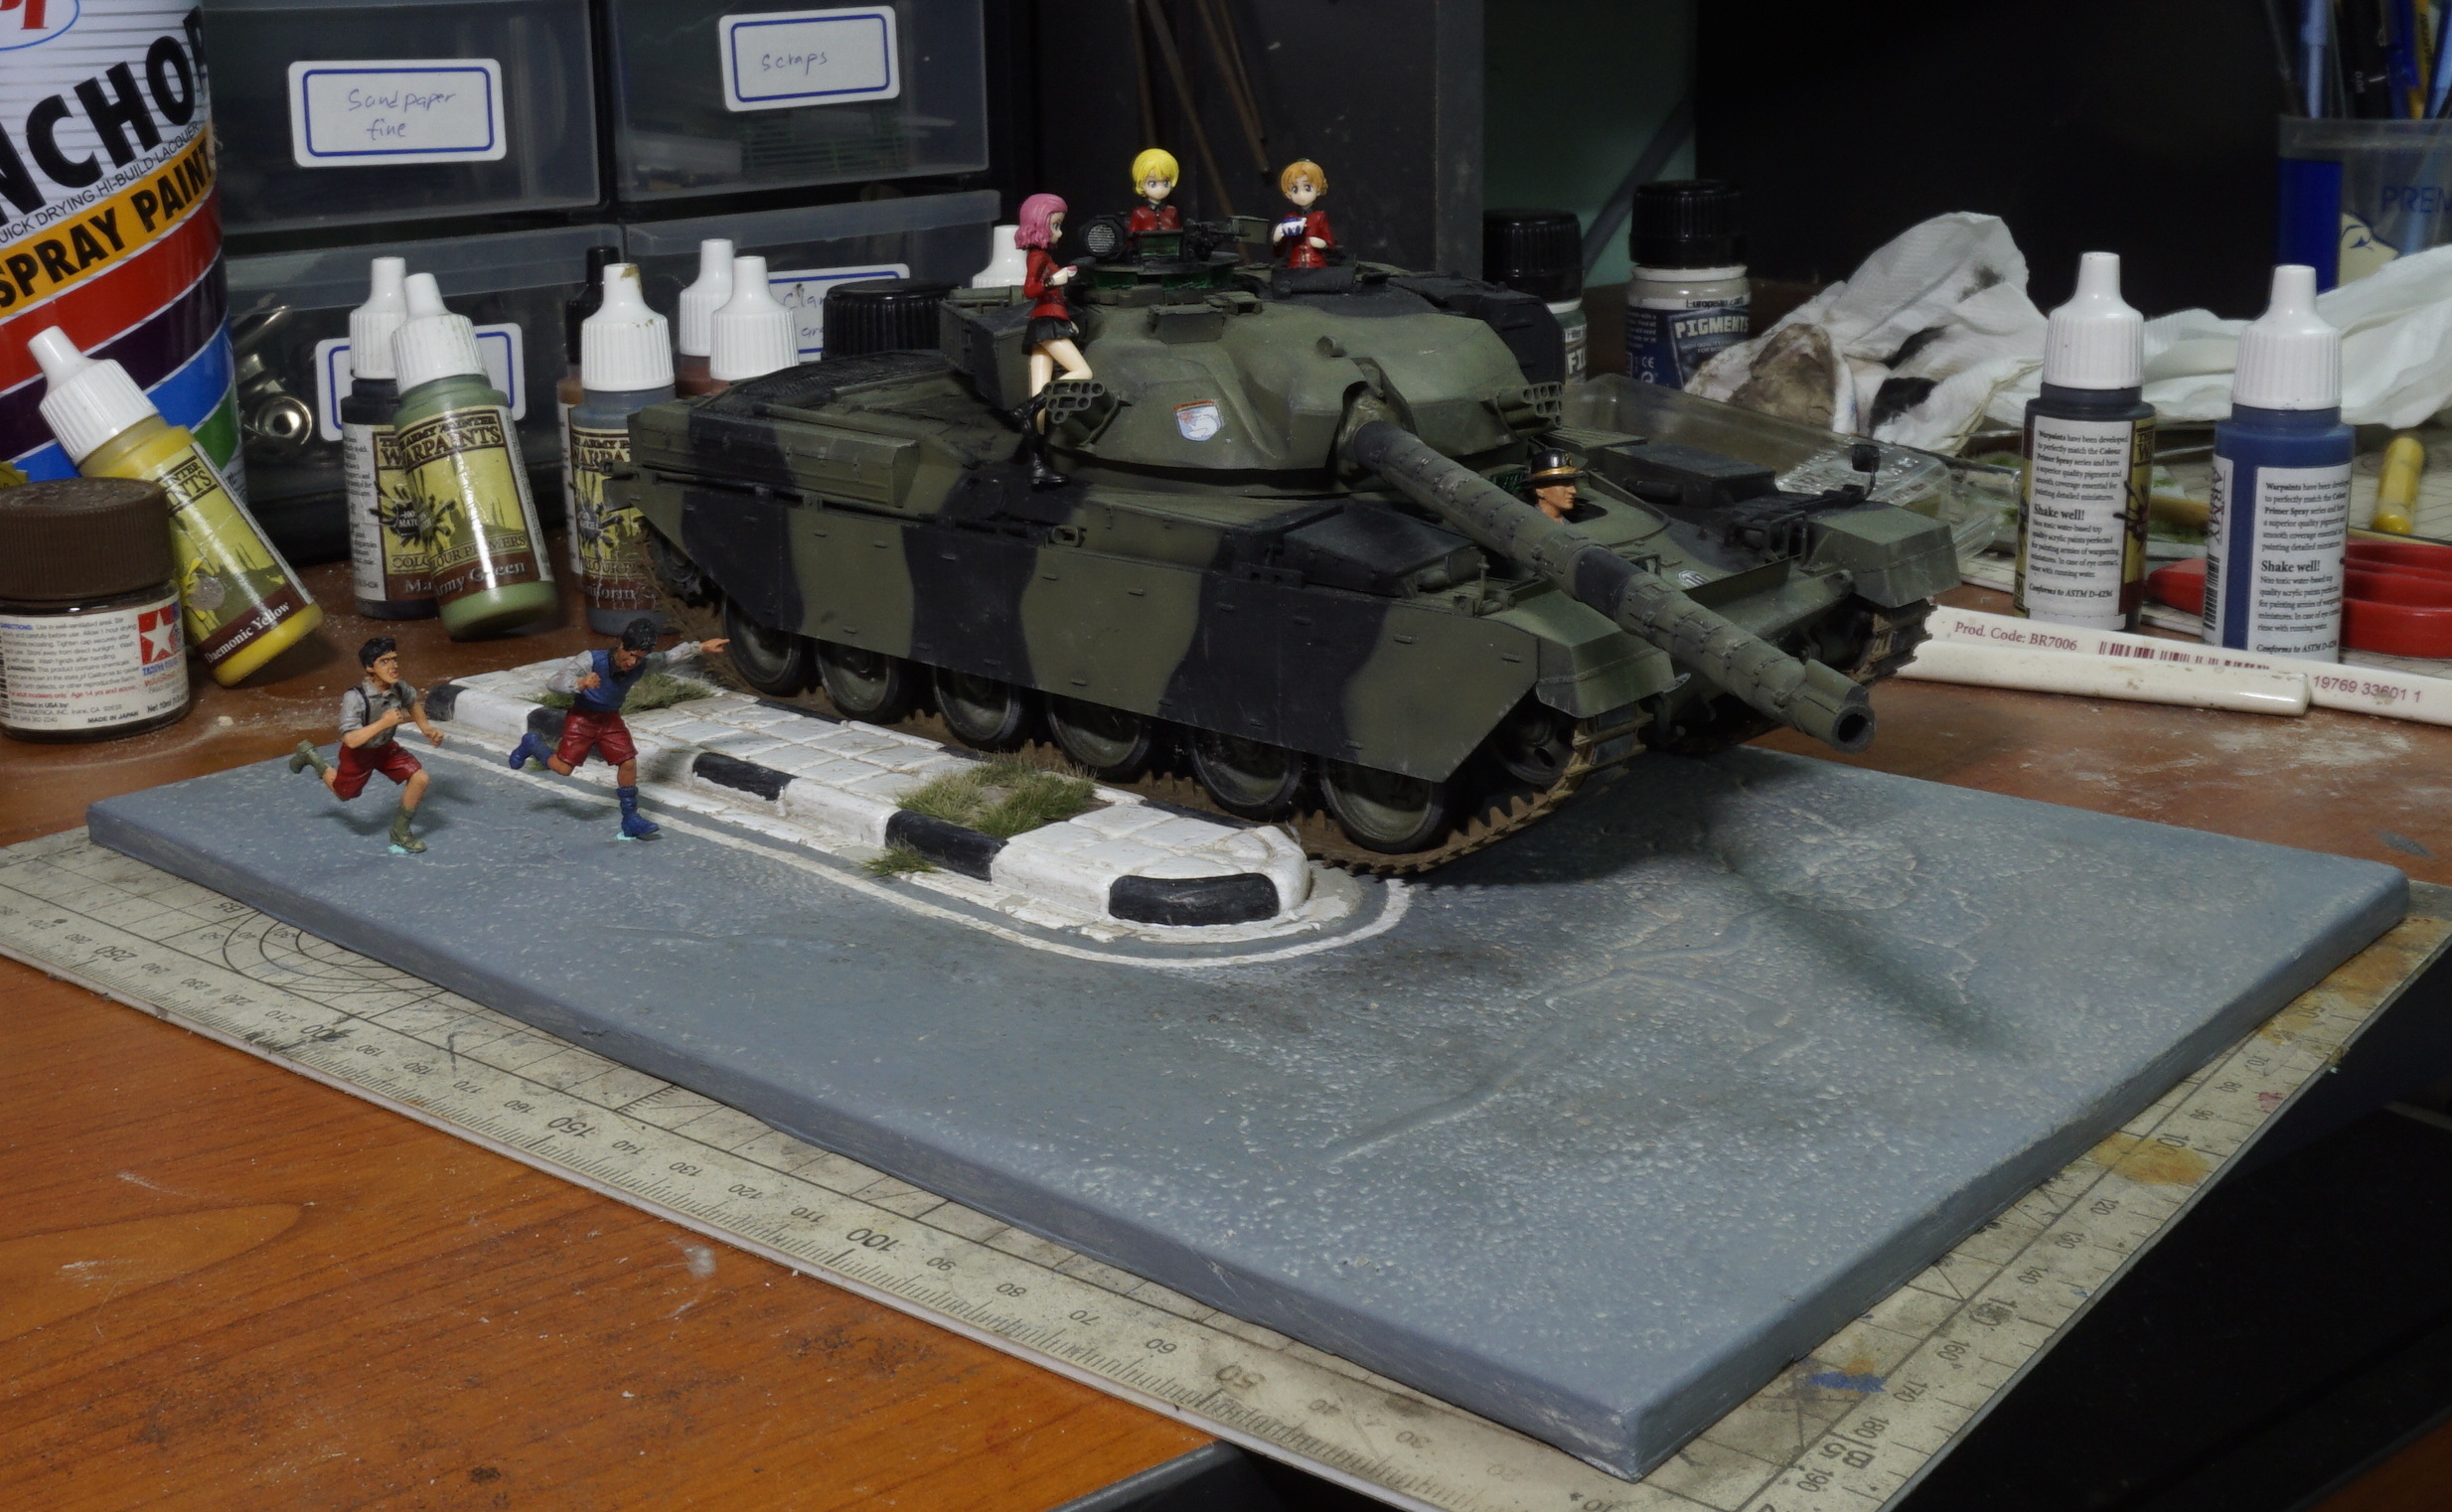
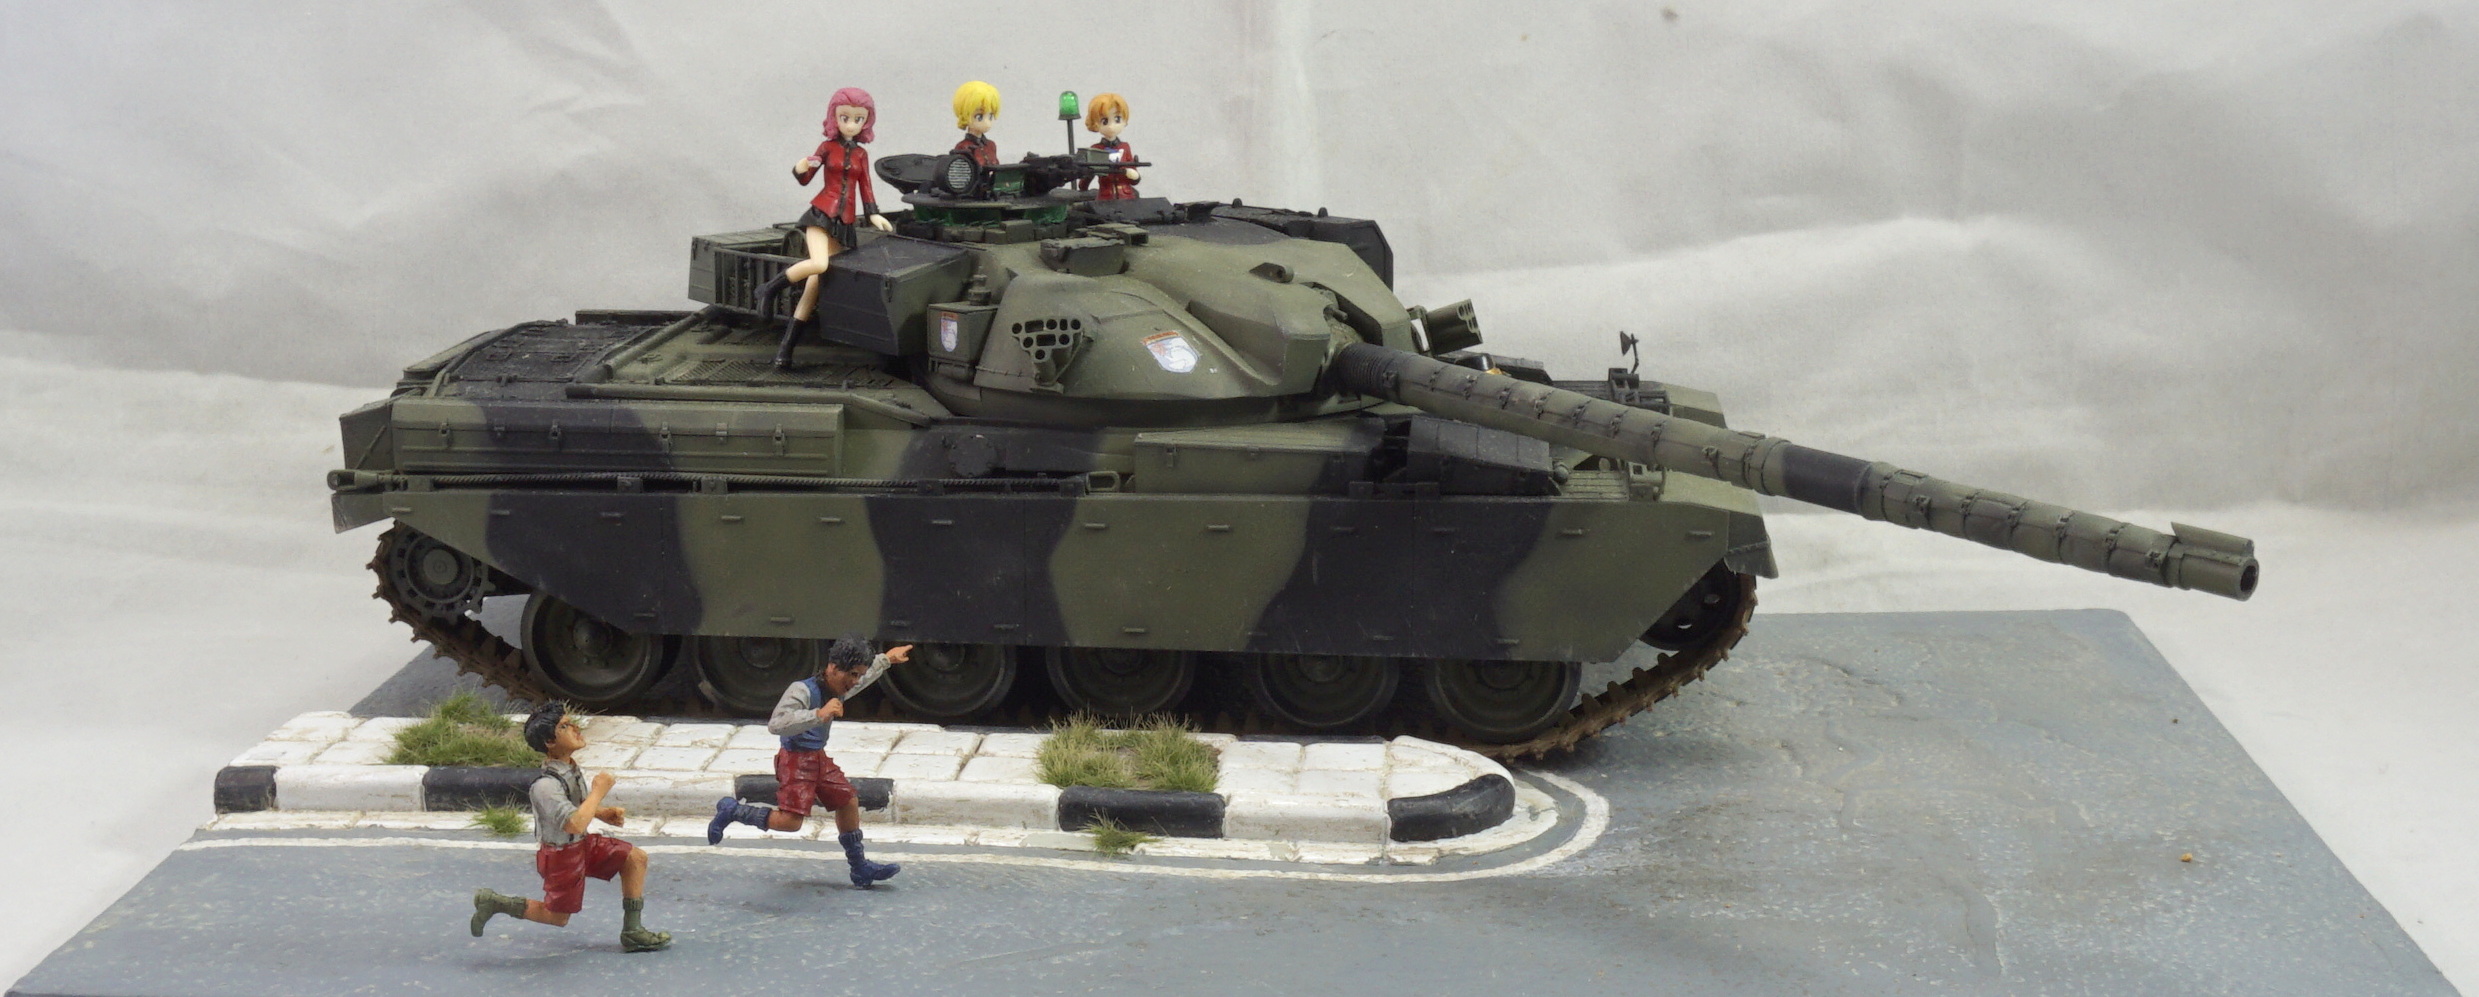
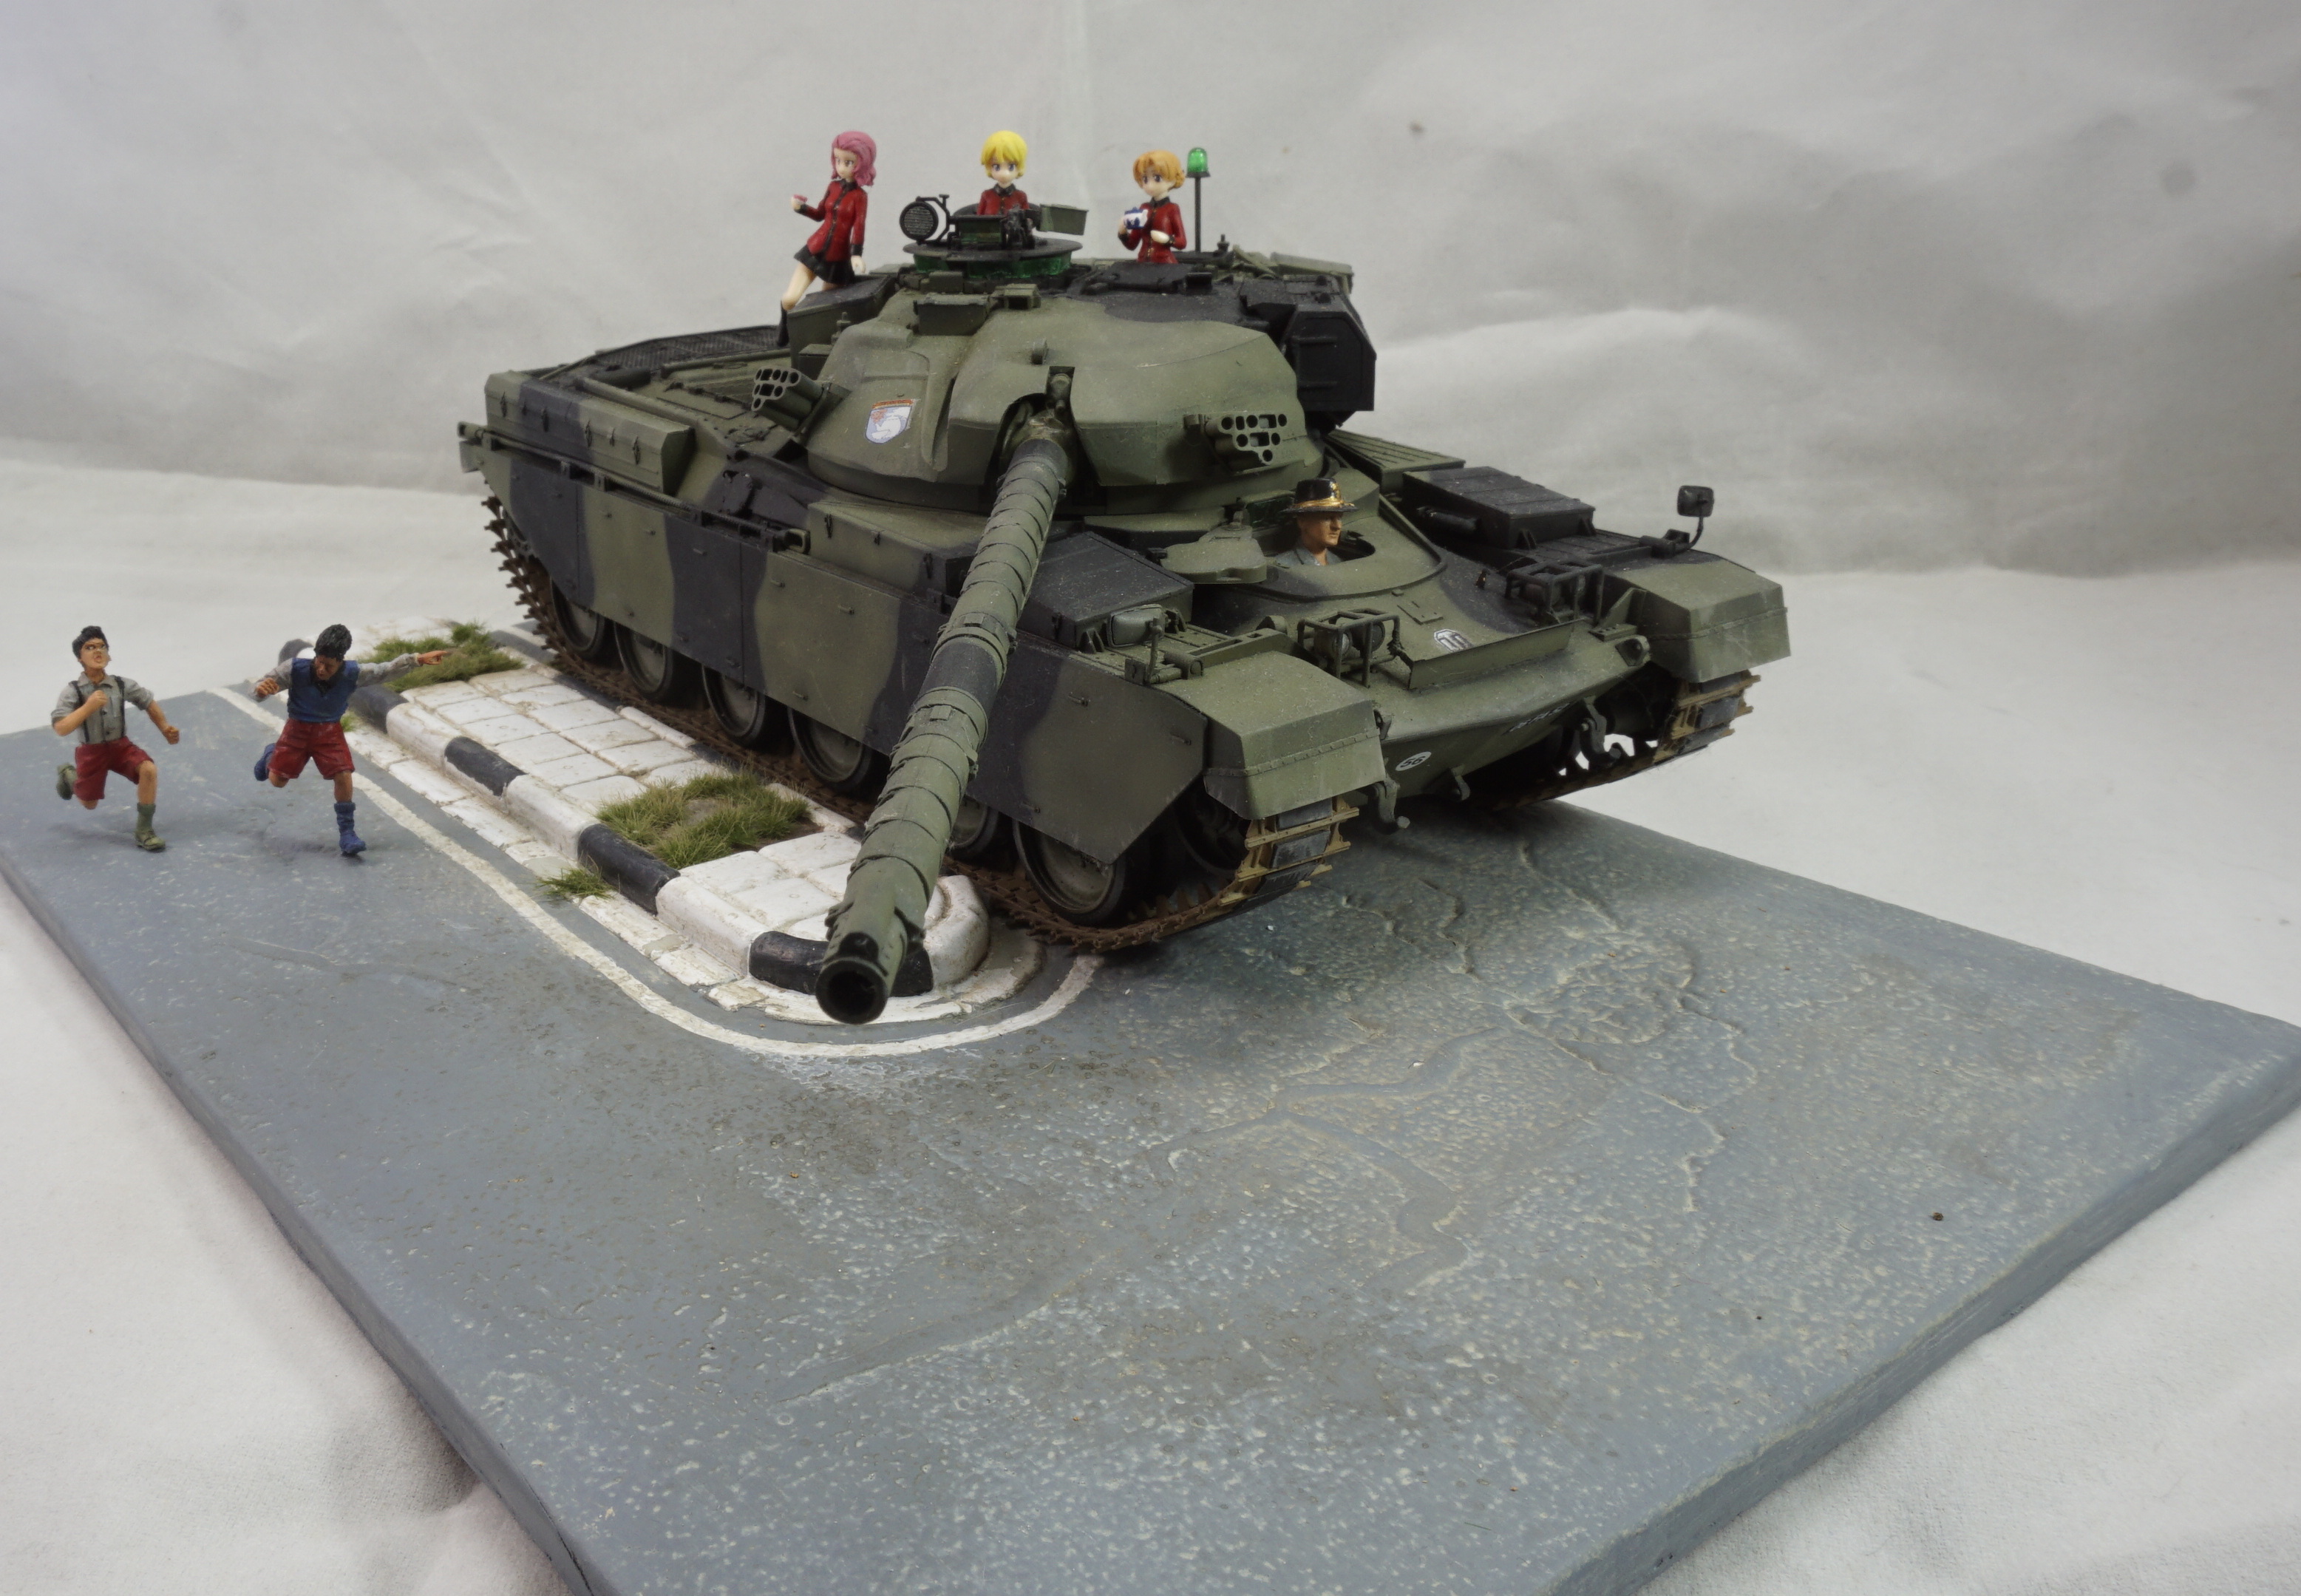
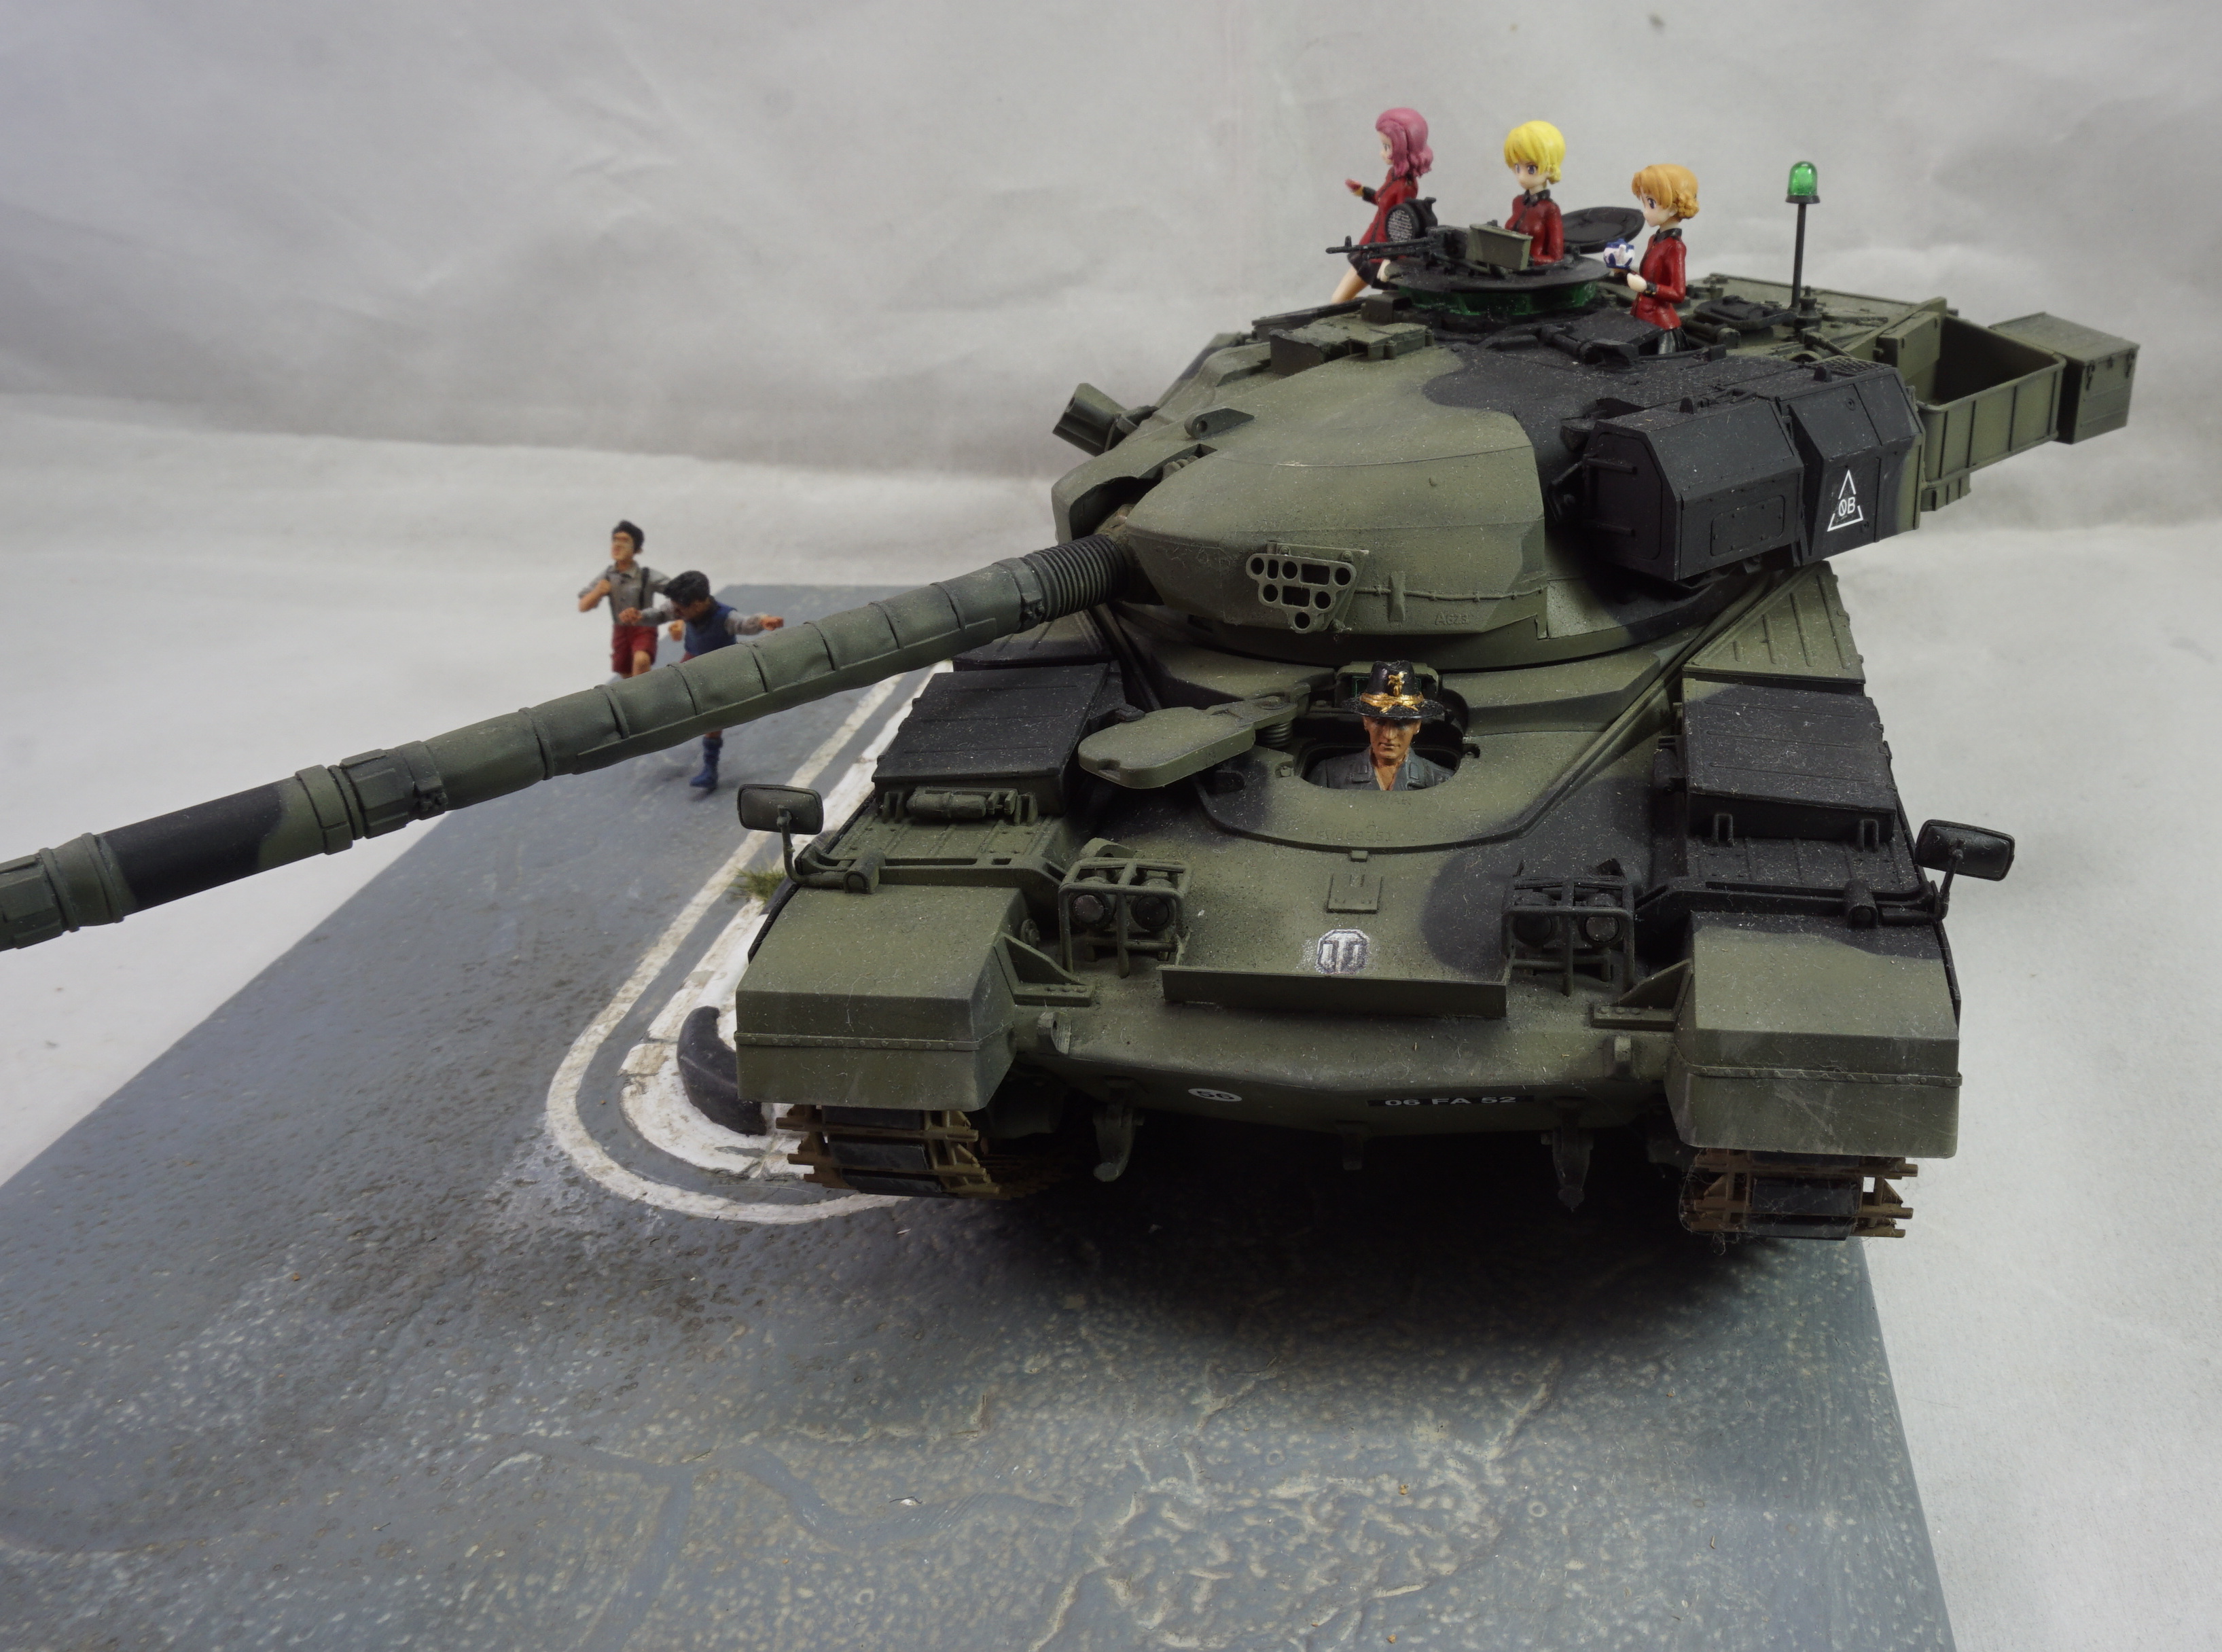
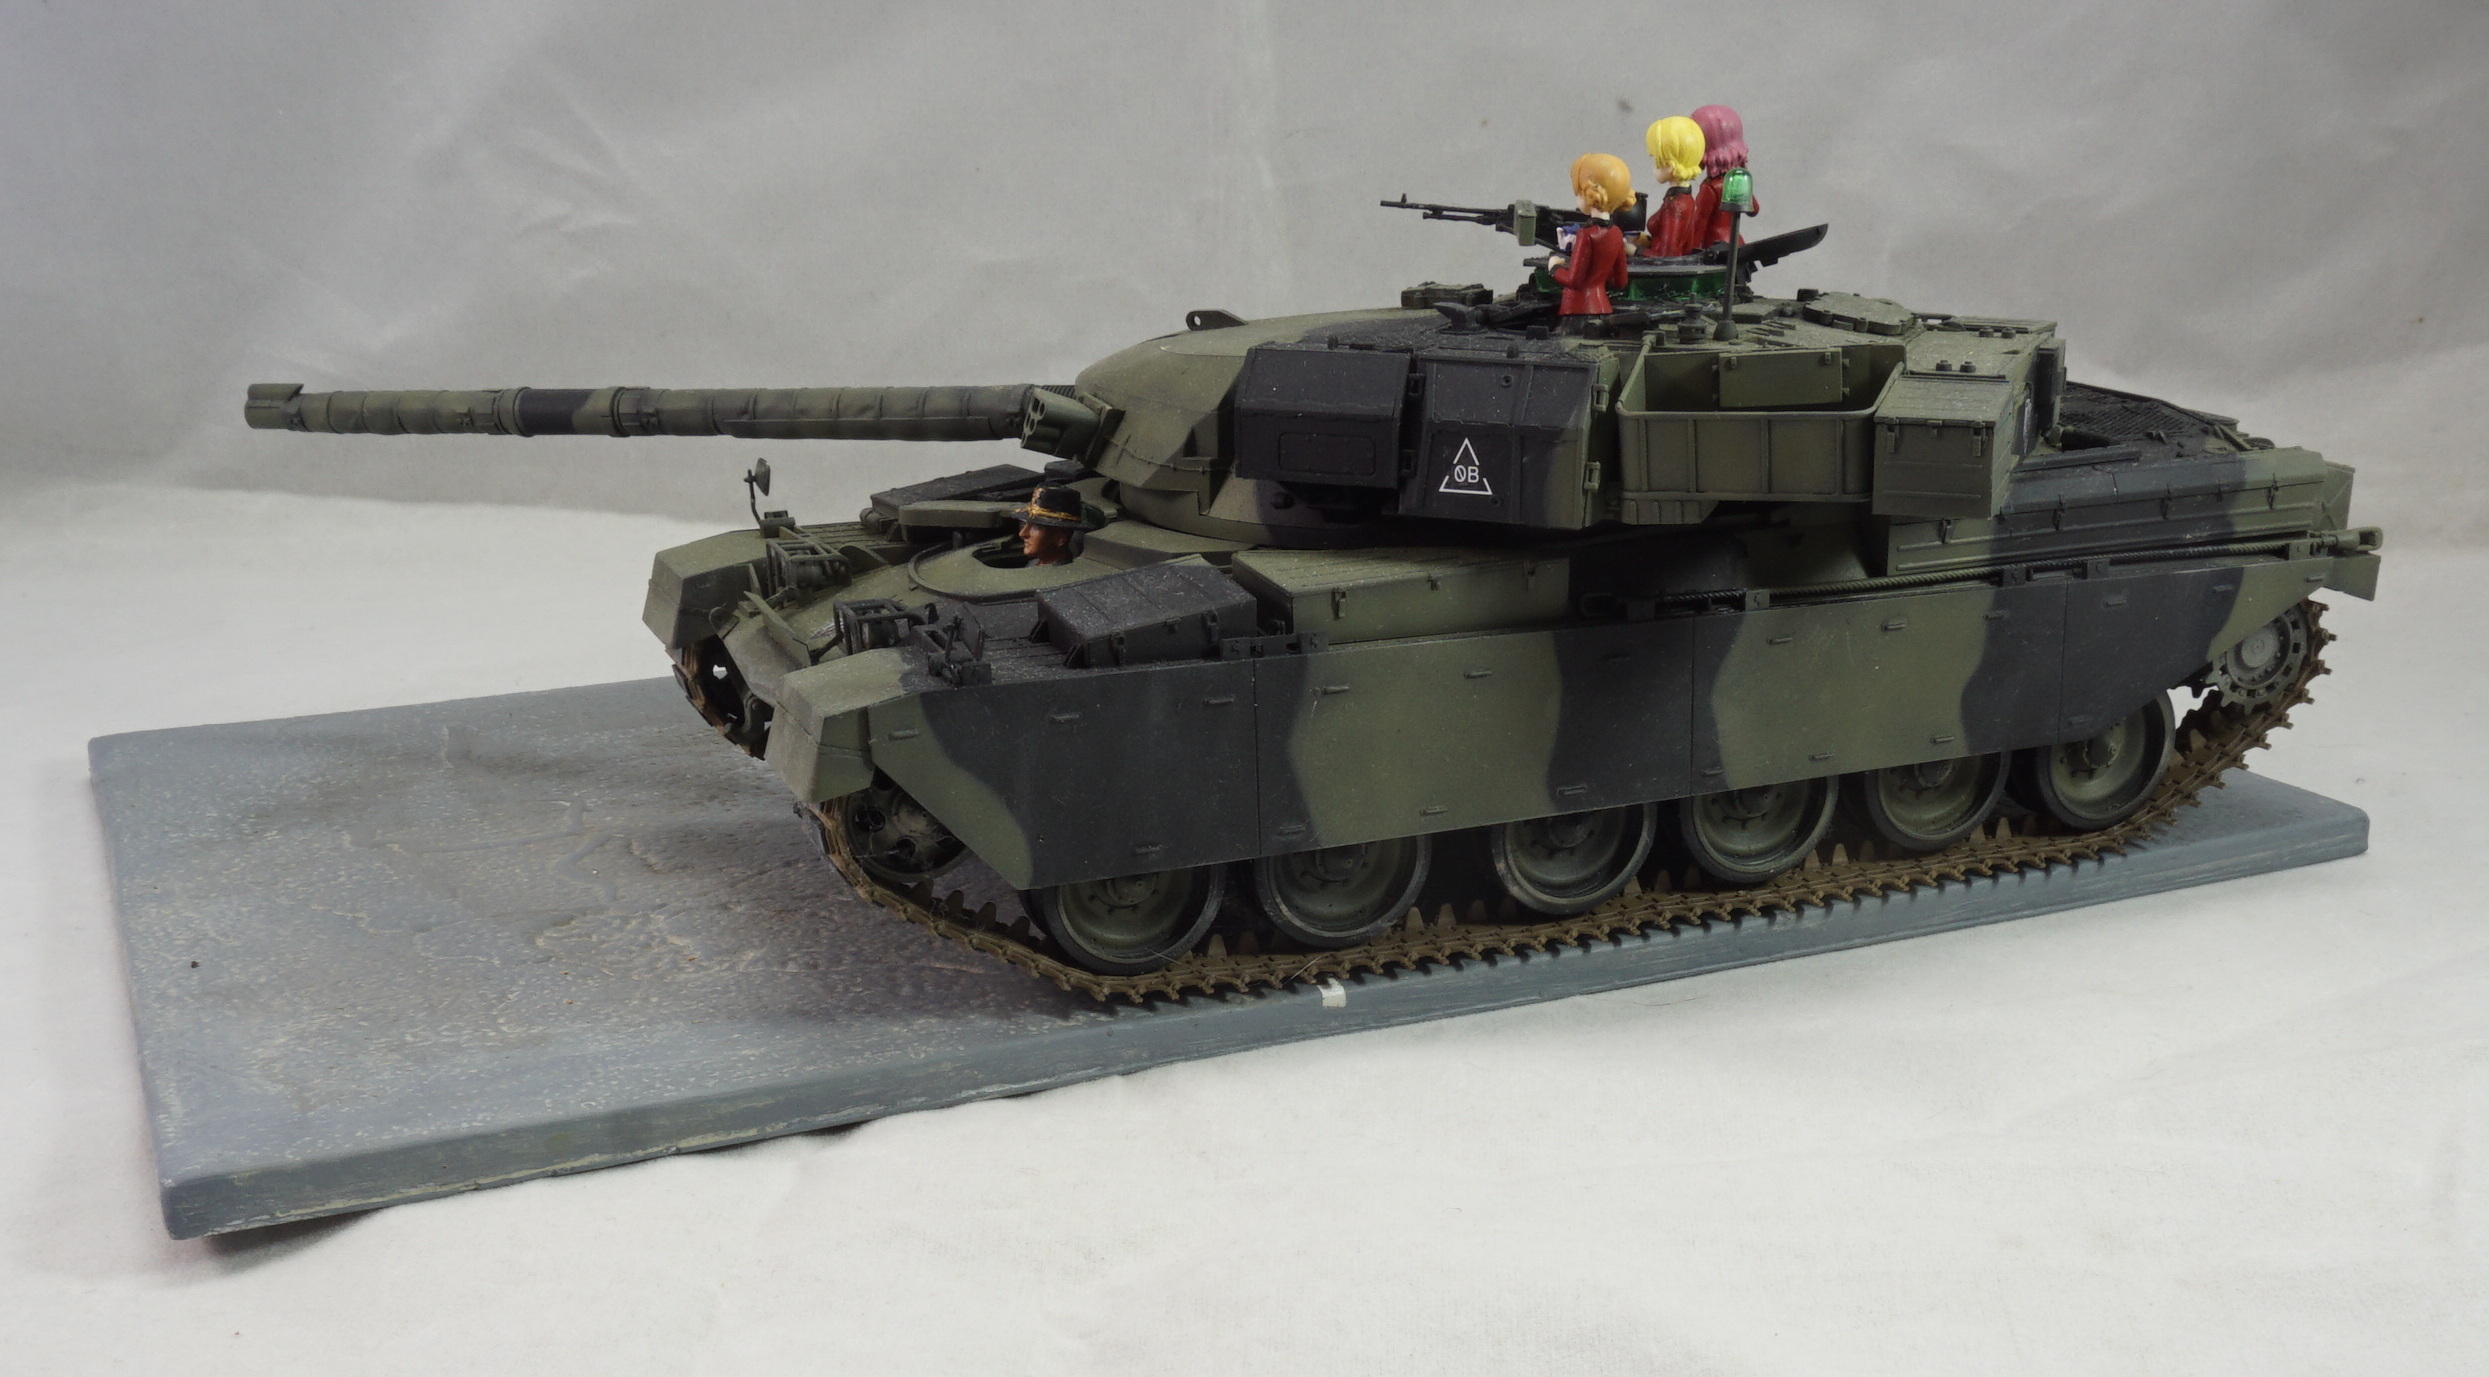
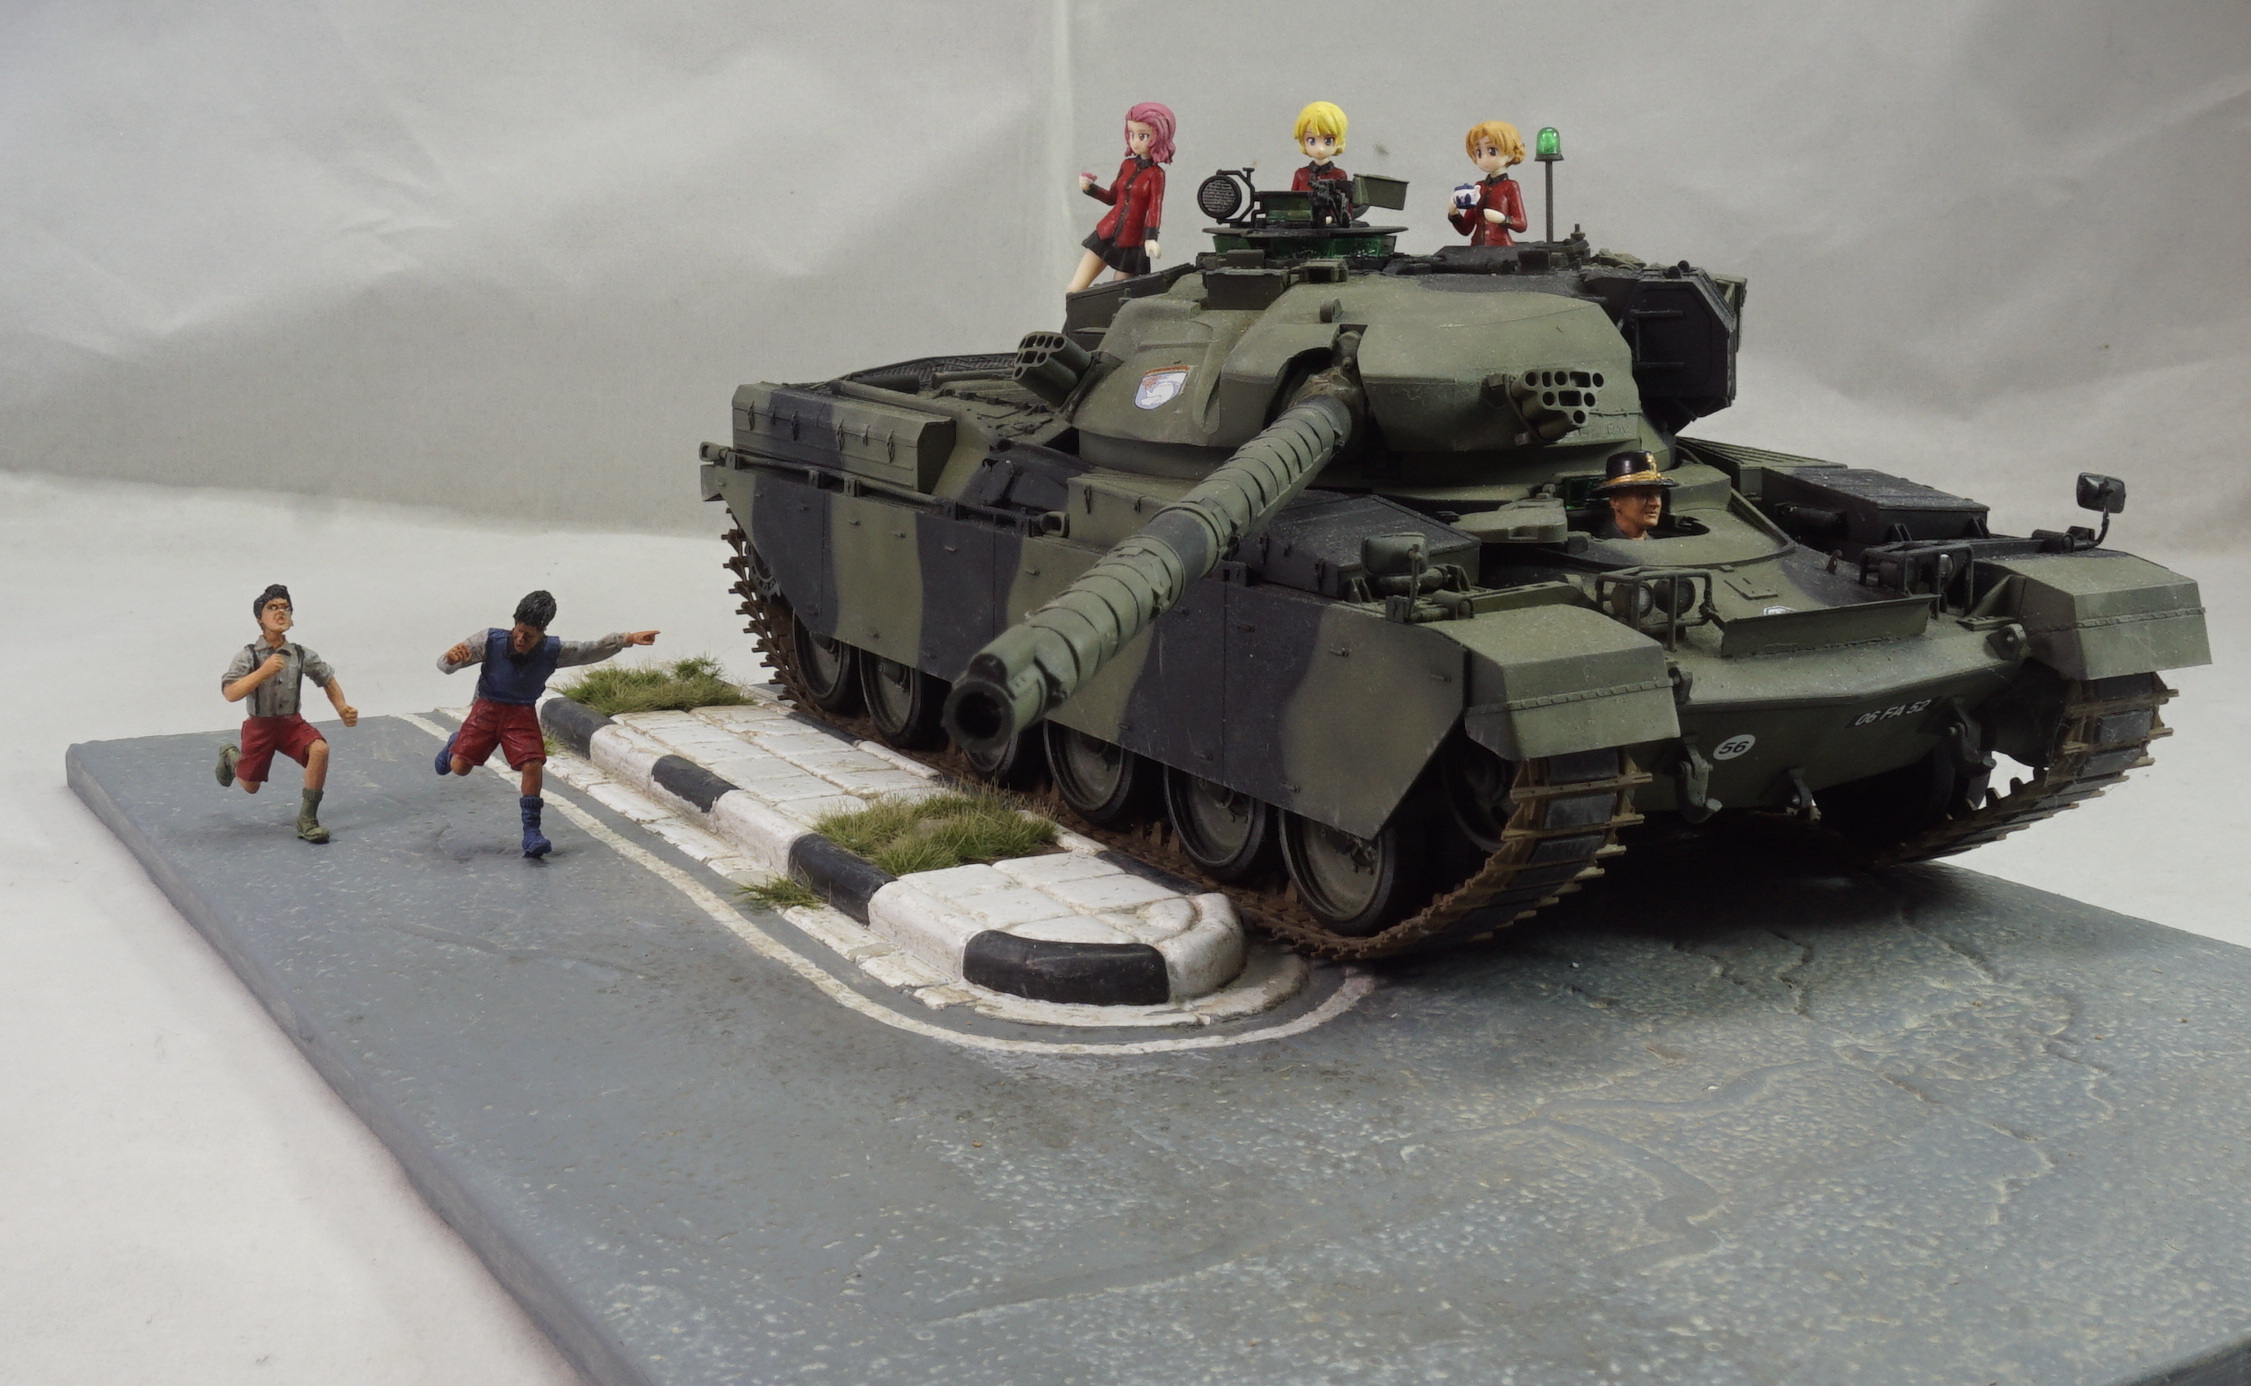
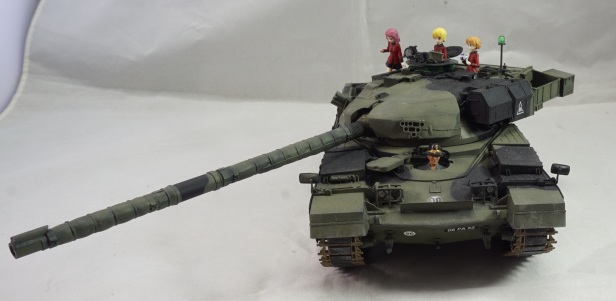
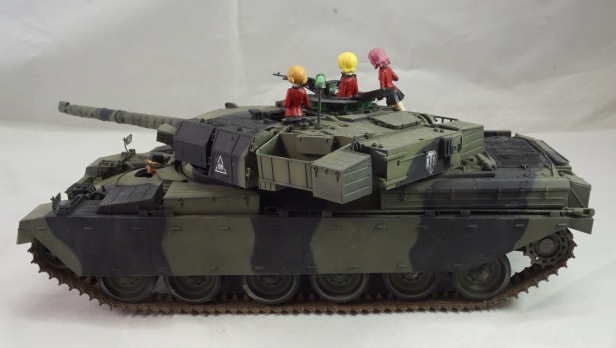
The idea came from a pixiv picture that featuring “The Chieftain” driving Chieftain tank with Darjeeling. Which i taught that would be a good reason to buy one of the *then* recently release Takom Chieftain Trio. I choose the MK.11 since it look more complete than it’s earlier variation also it sold about the same price as the other two so might as well get this instead.

by toorops
Now for those that don’t know The Chieftain here the given description
The Chieftain (Real name Nicholas Moran) is Wargaming America’s resident tanker and amateur historian. In addition to doing research for the tanks in the game World of Tanks, he also makes informational videos, found on this channel, and on a more frequent basis, creates written articles on his column, “The Chieftain’s Hatch”
What i like about his videos is that he get technical on how the tank work and commenting the general feel of working inside the tank instead of god knows how many tank videos that only focus on rehash history and stats *I looking at you German Cats!* but then again not everyone able to access inside the tank so eh.
Anyway before going offtopic. Just like the IS-3, i want to do a small dio with it and there are many idea swirling around. The ambitious one is the river embankment dio where the Chieftain tank sit on top of the embankment while an amphibious vehicles on the water beside it. That get axed because of high cost and availability since the amphibious vehicles in question is the Dragon 1/35 IJN Type 2 (Ka-Mi) which seem no where to be found last i check and it cost quite alot even on it retail price for such a small tank. I wish i can proceed along this idea in the future but probably when i have a stable job that is.
Another one is instead of embankment, use bridge instead. Actually that hard to find and expensive since most of it was in resin and the only common plastic bridge kit was the Bronco Models Bailey Bridge which is certainly not what i have in mind. I also look into O gauge railway bridge to see if it feasible to use with the tank but nope.
Even the final one have some changes which i would talk about it later.
The Build

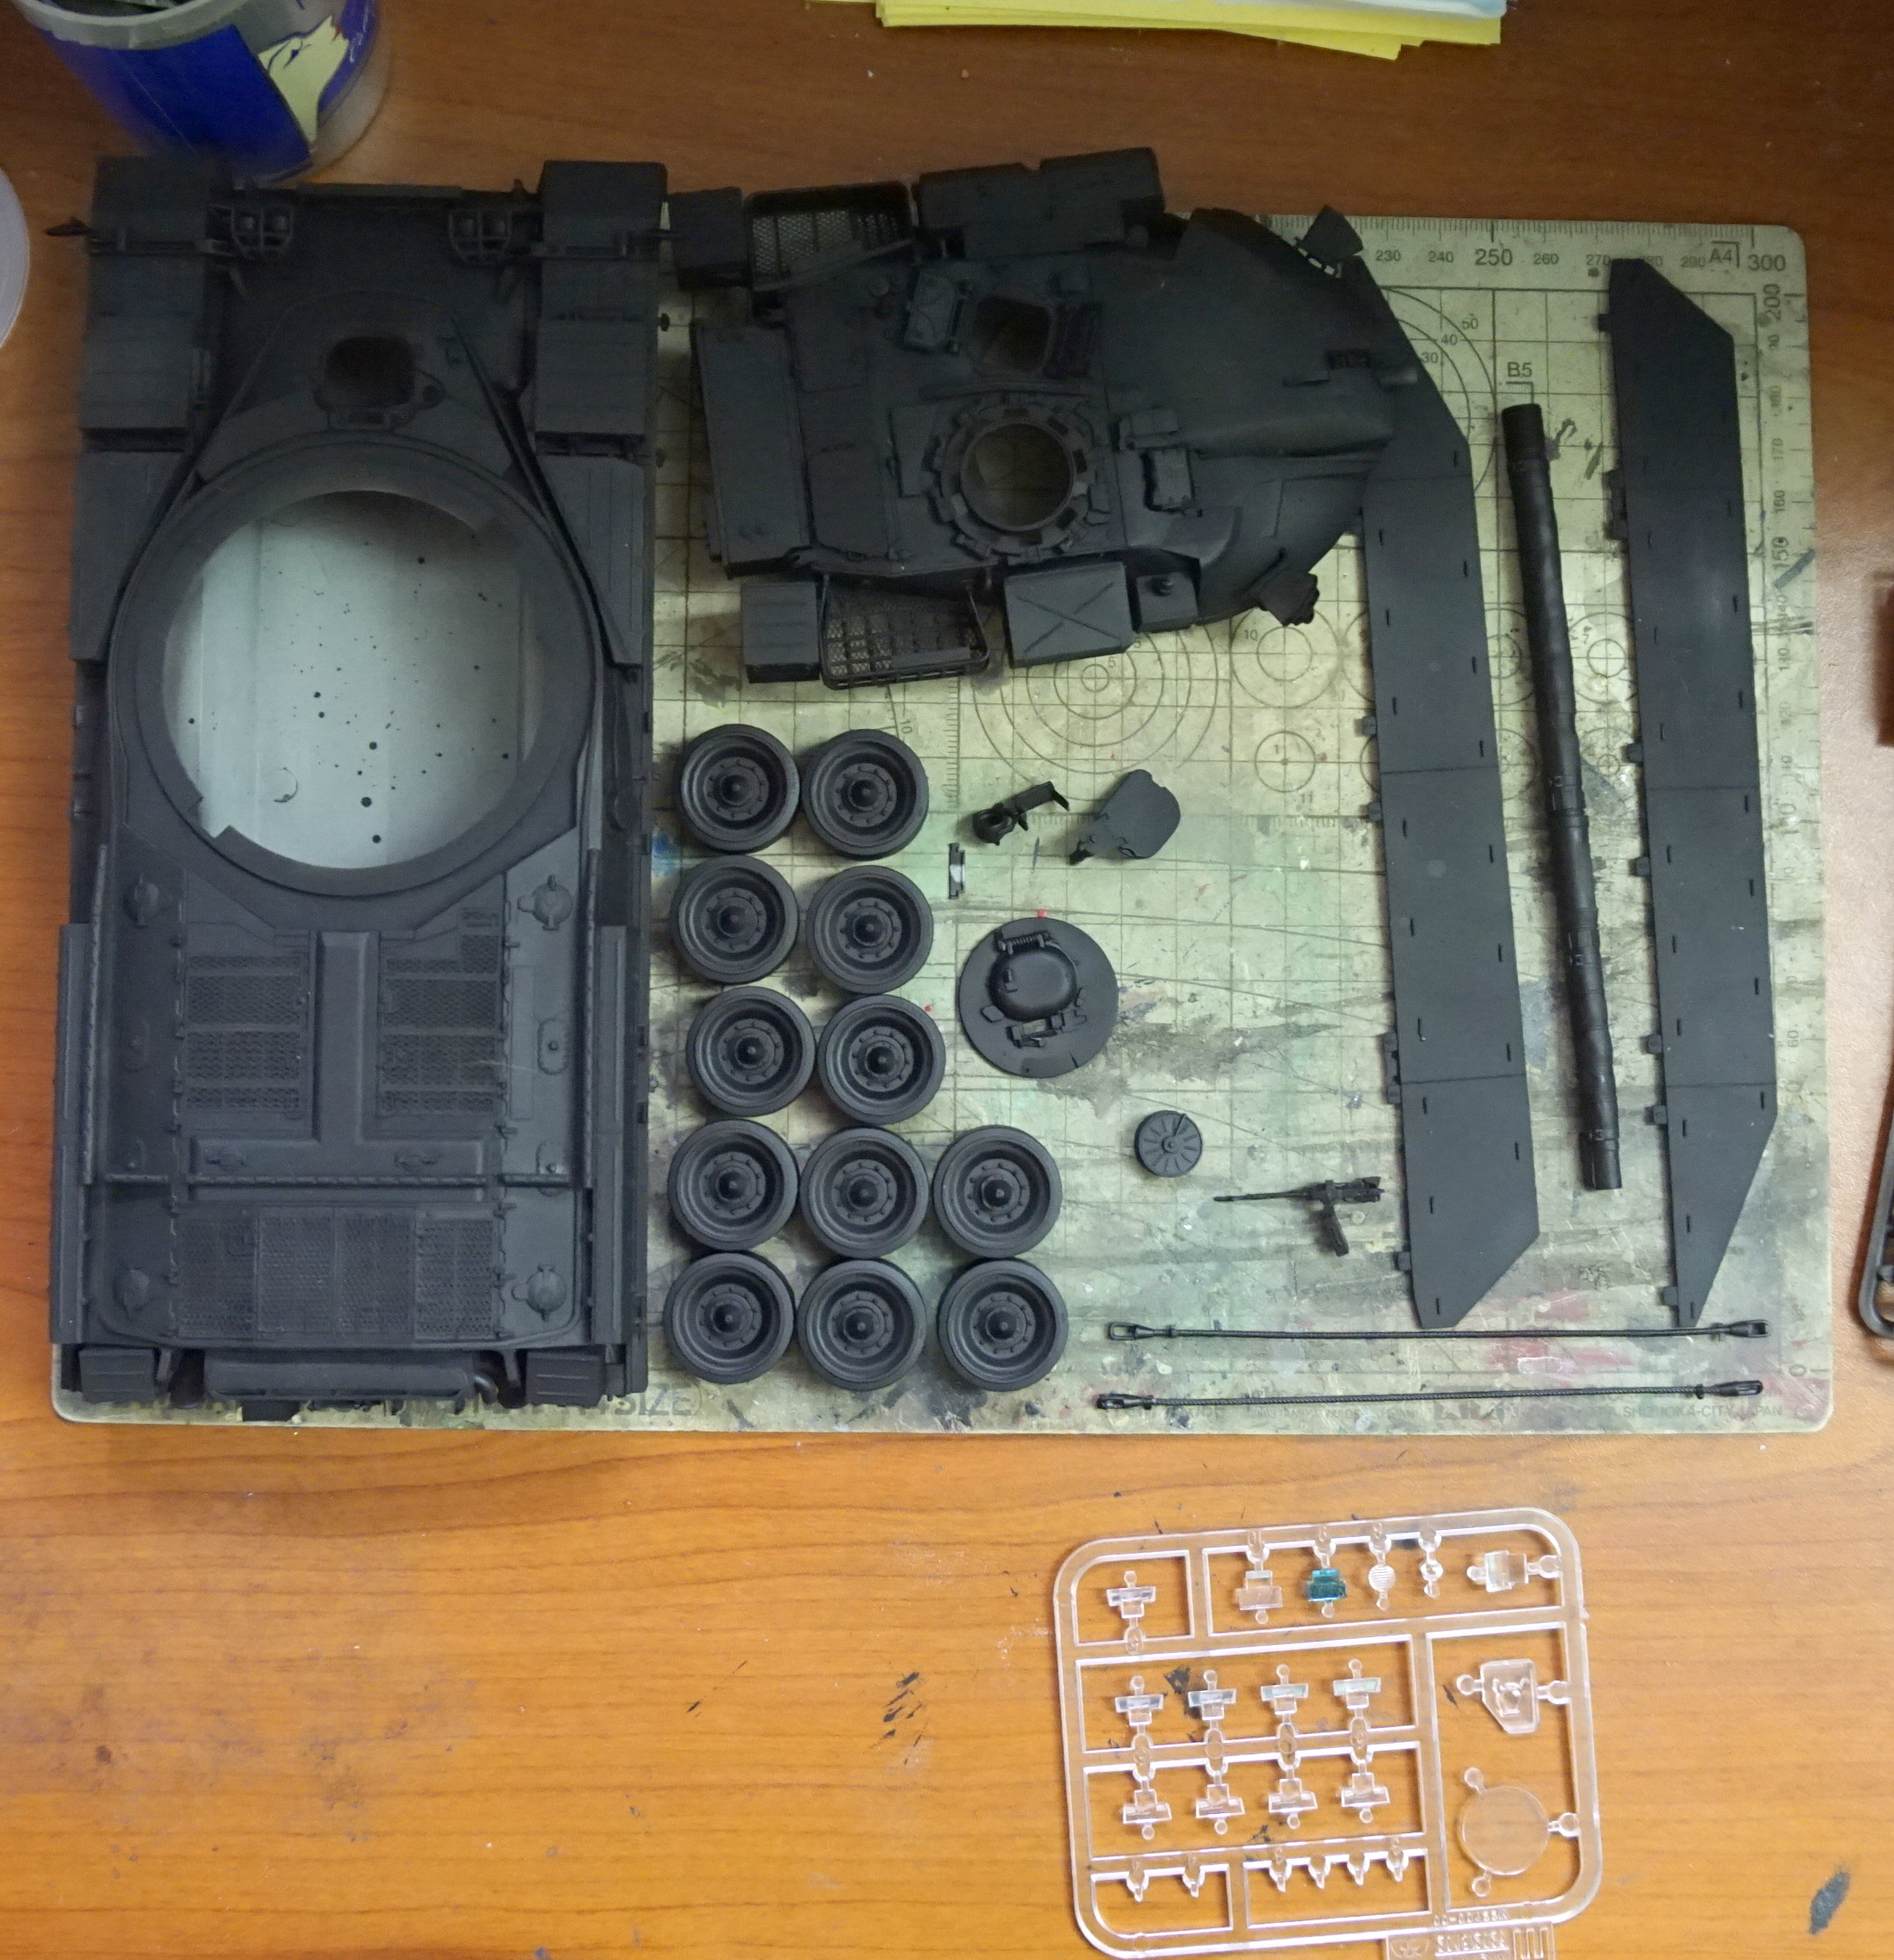
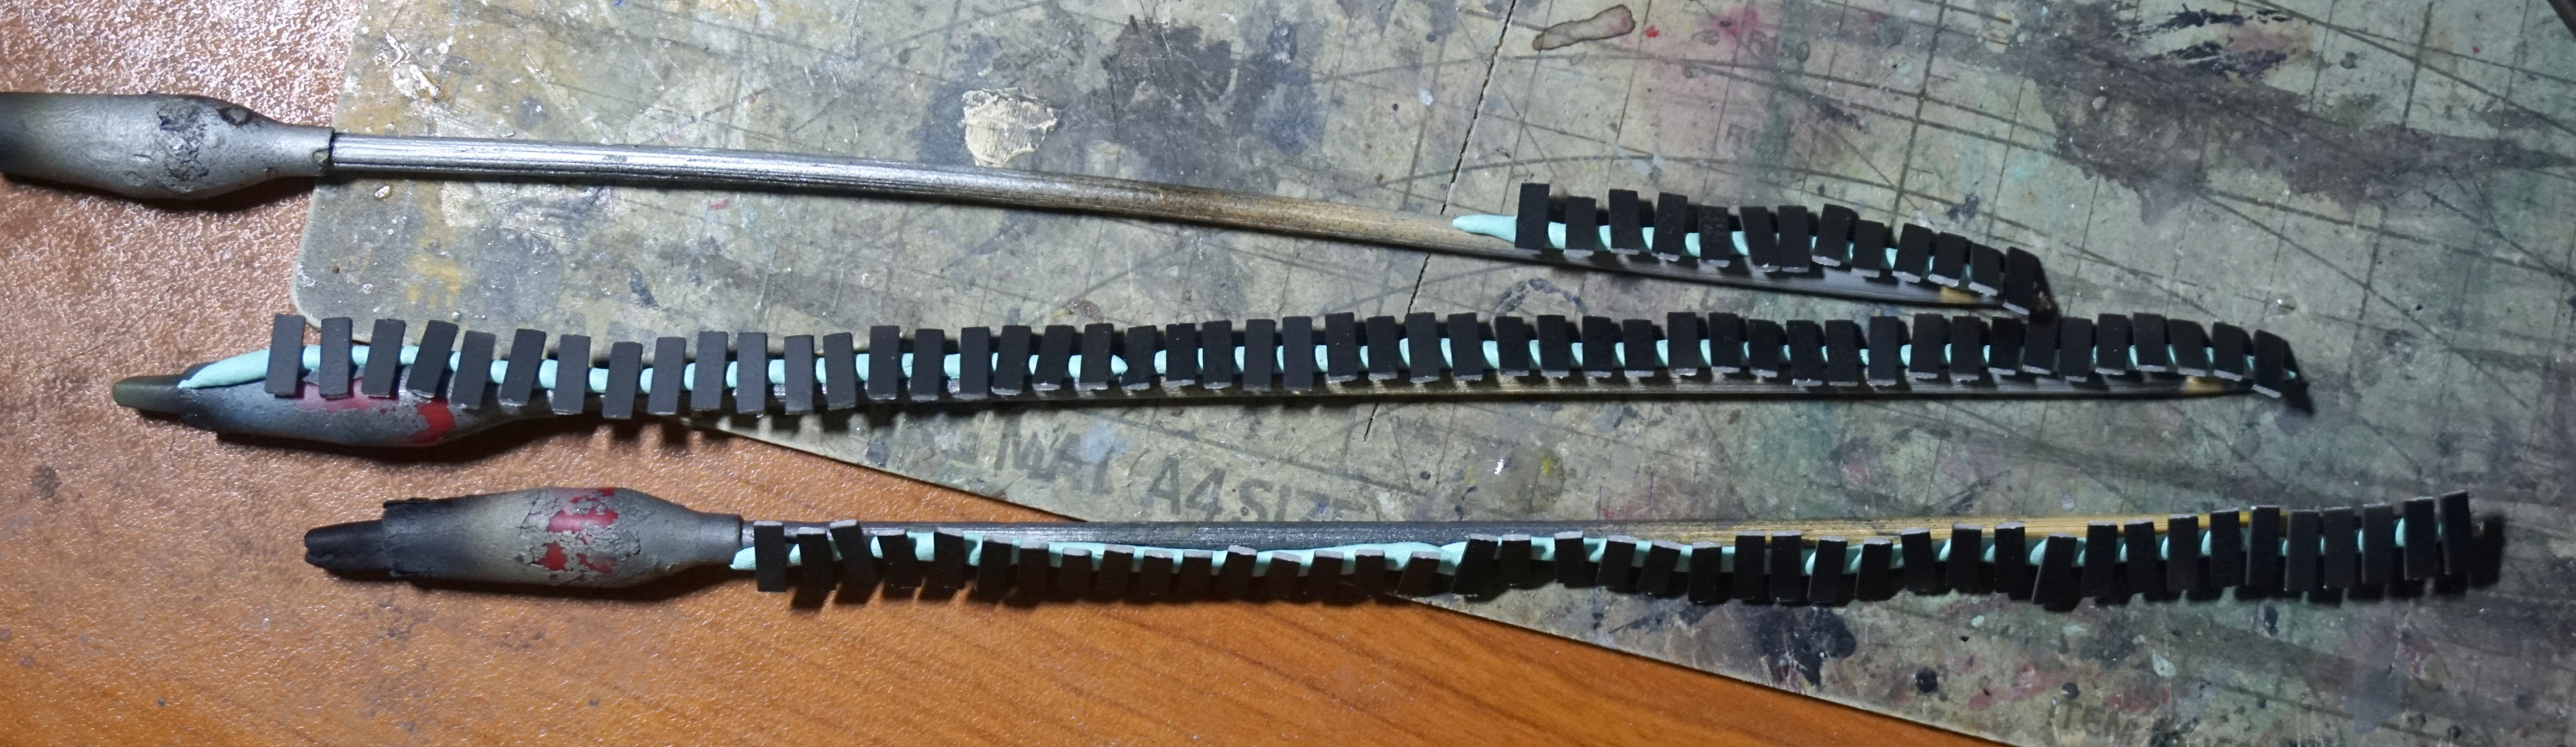
As i when still deciding what kind of dio i would do, i quickly build up the tank and thank goodness it a better build experience than their Armata that i build quite a while ago. The main plus point is the tracks is pre-cut! also interestingly each one of them was numbered which would be covered with the rubber pads but i don’t sort them by that since i don’t have the time for that! It was still a non workable tracks and still require cement to assemble just like most of their products.

Tracks bag 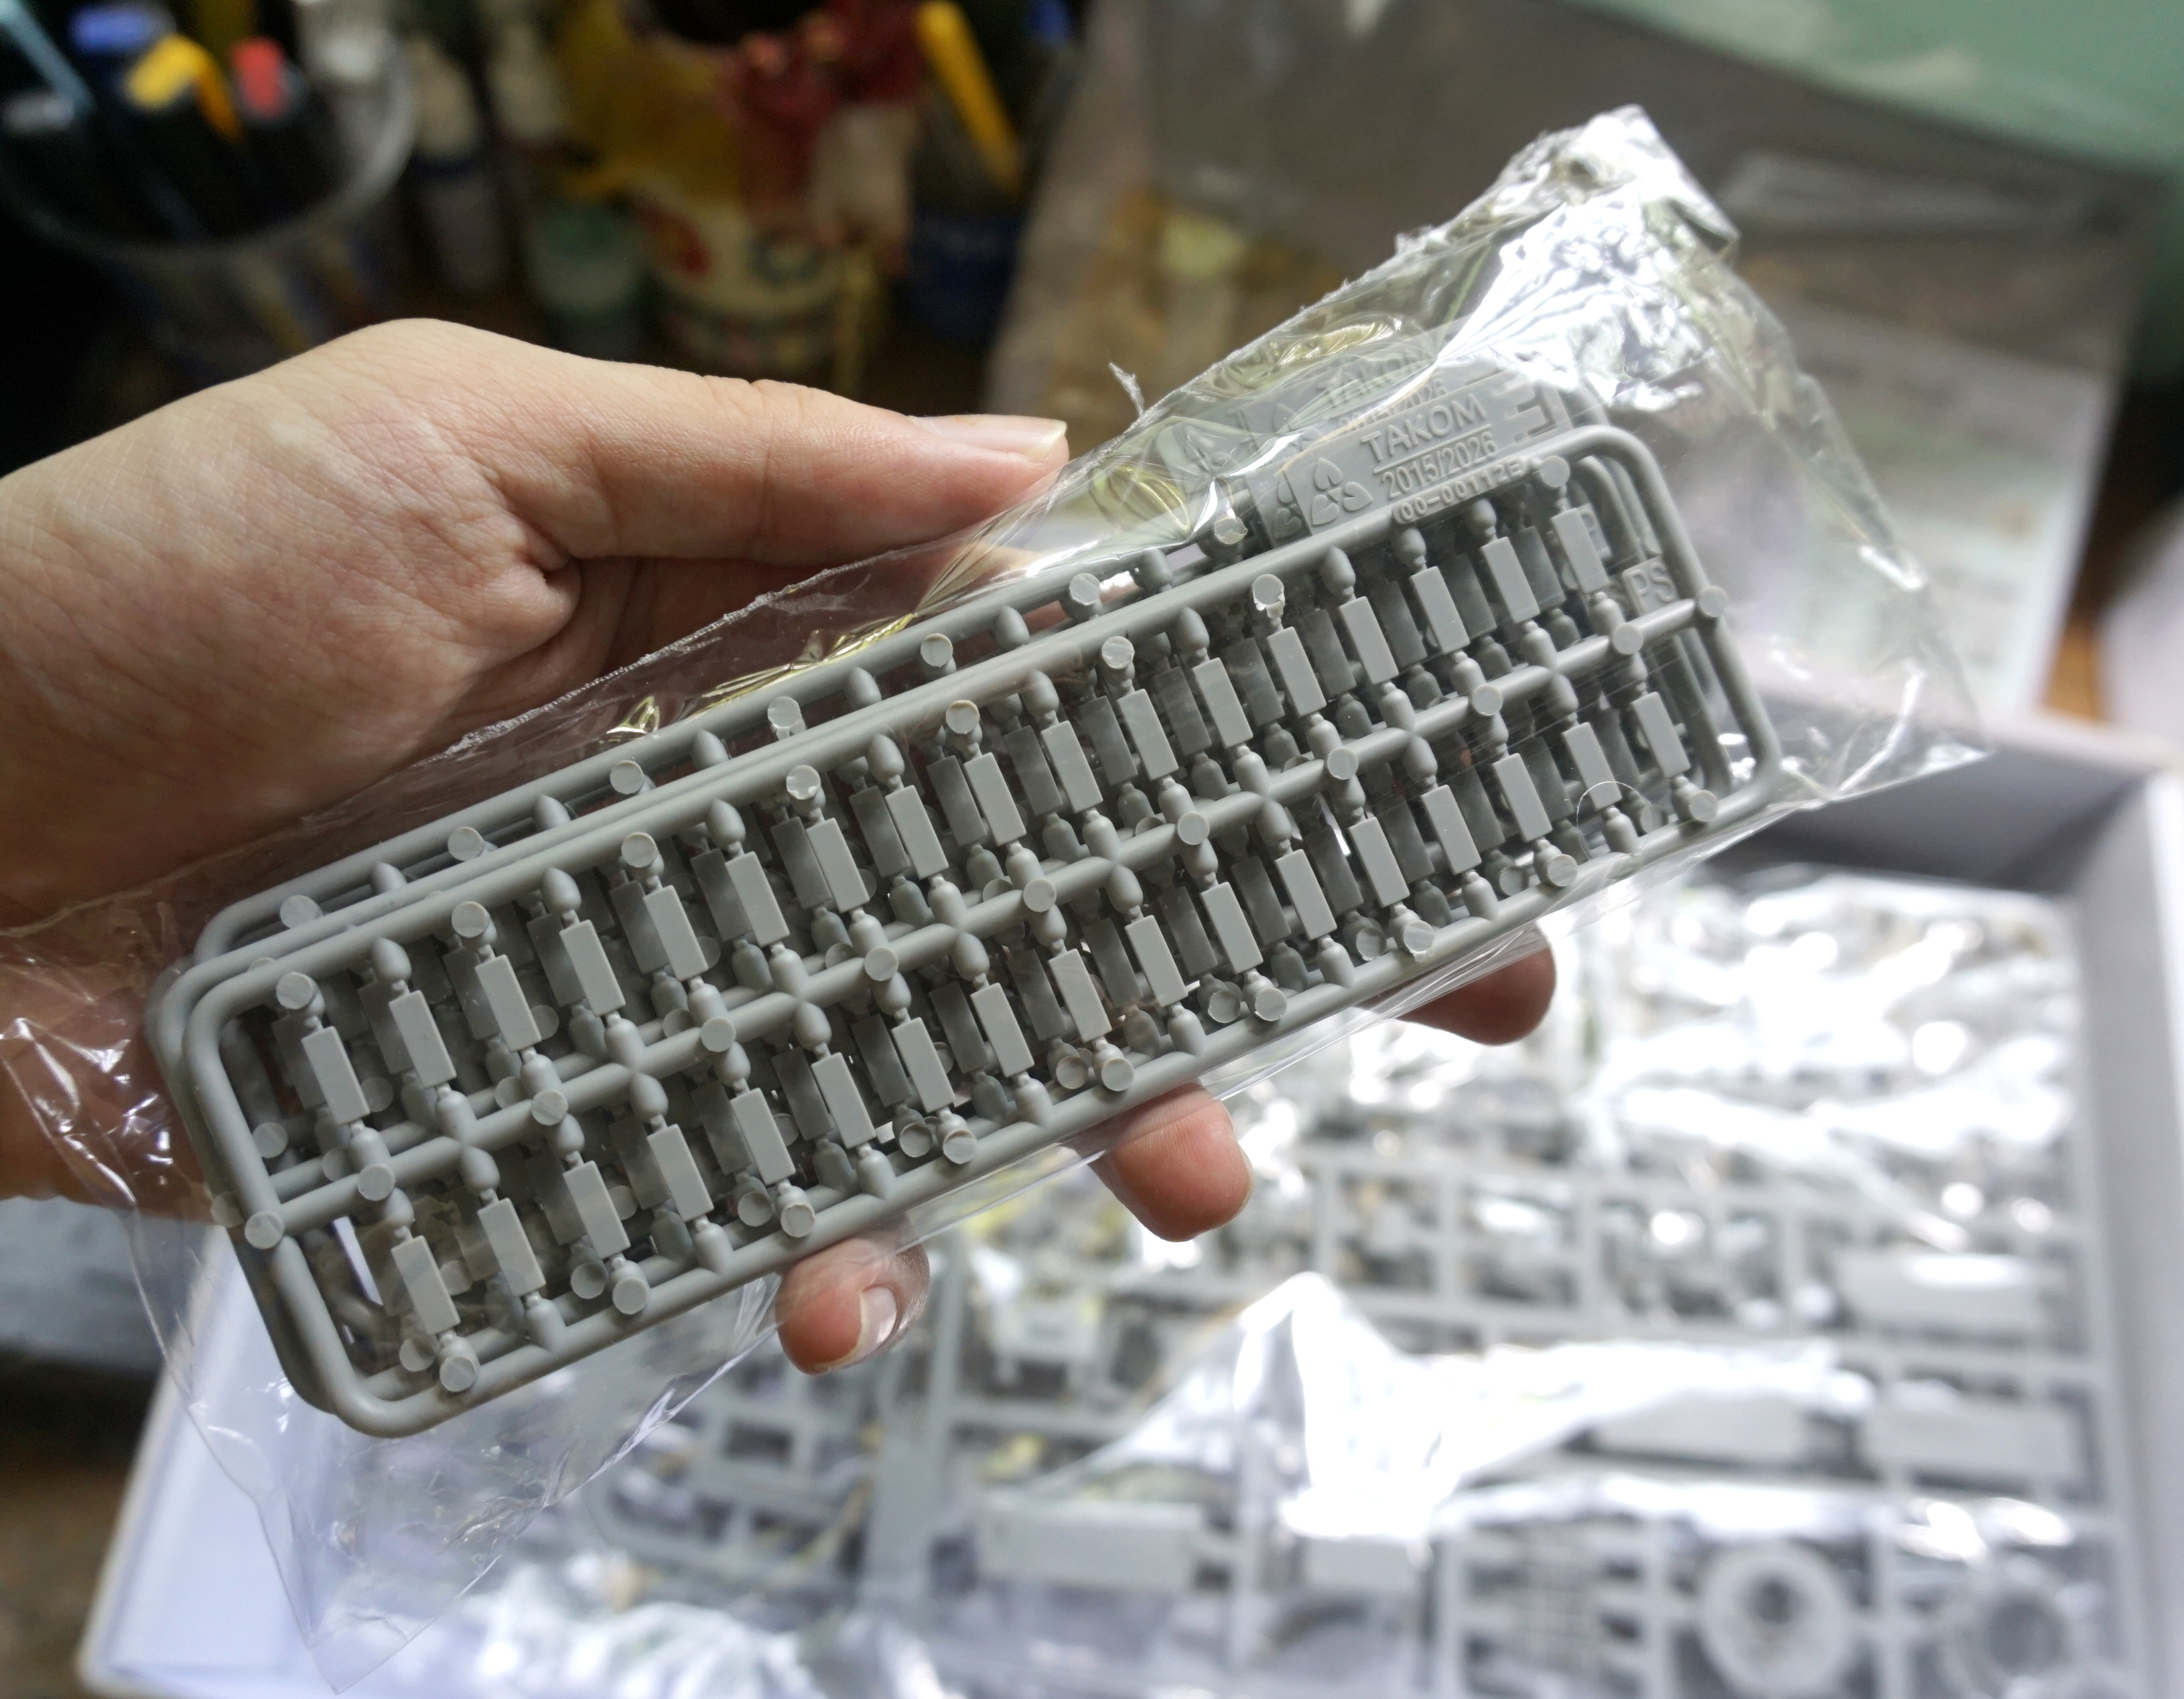
Track Rubber Pads 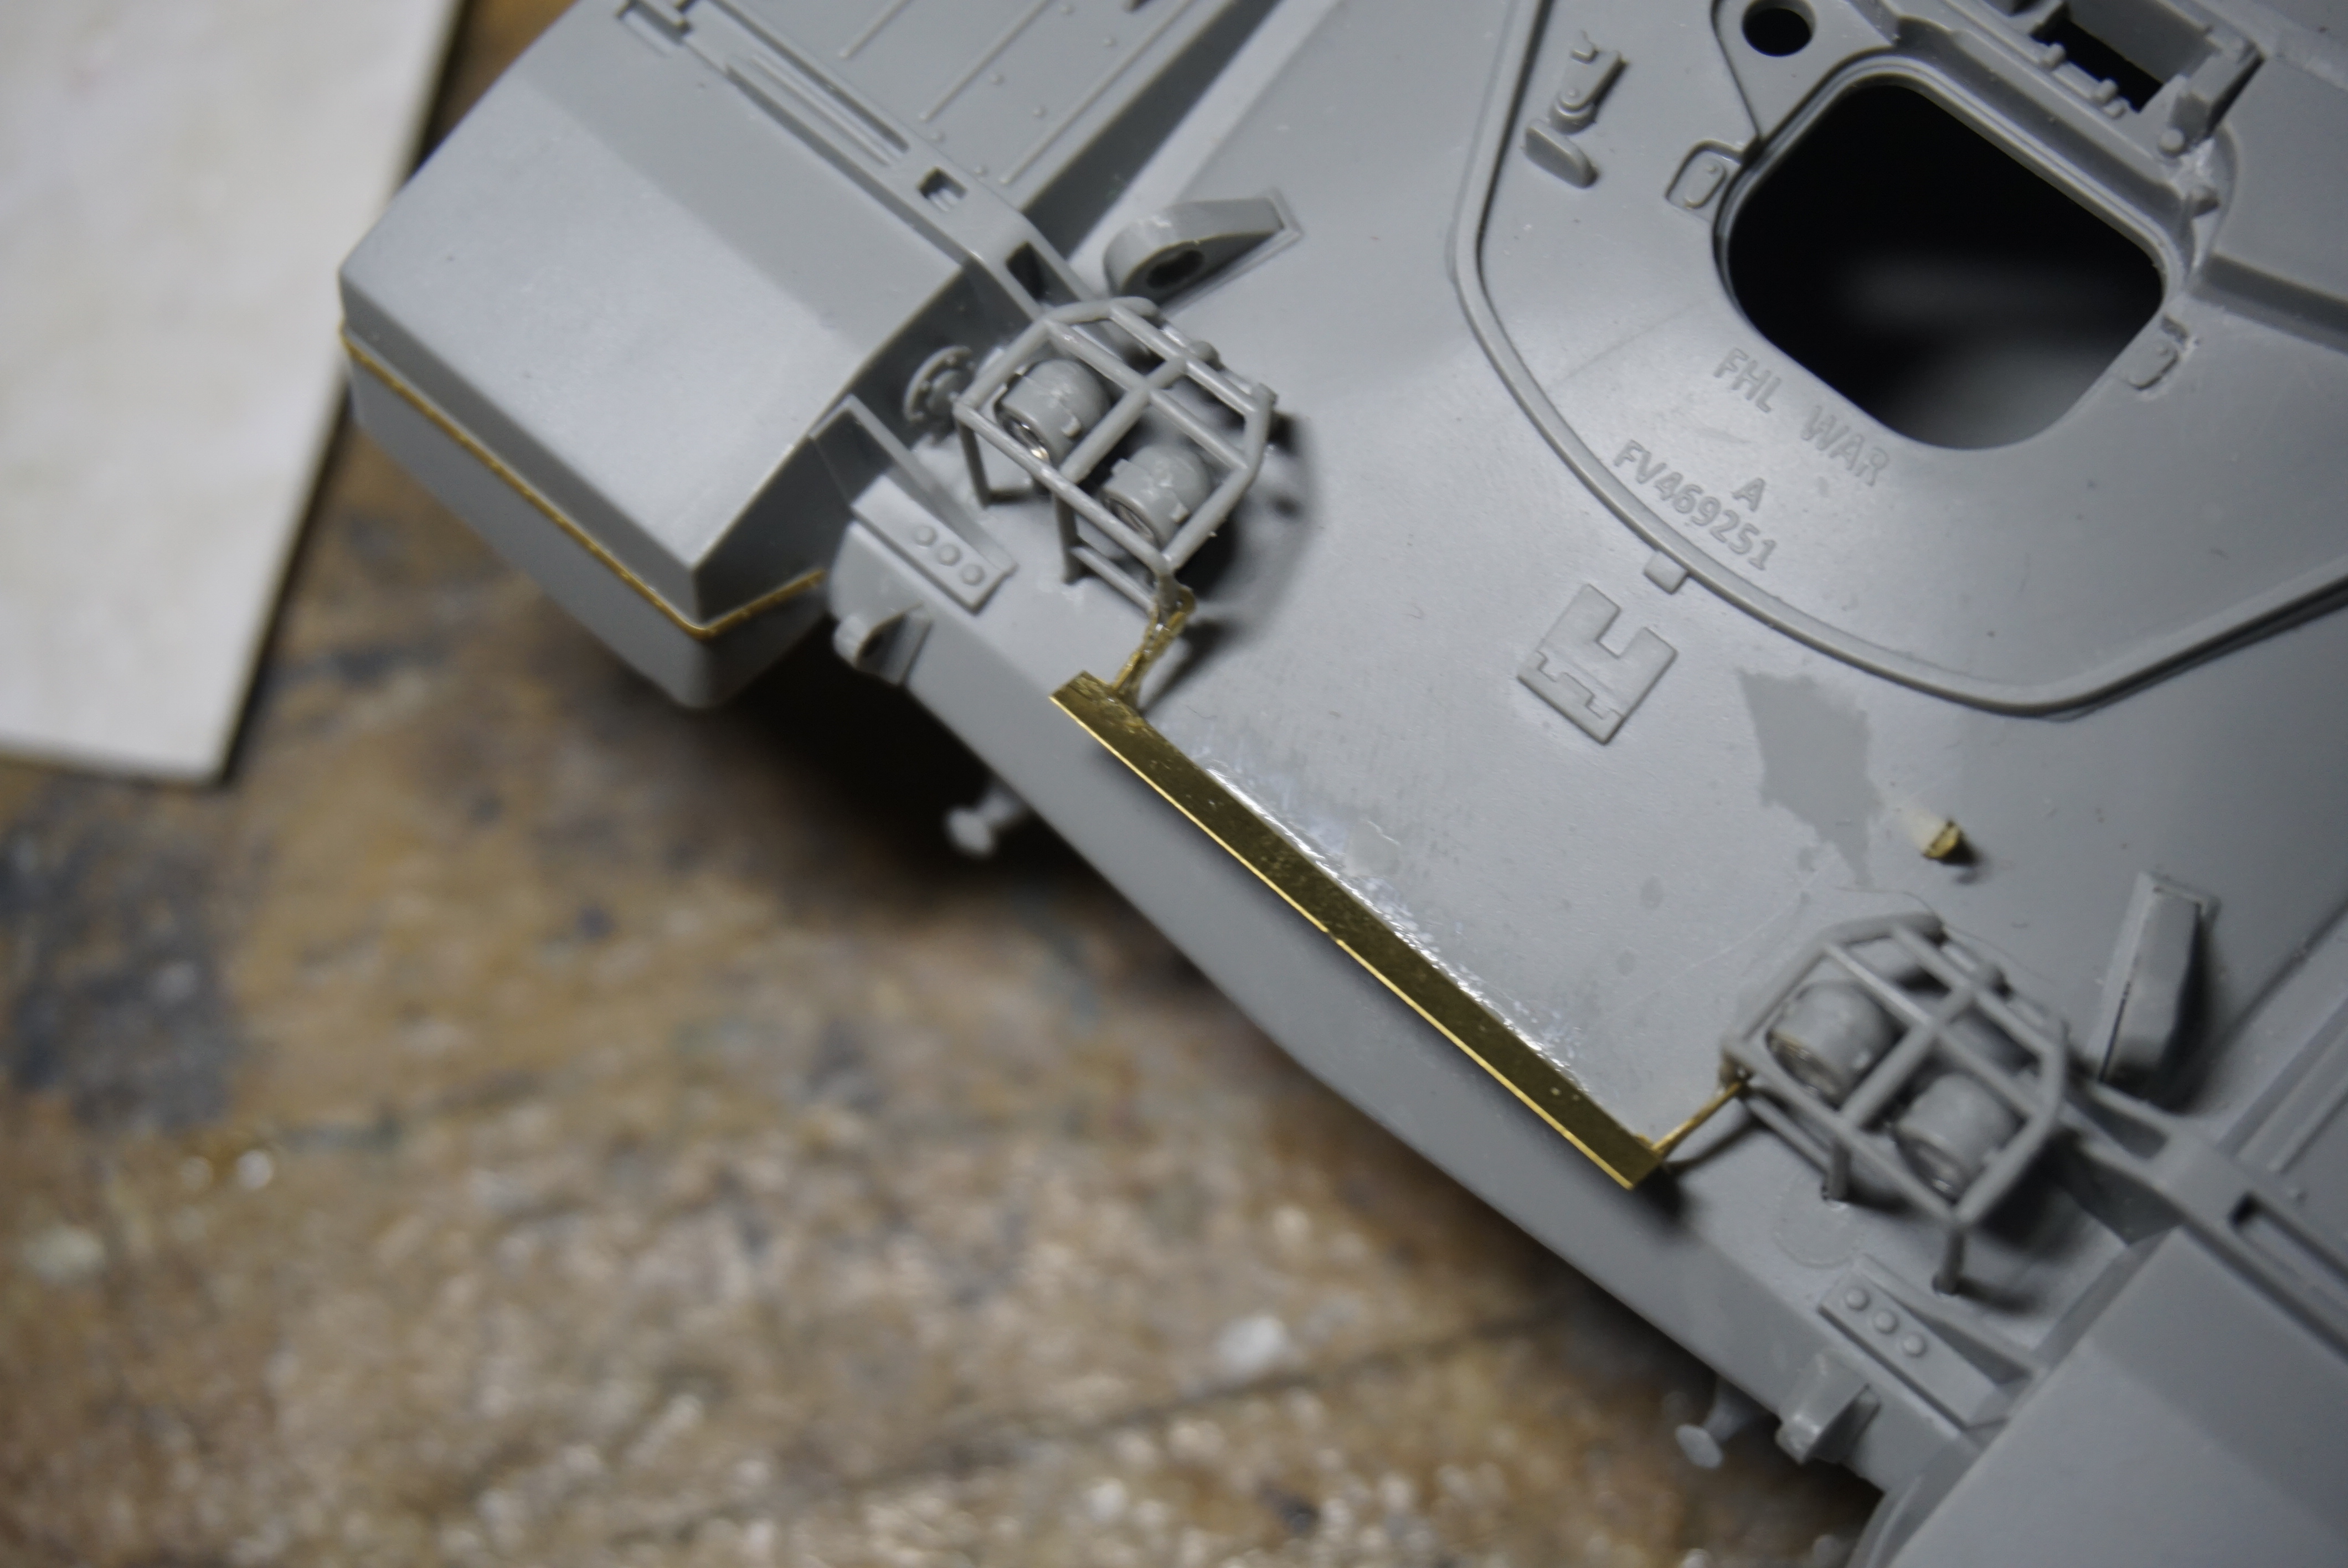
Front guard fender
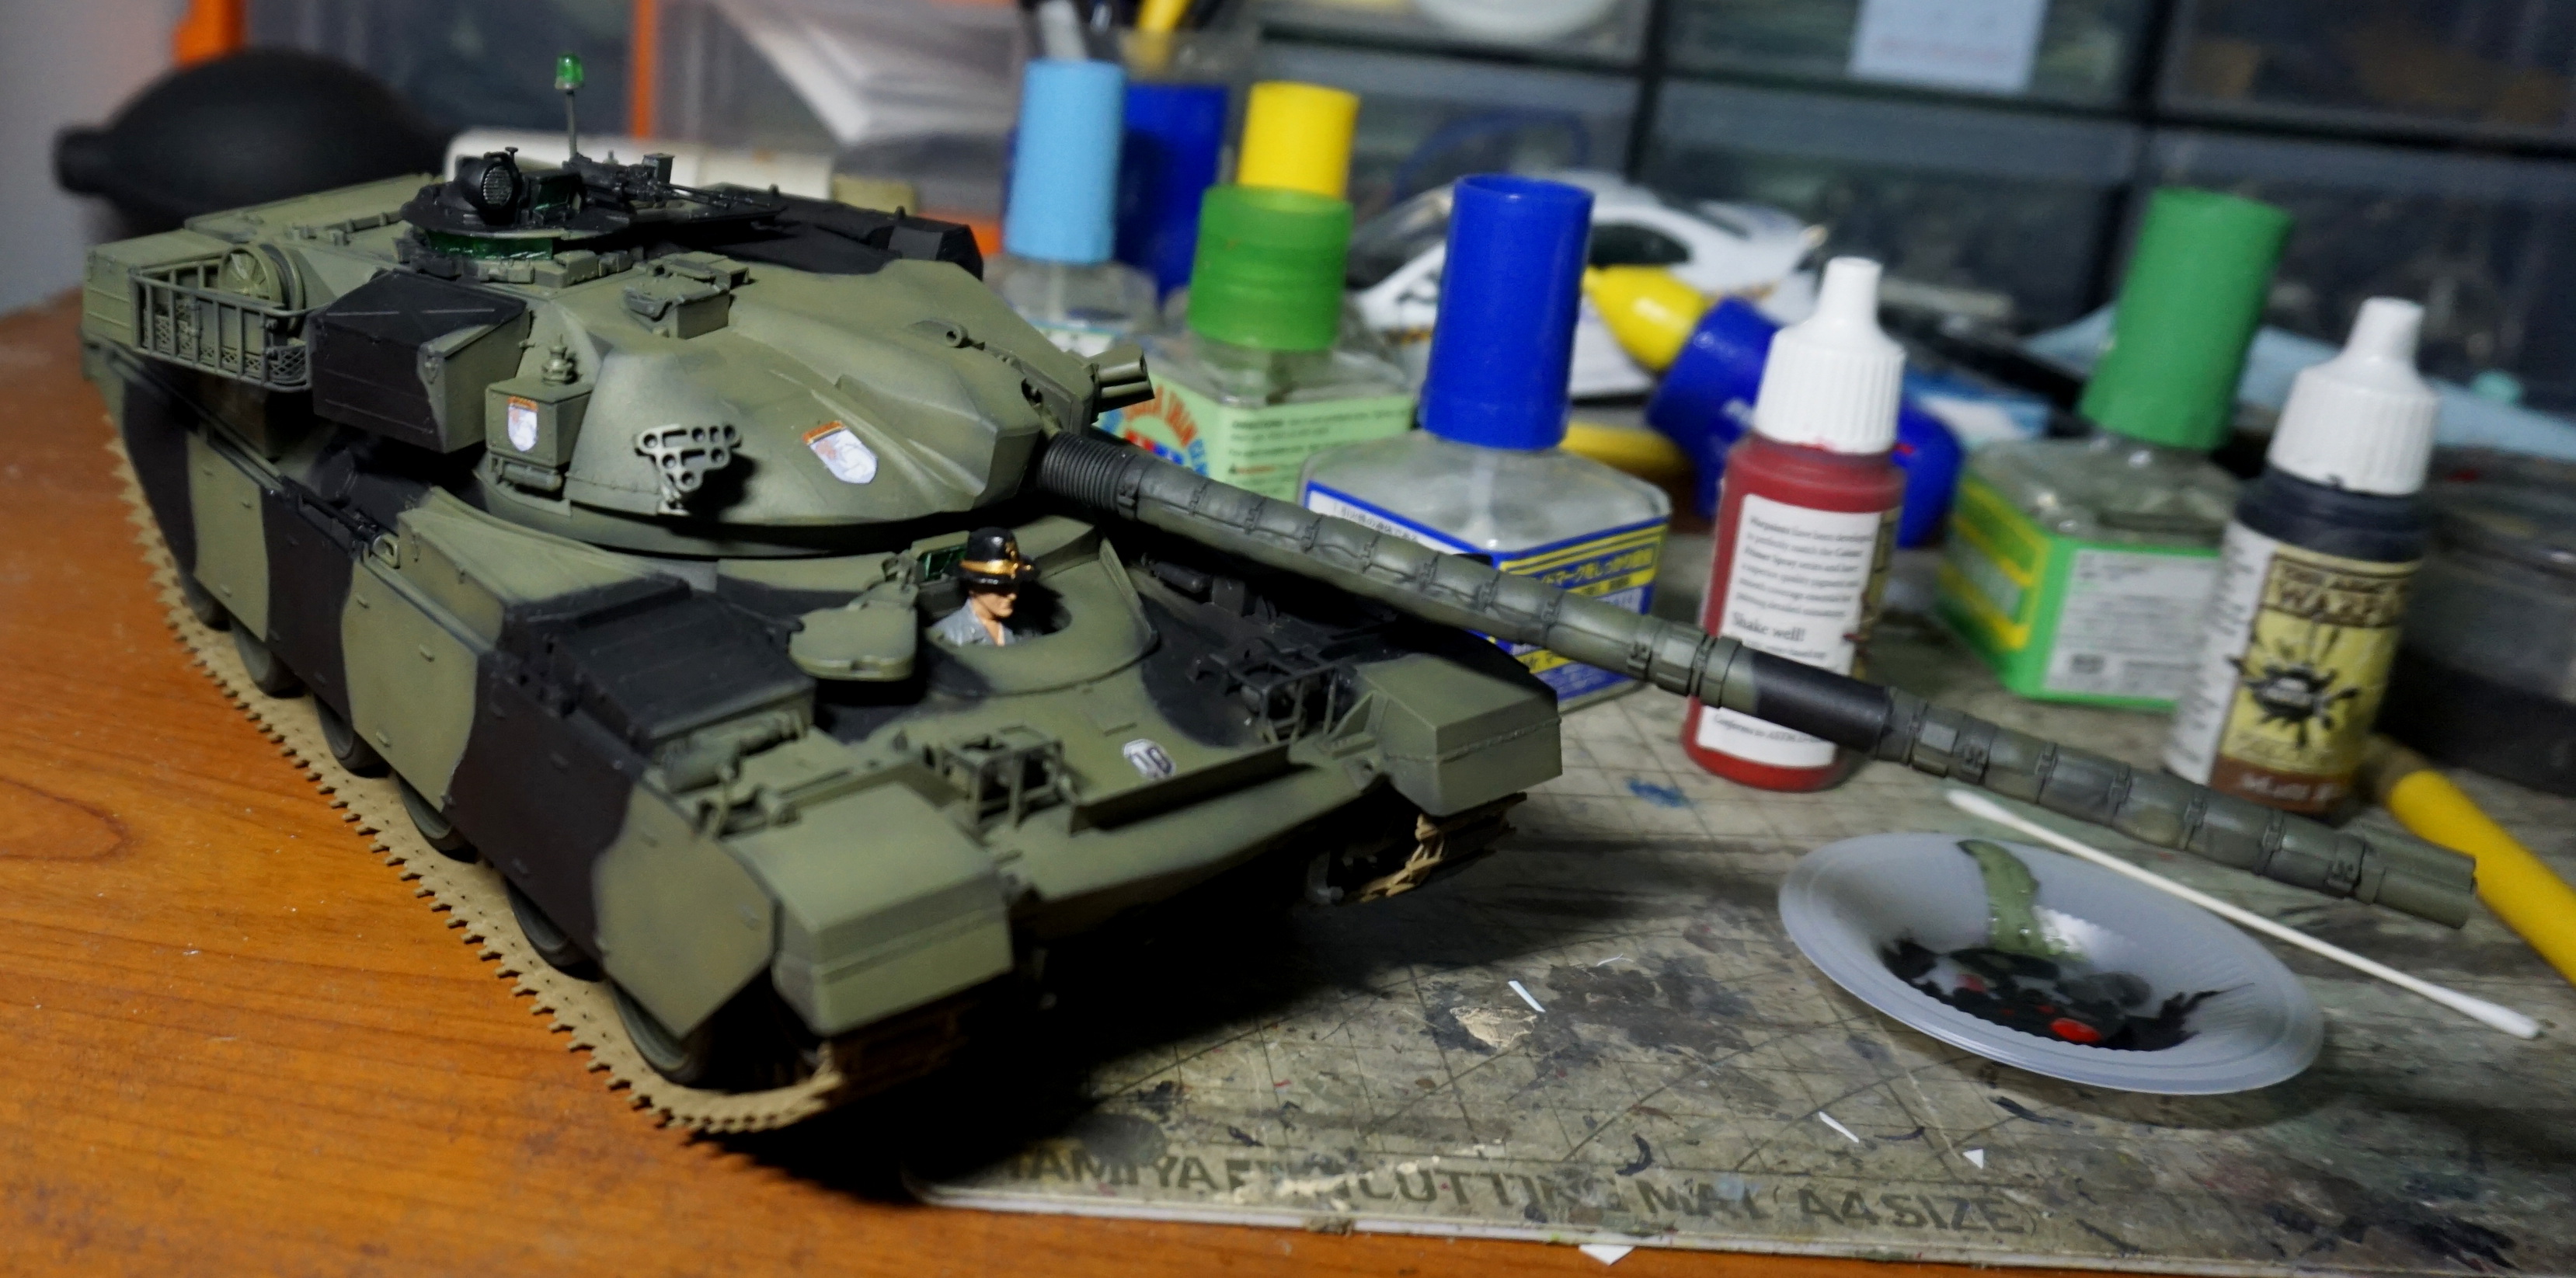
Other notable note about it was the turret assembly which surprisingly have the Stillbrew Armor molded together while retaining the details. The most problem i have was the turret boxes especially the TOGS which somehow don’t seem to lineup well with the turret but after a few wiggling around it fit nicely. Another notable problem one was the front PE fender guard which i find the attachment to be a major pain in the arse to glue and align them together.
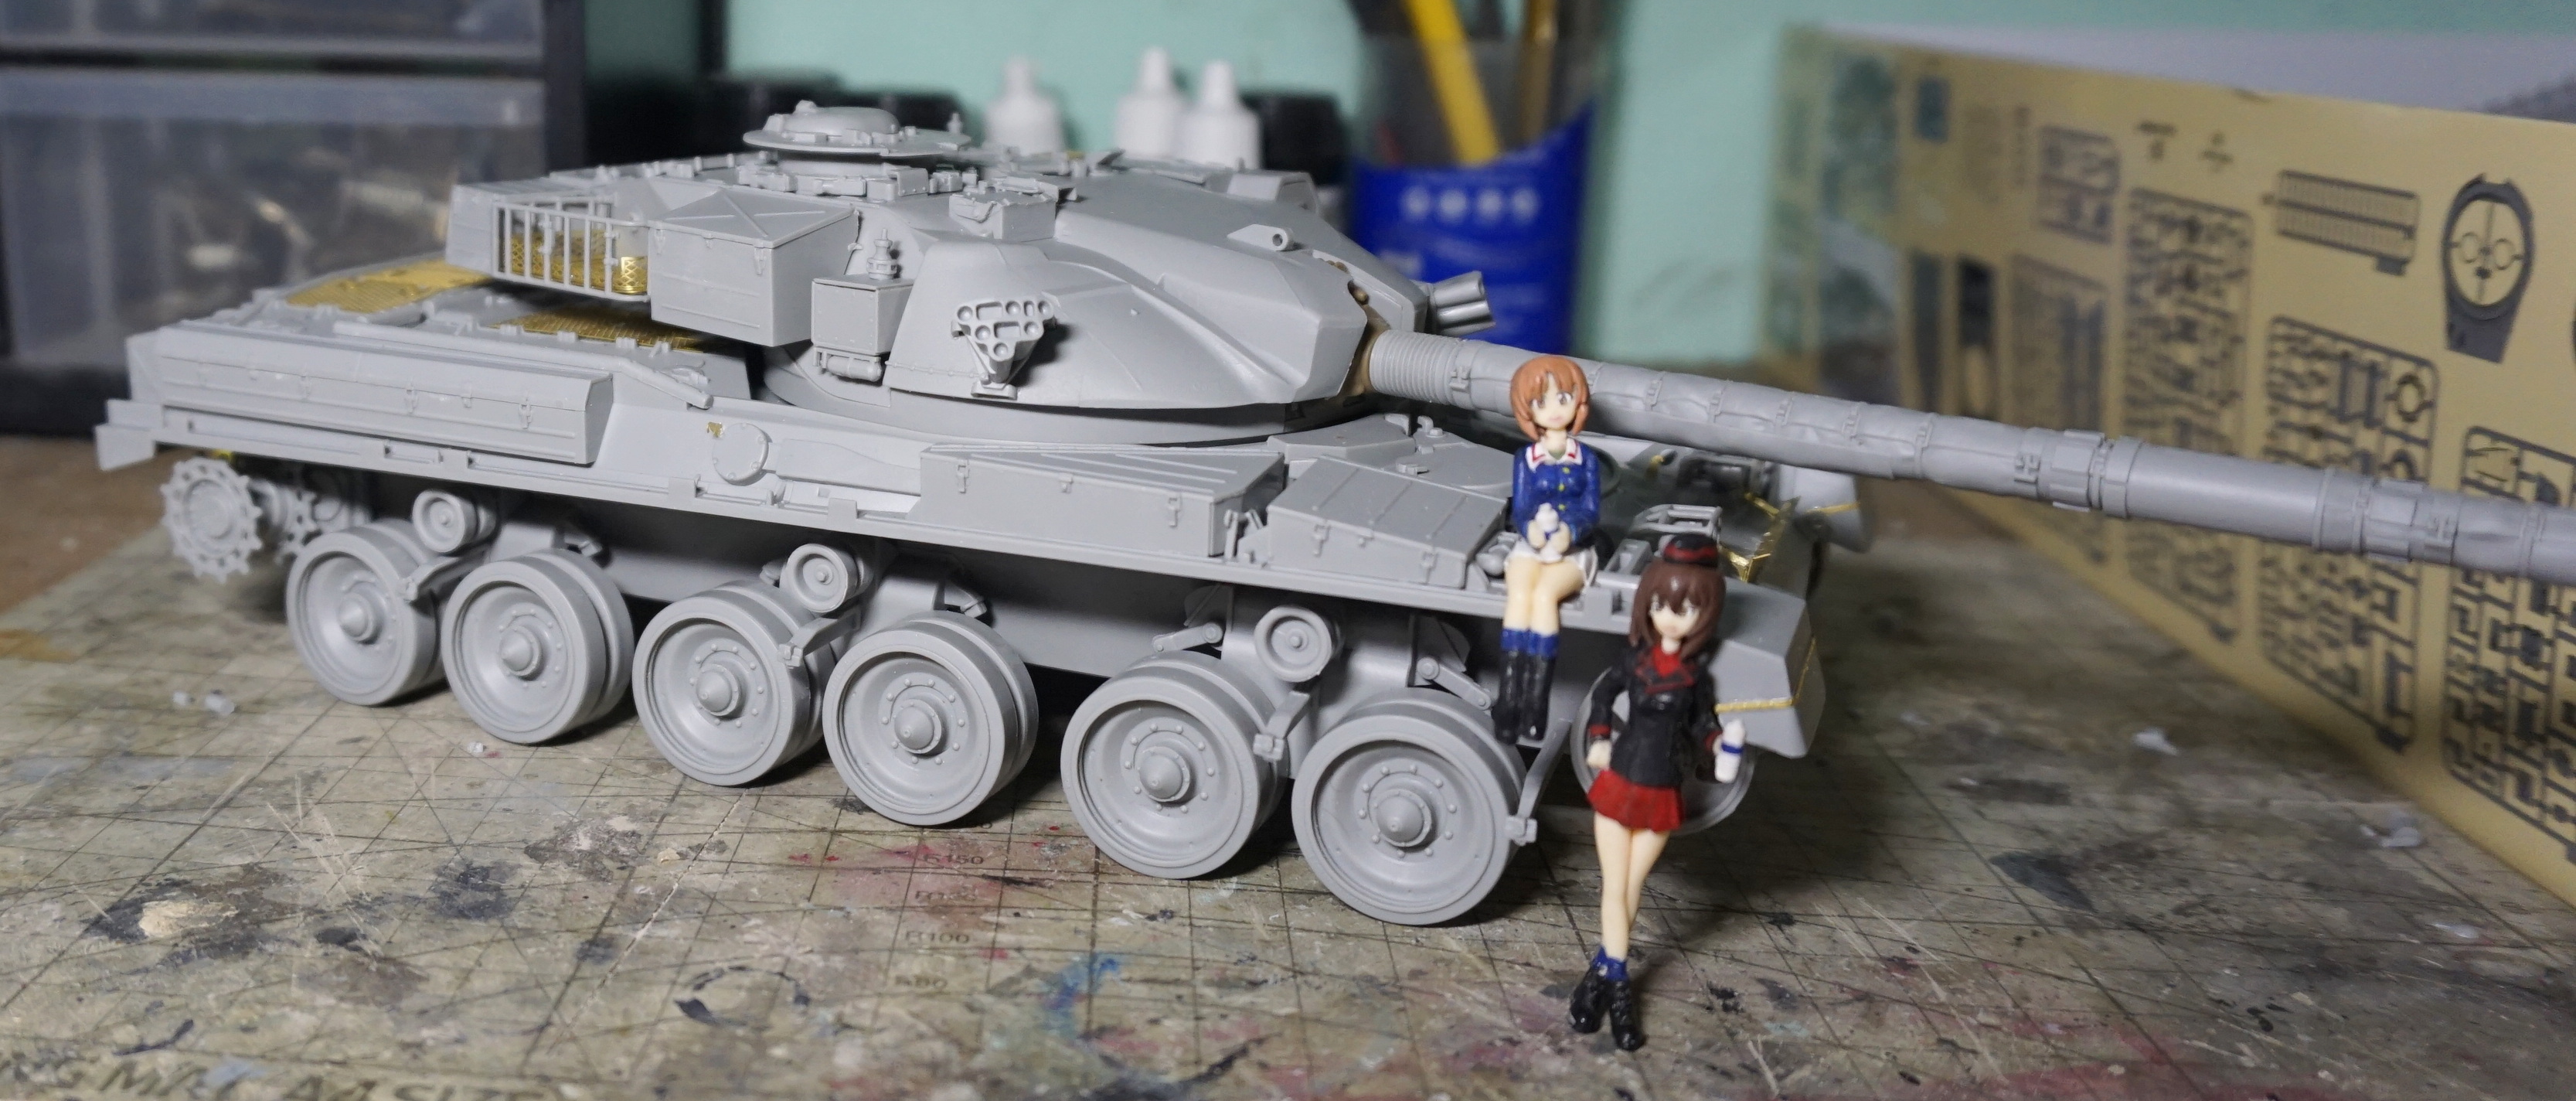
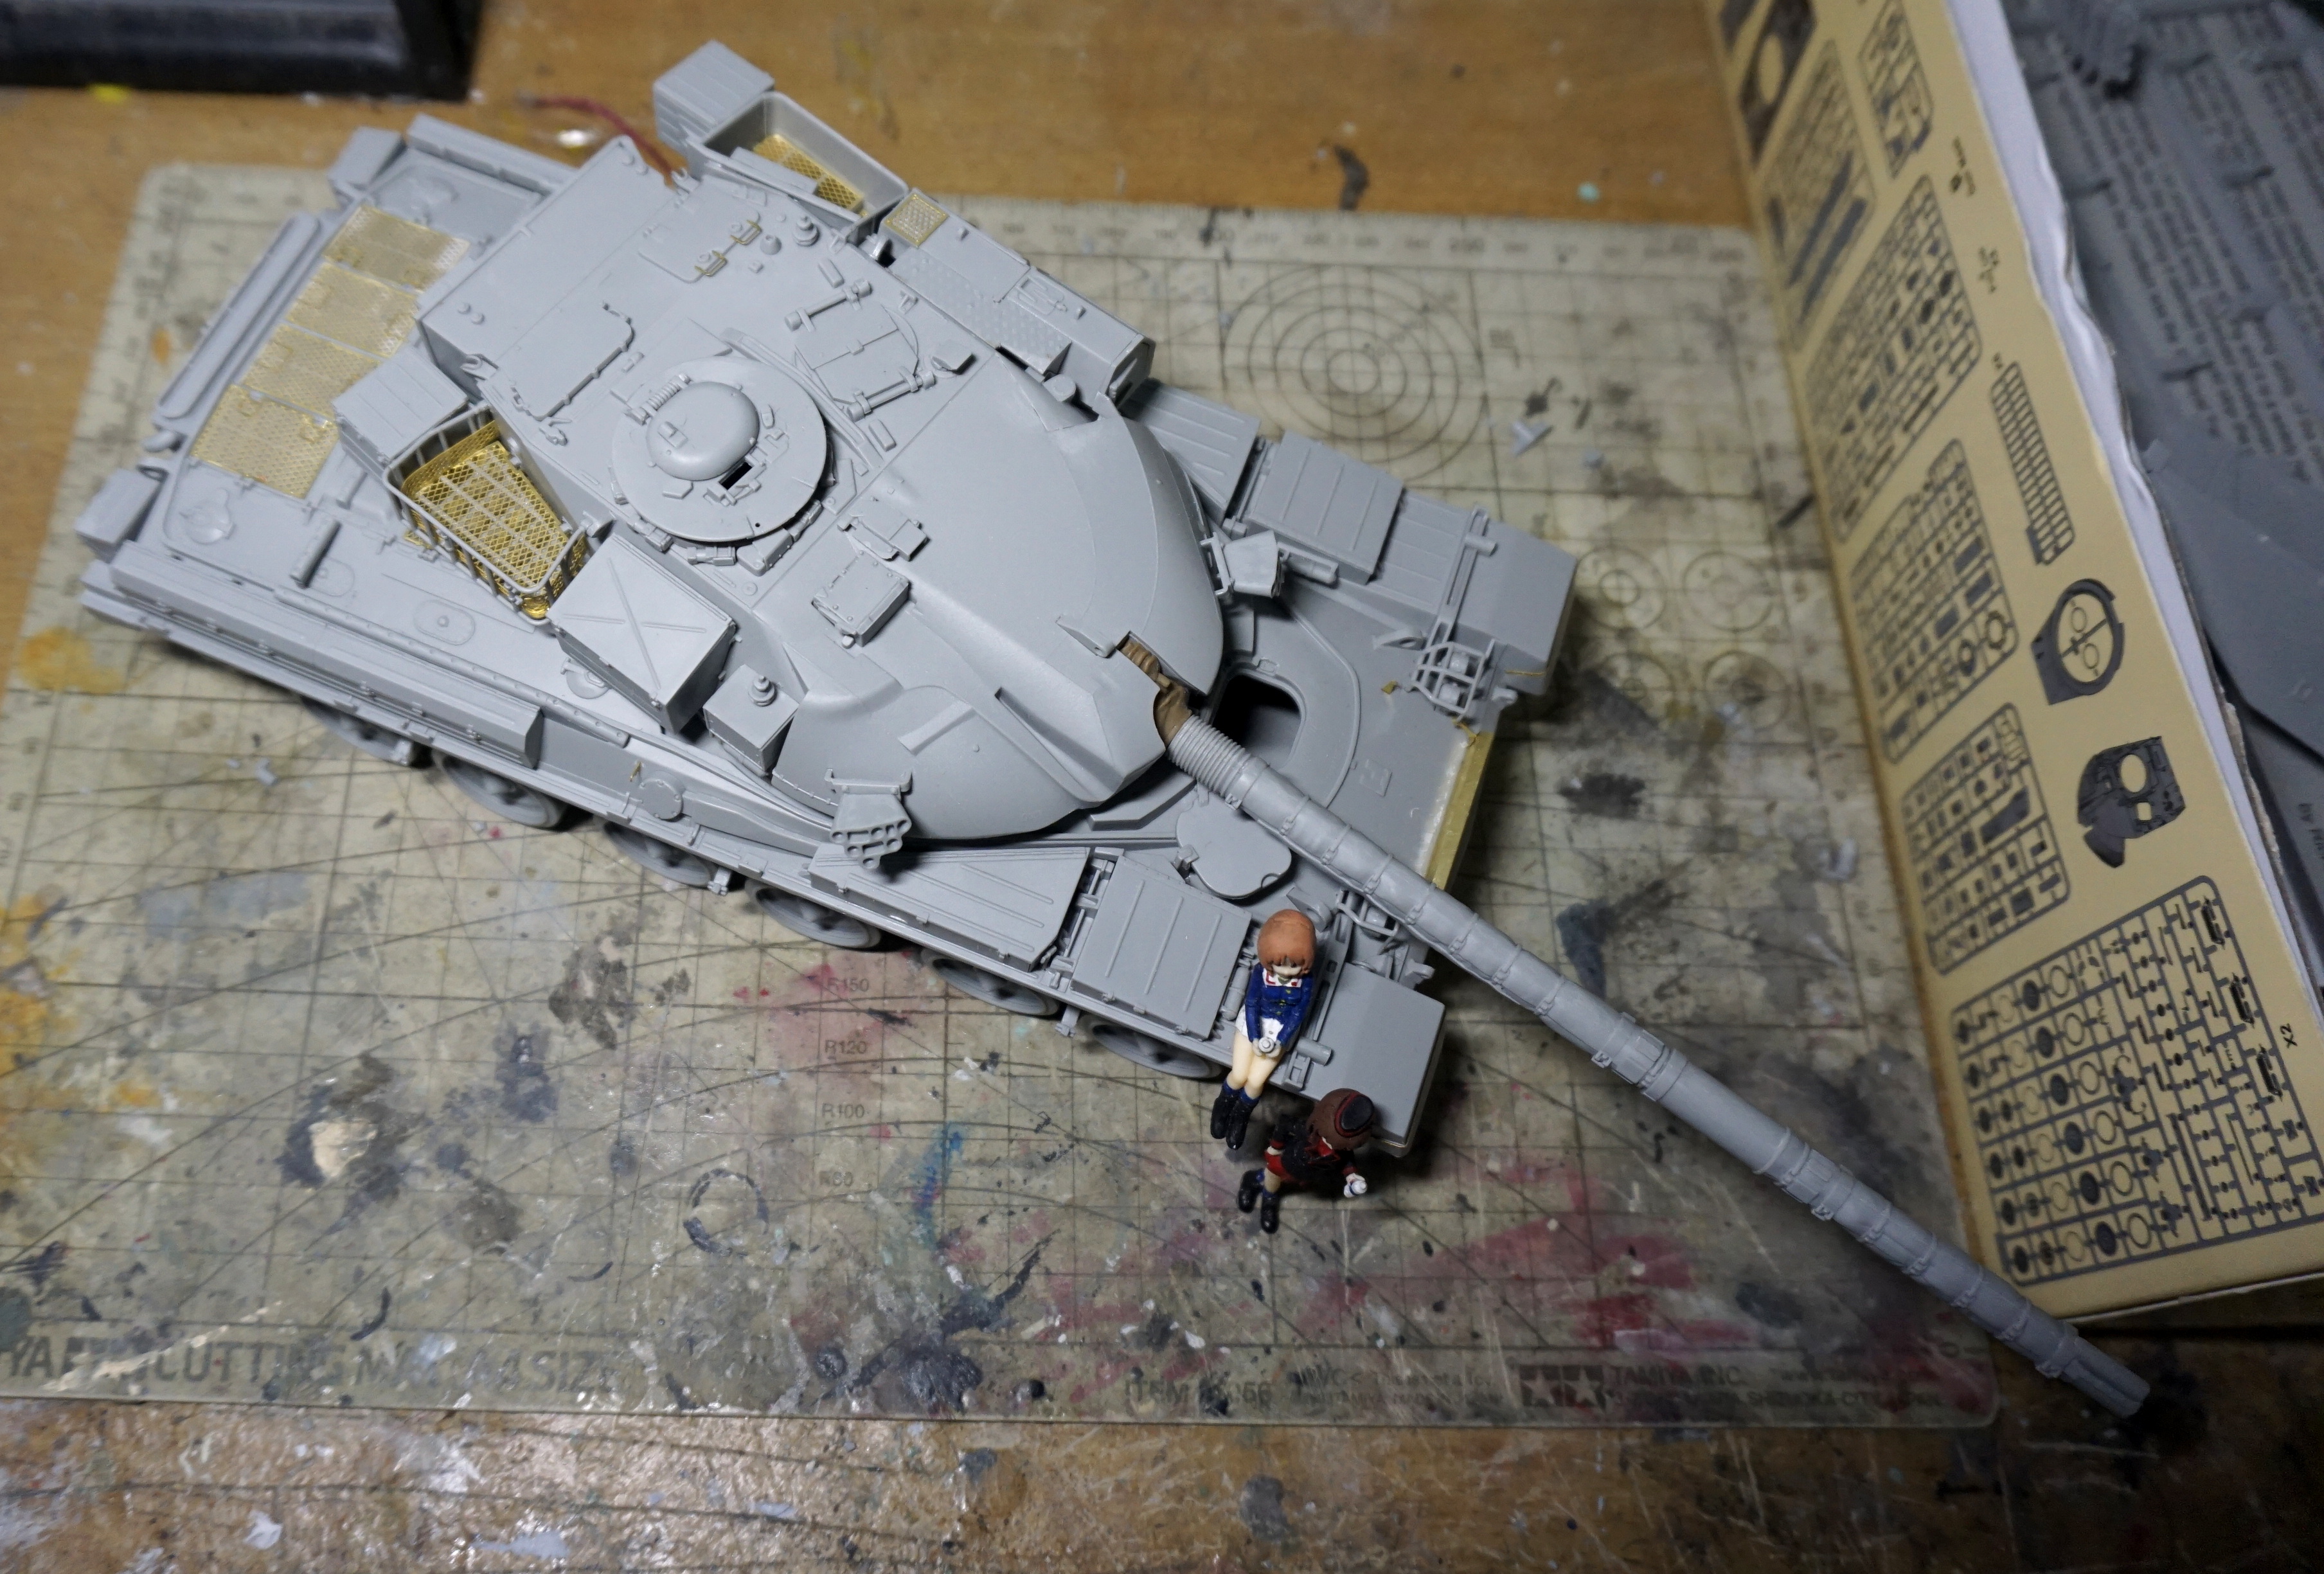
Beside those aforementioned problems, it actually quite an easy build and certainly much more fun to build compare to their Armata.
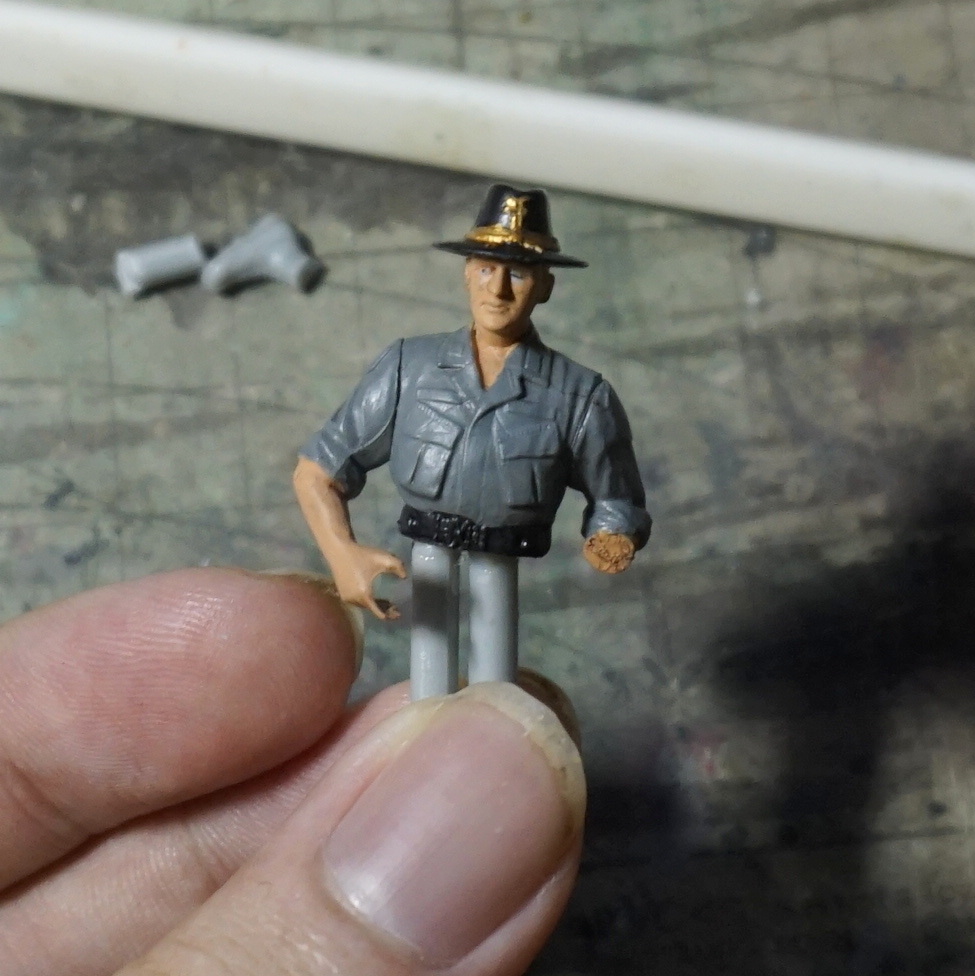
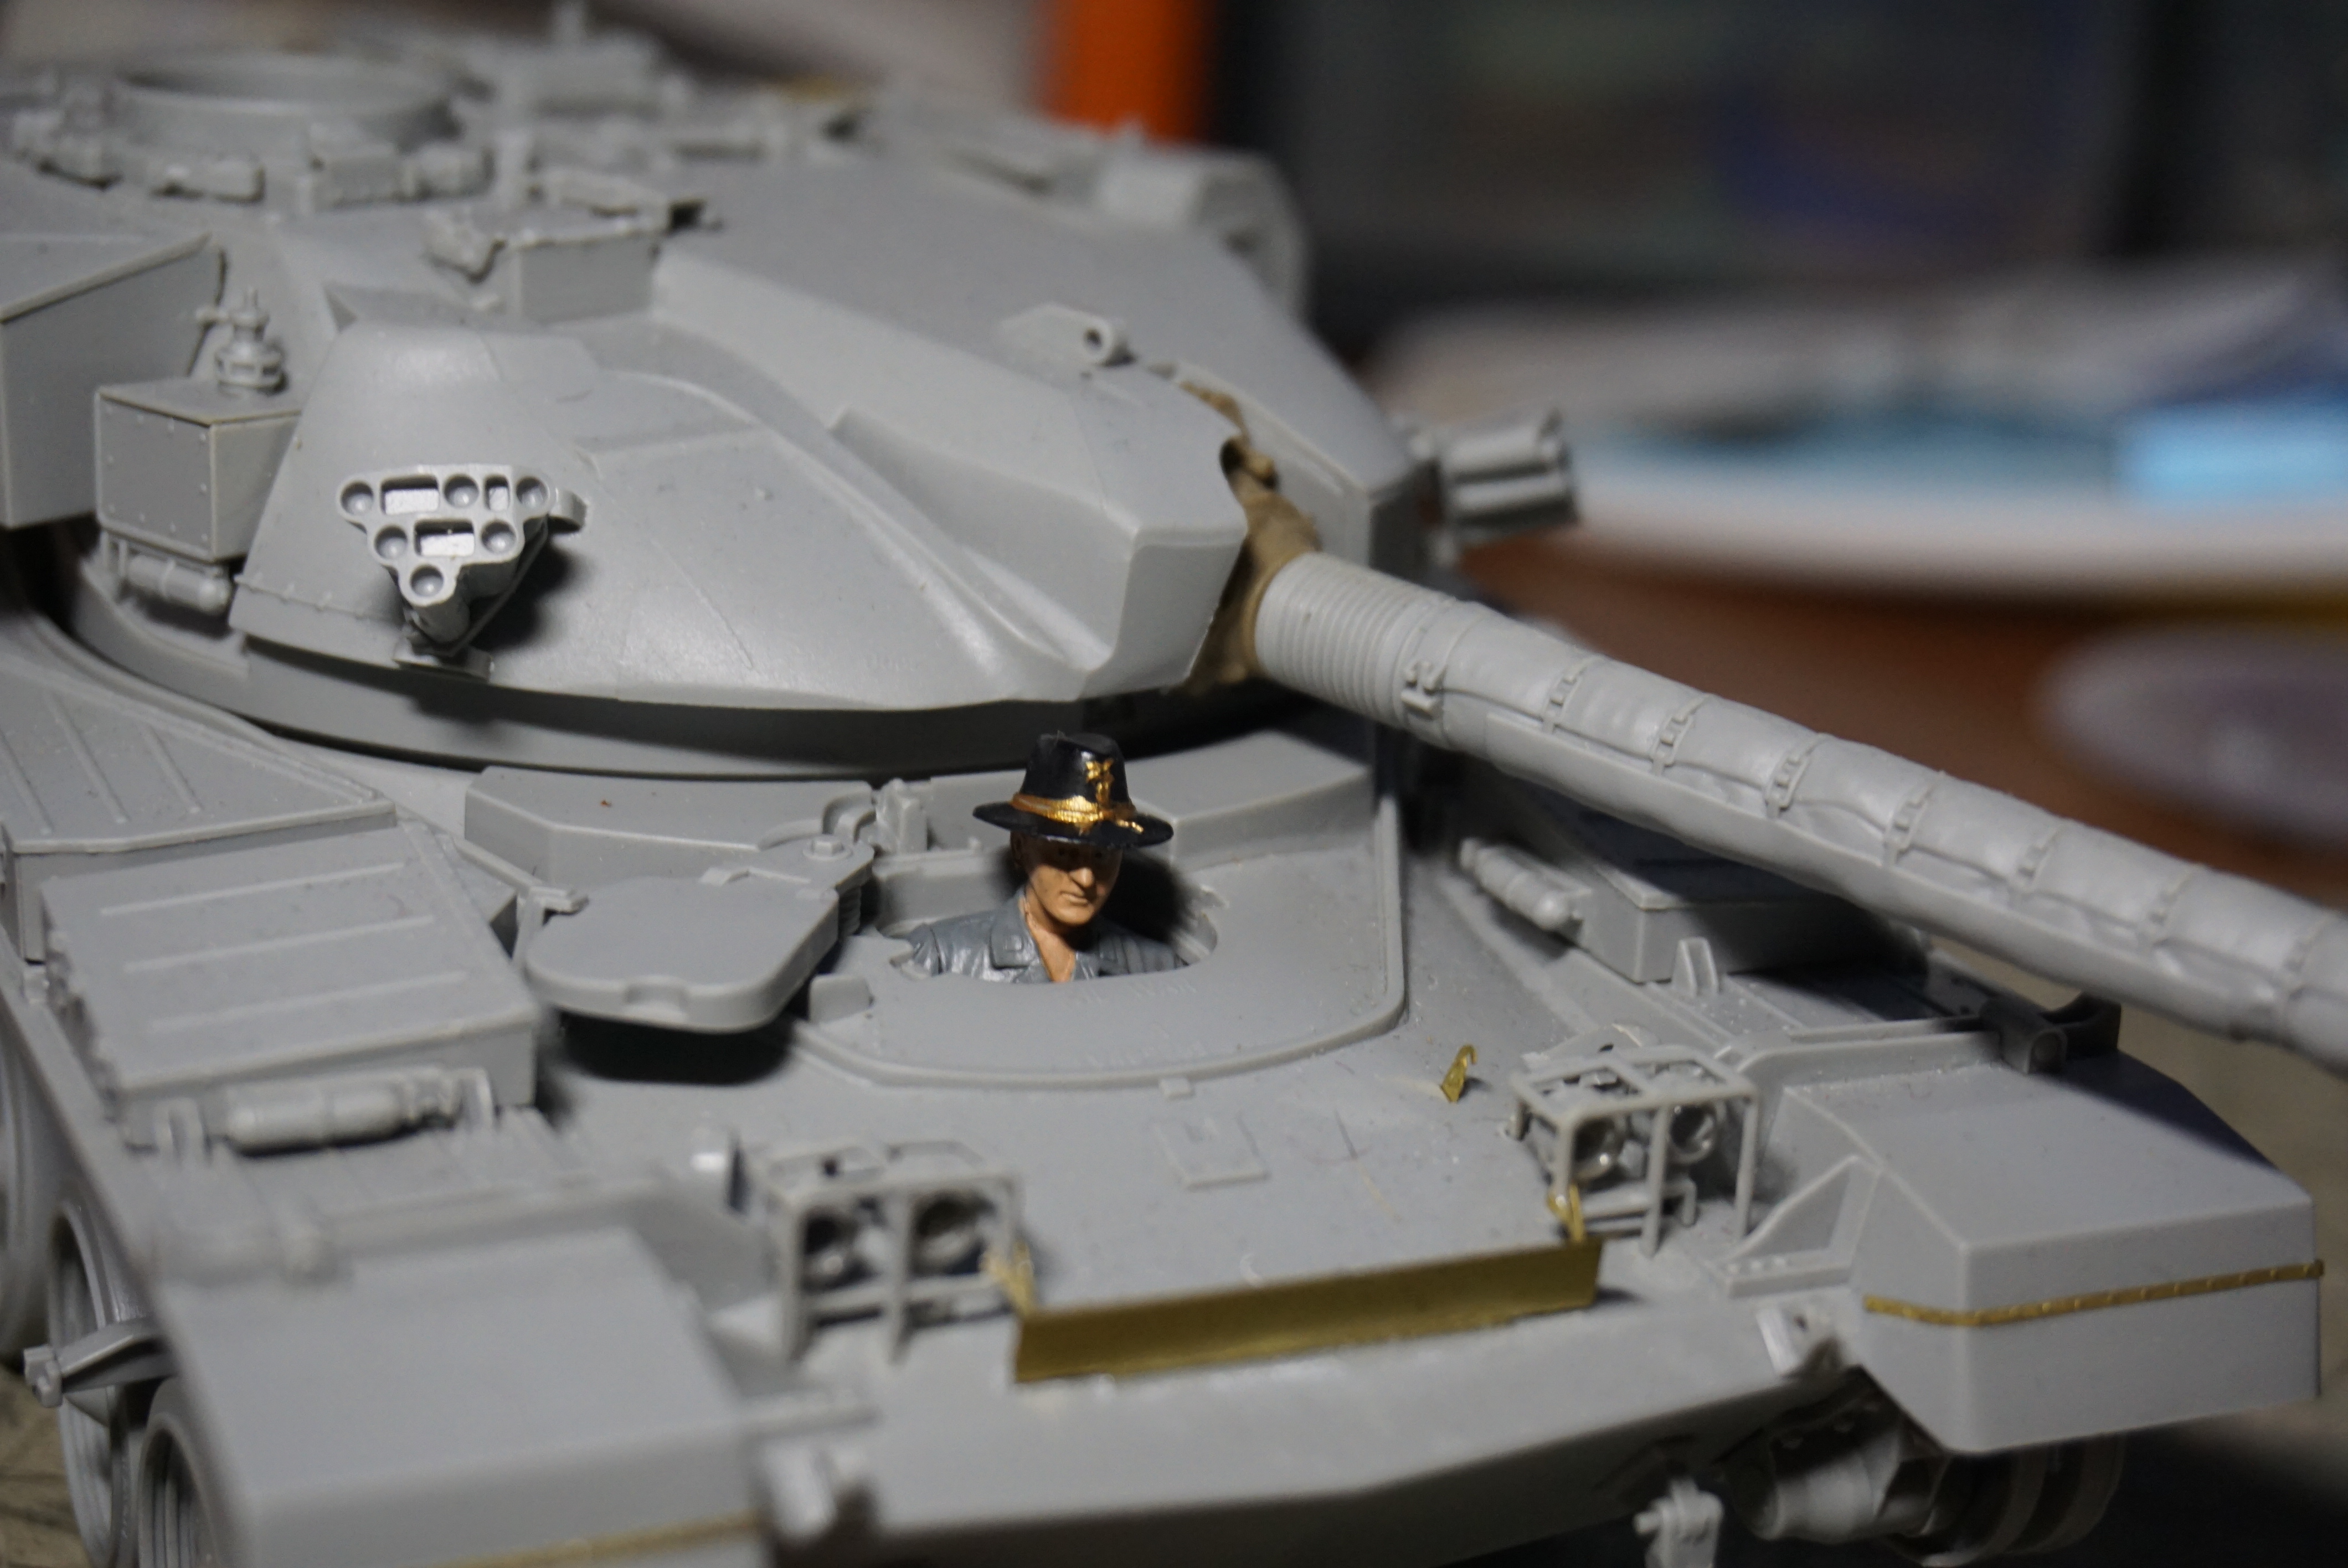
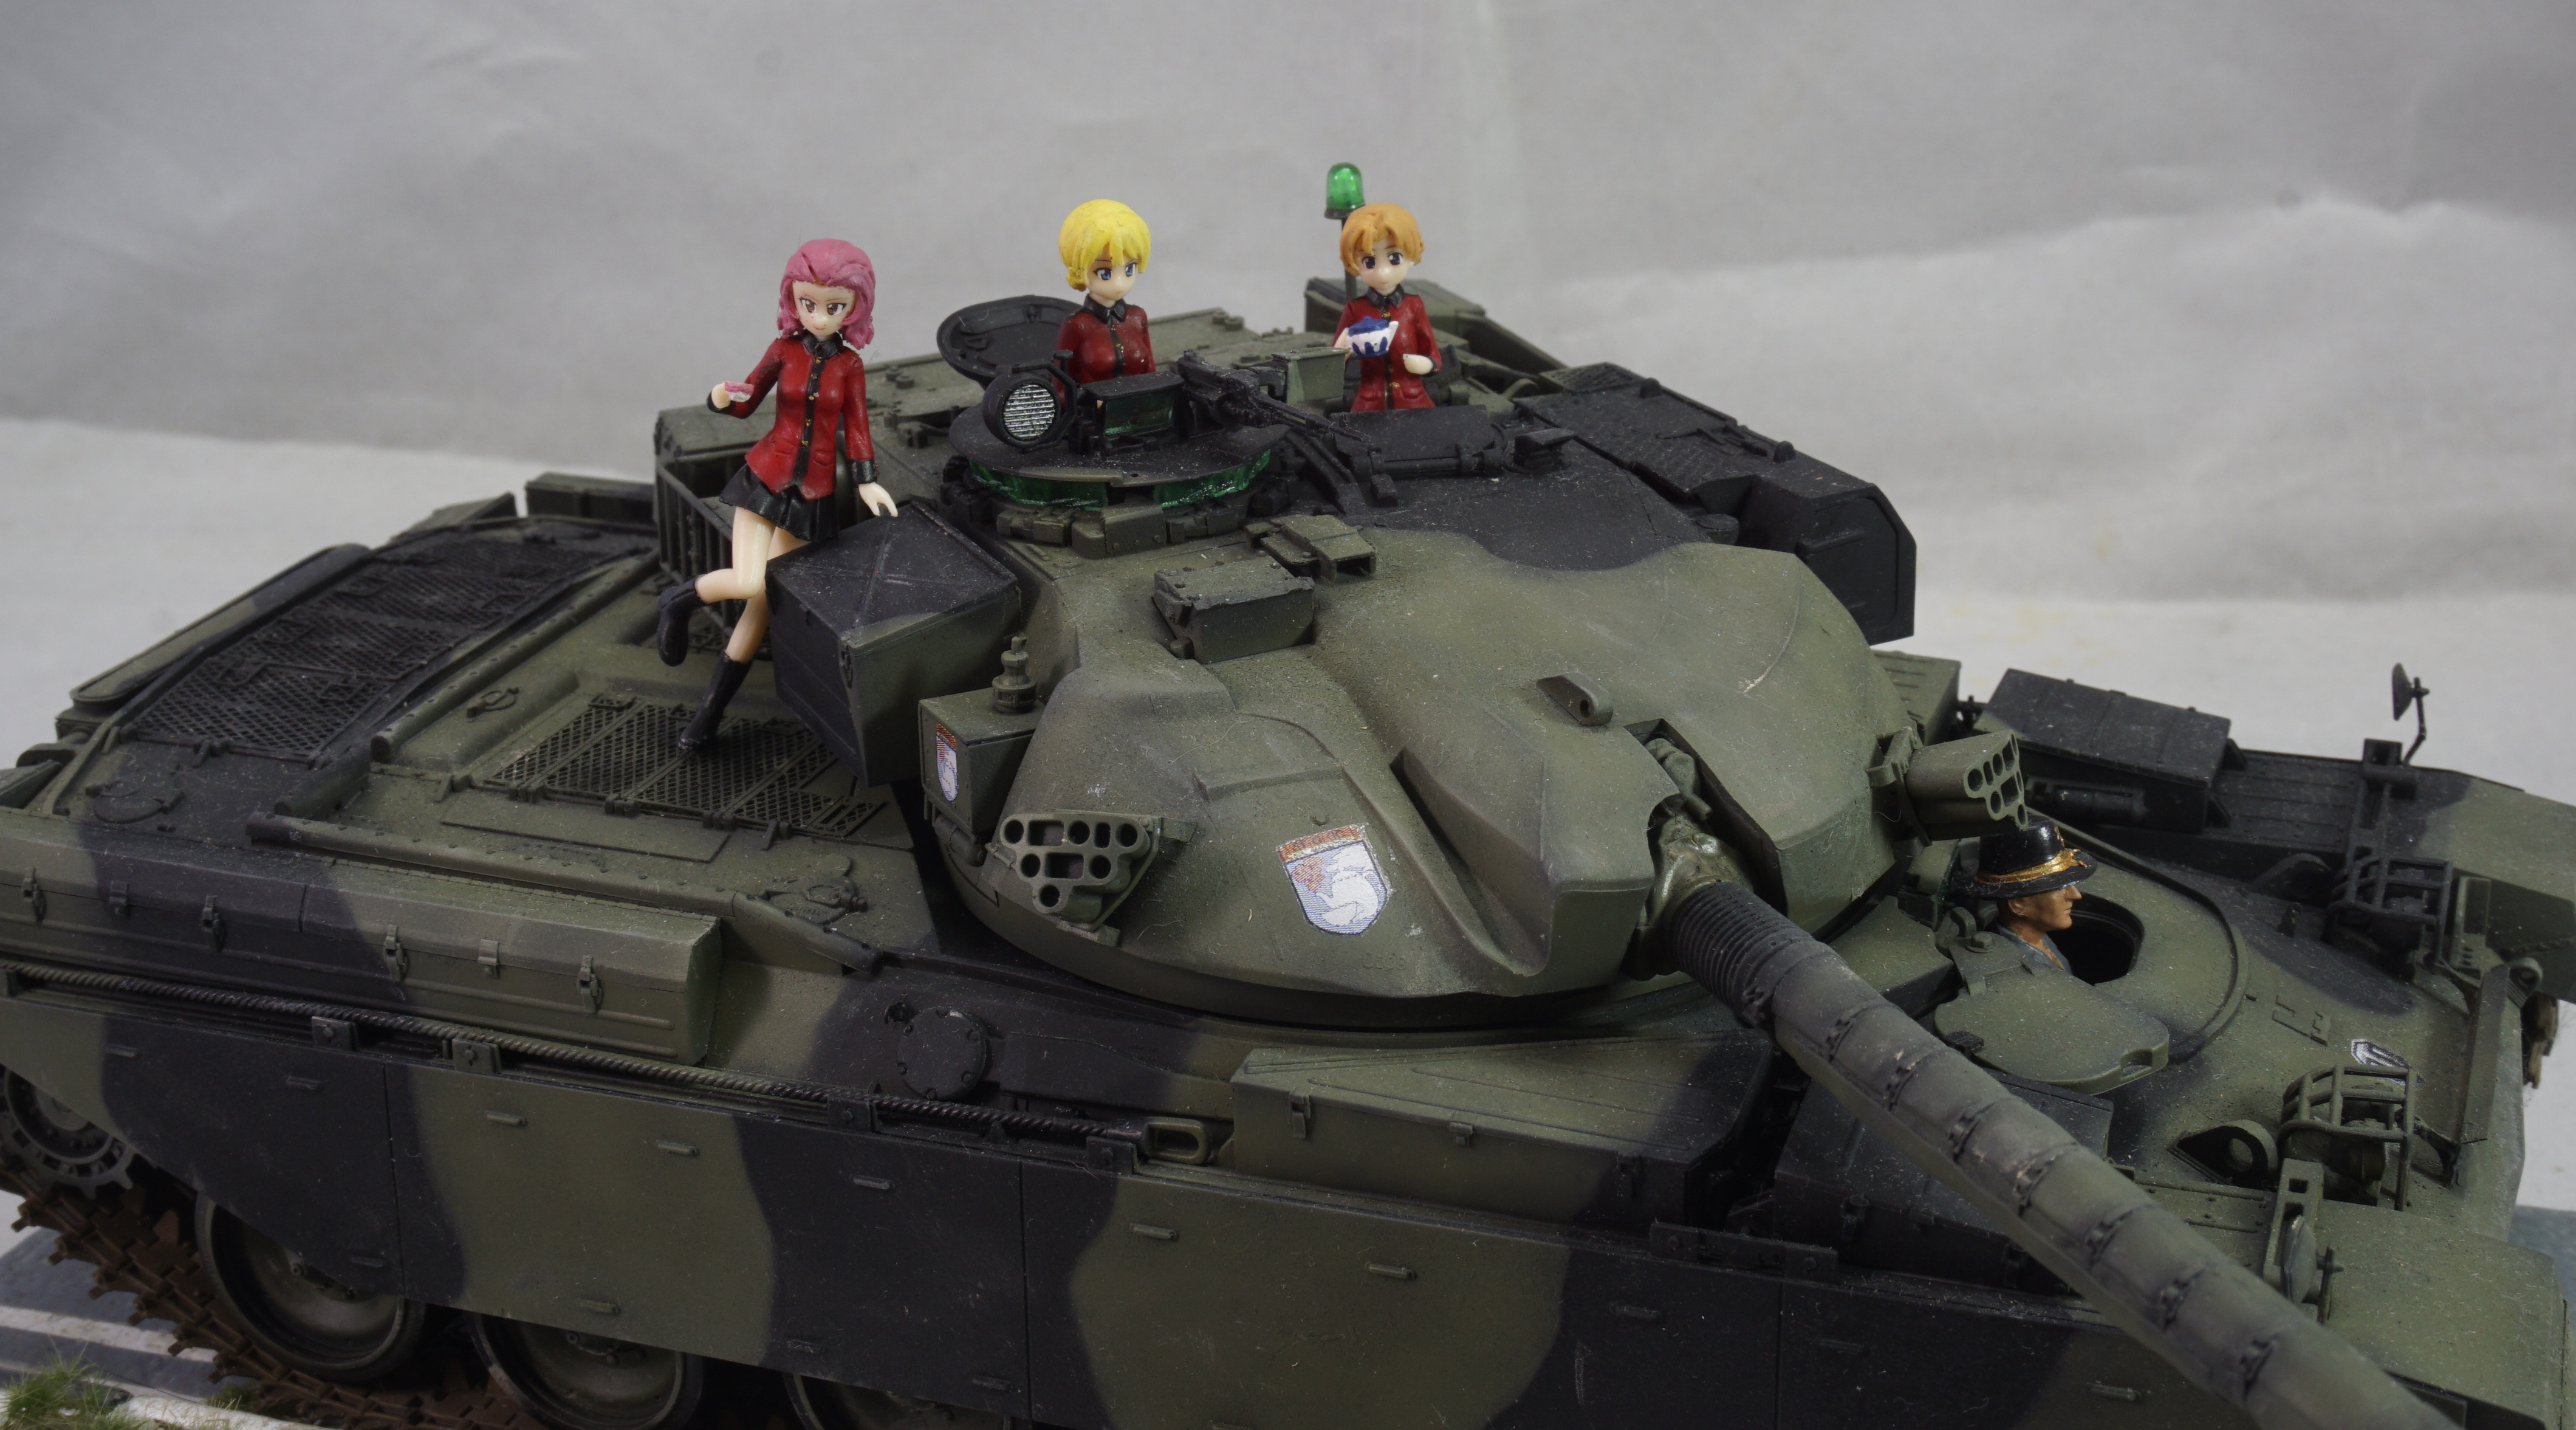
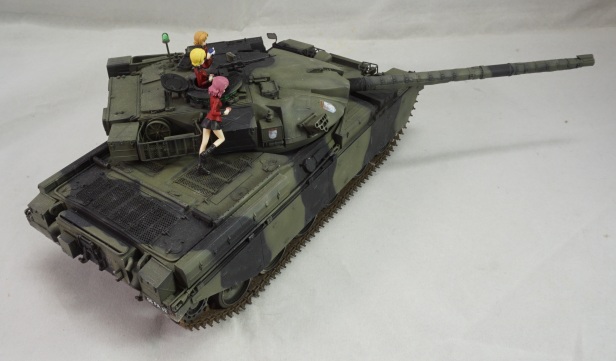
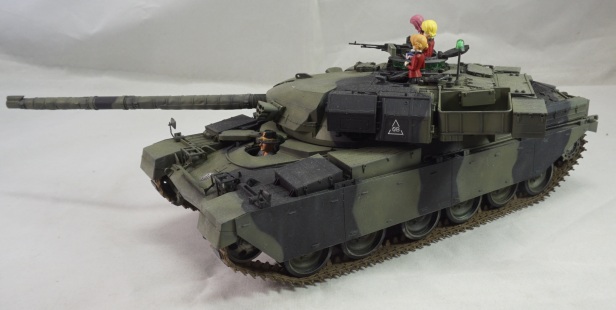
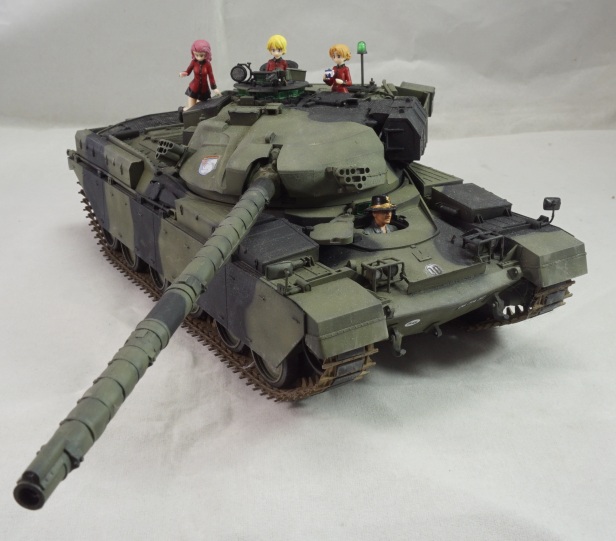
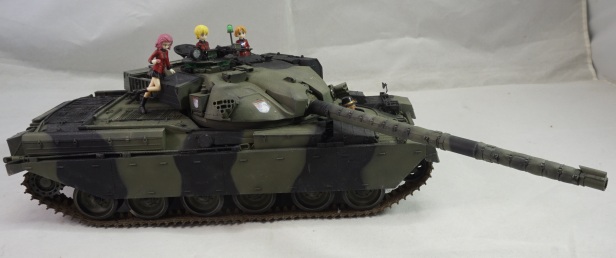
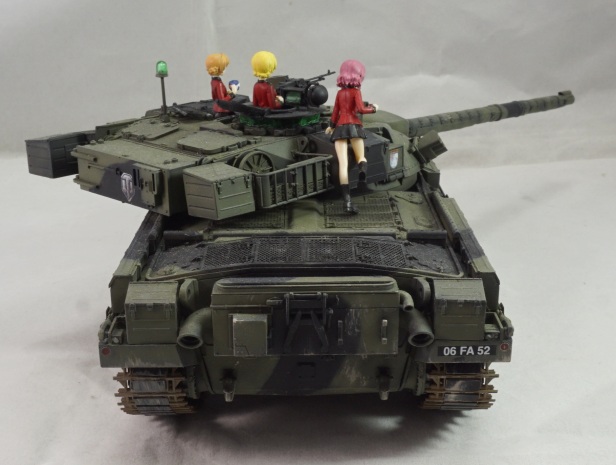
Now we focus on the figures for this project. For The Chieftain, the only figure that i can find with the stetson cavalry hats is from the Dragon 1/35 US 1st Cavalry figure set which i only able to find in E-bay but atleast not in rip-off price. To fit him inside the driver hatch pose quite a problem since he too big to fit into the hatch from the outside so have to go through the inside the hull and put 2 stick to get into appropriate height.
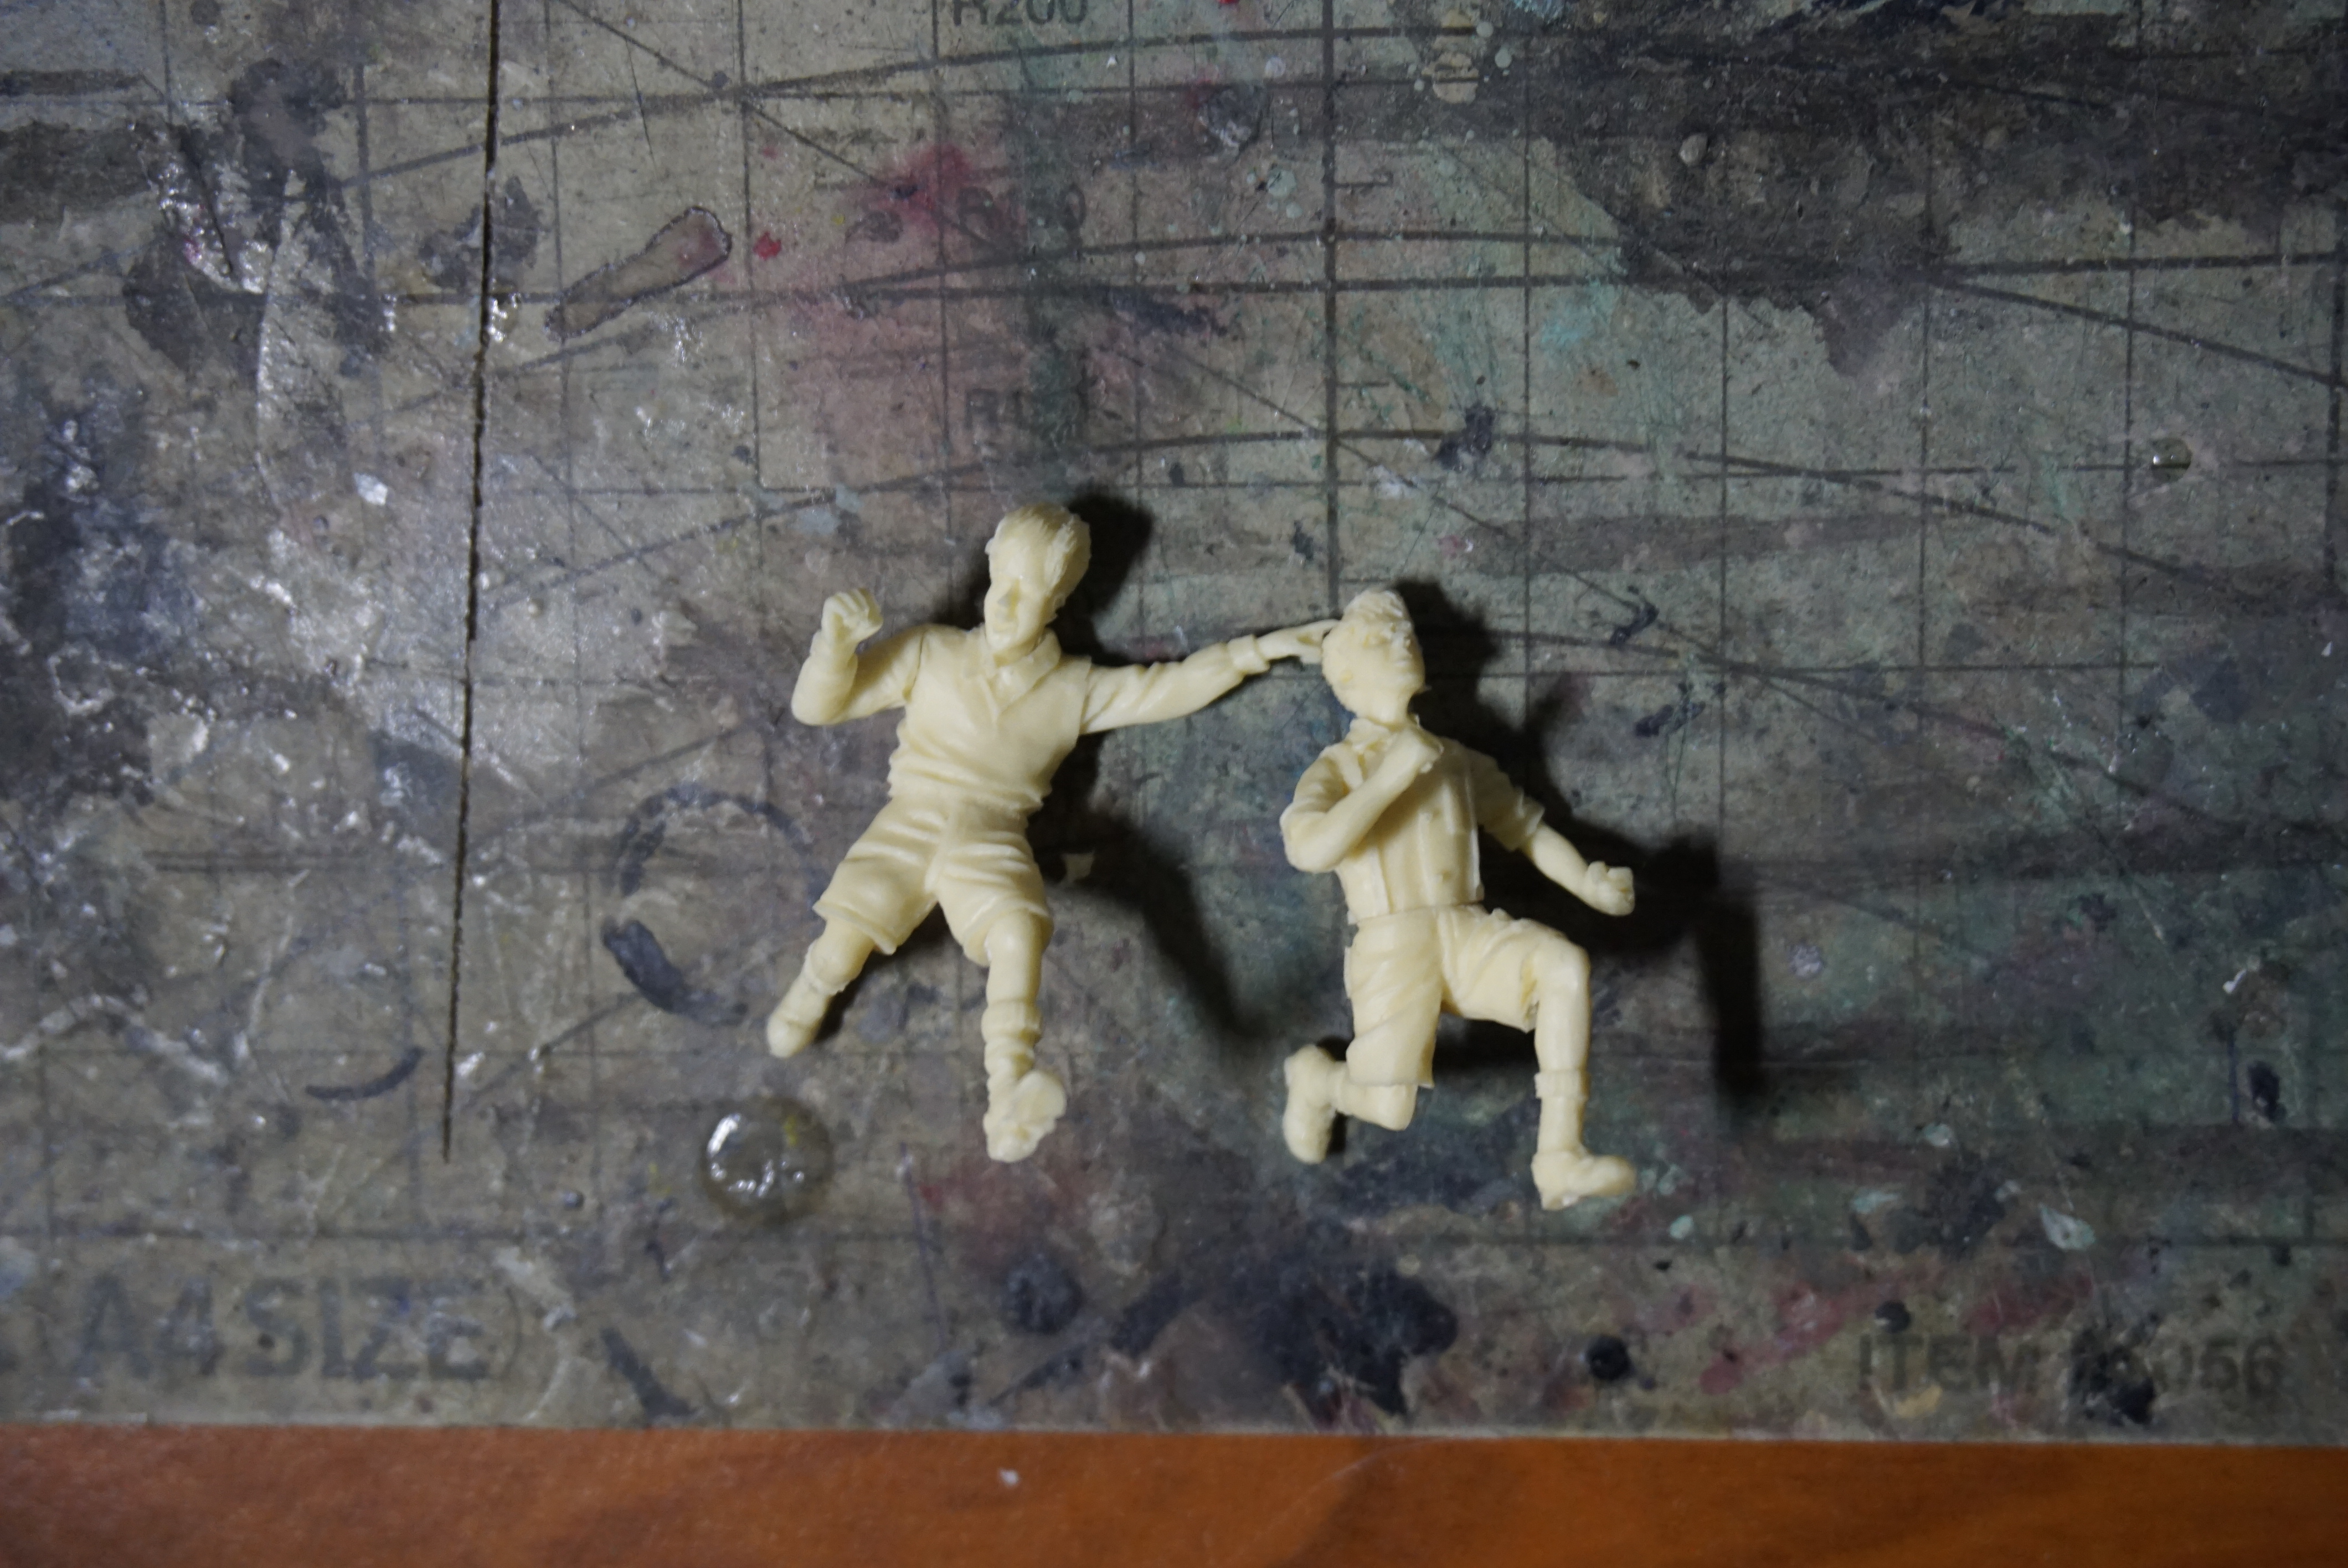
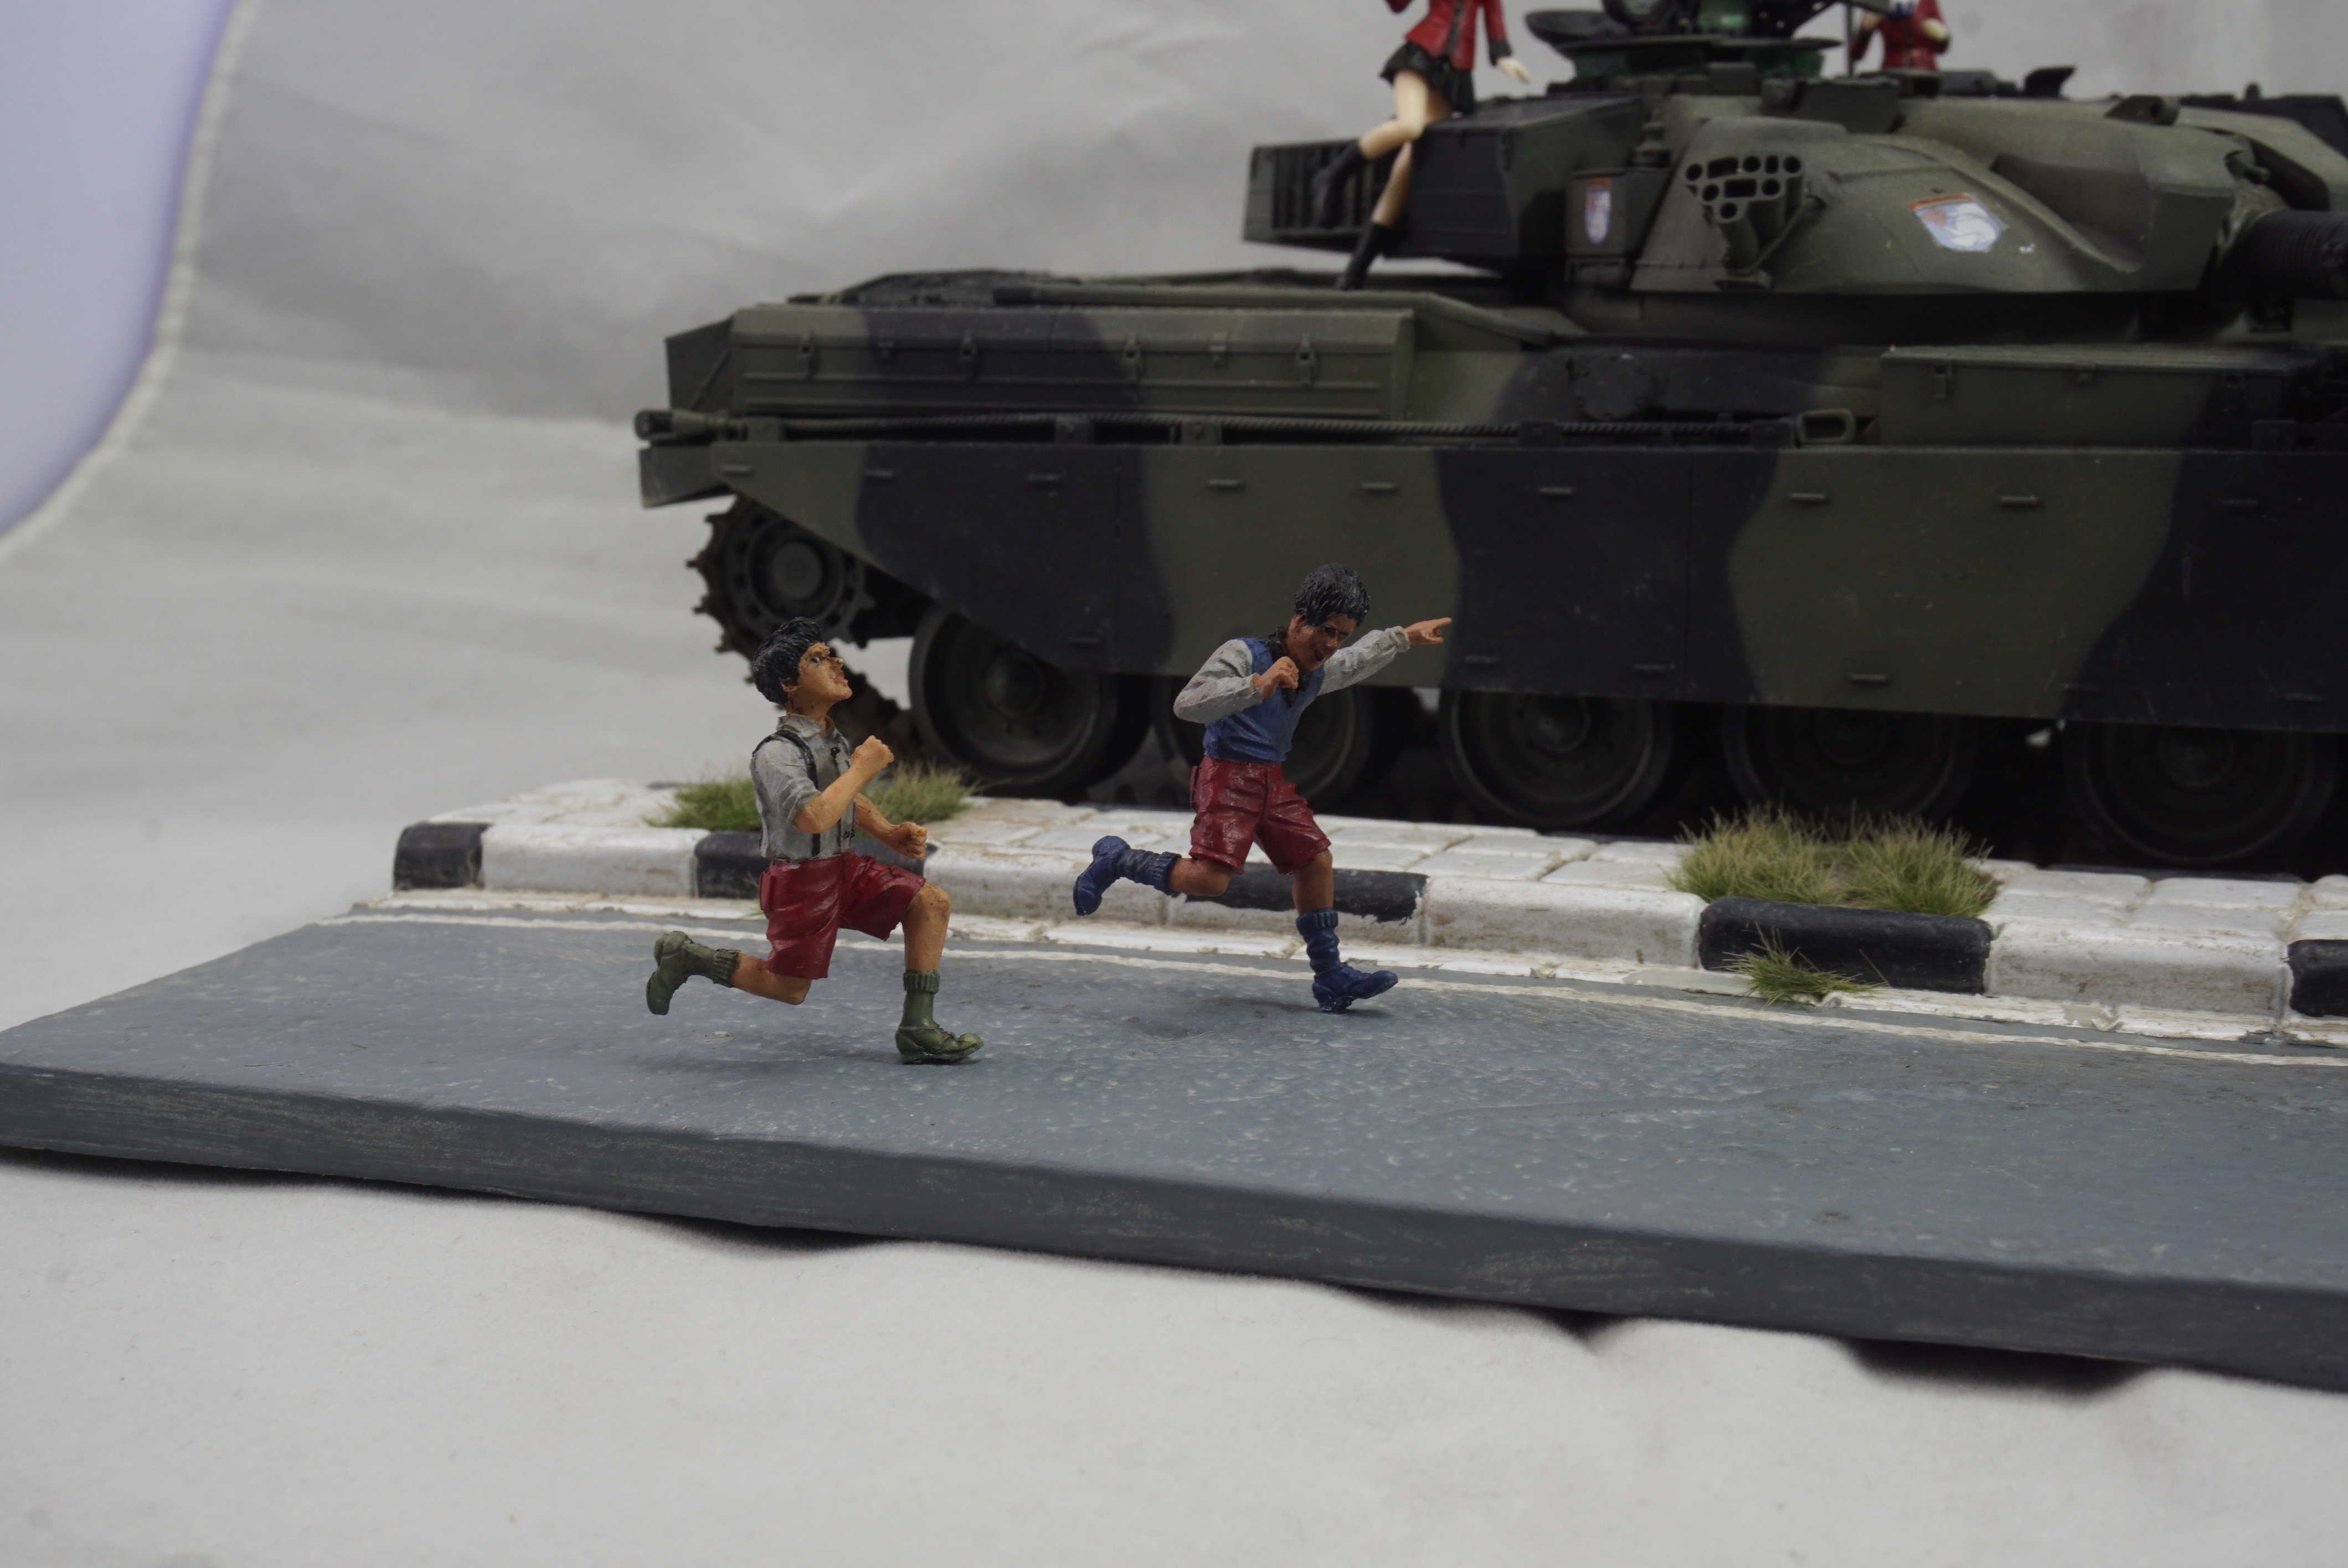
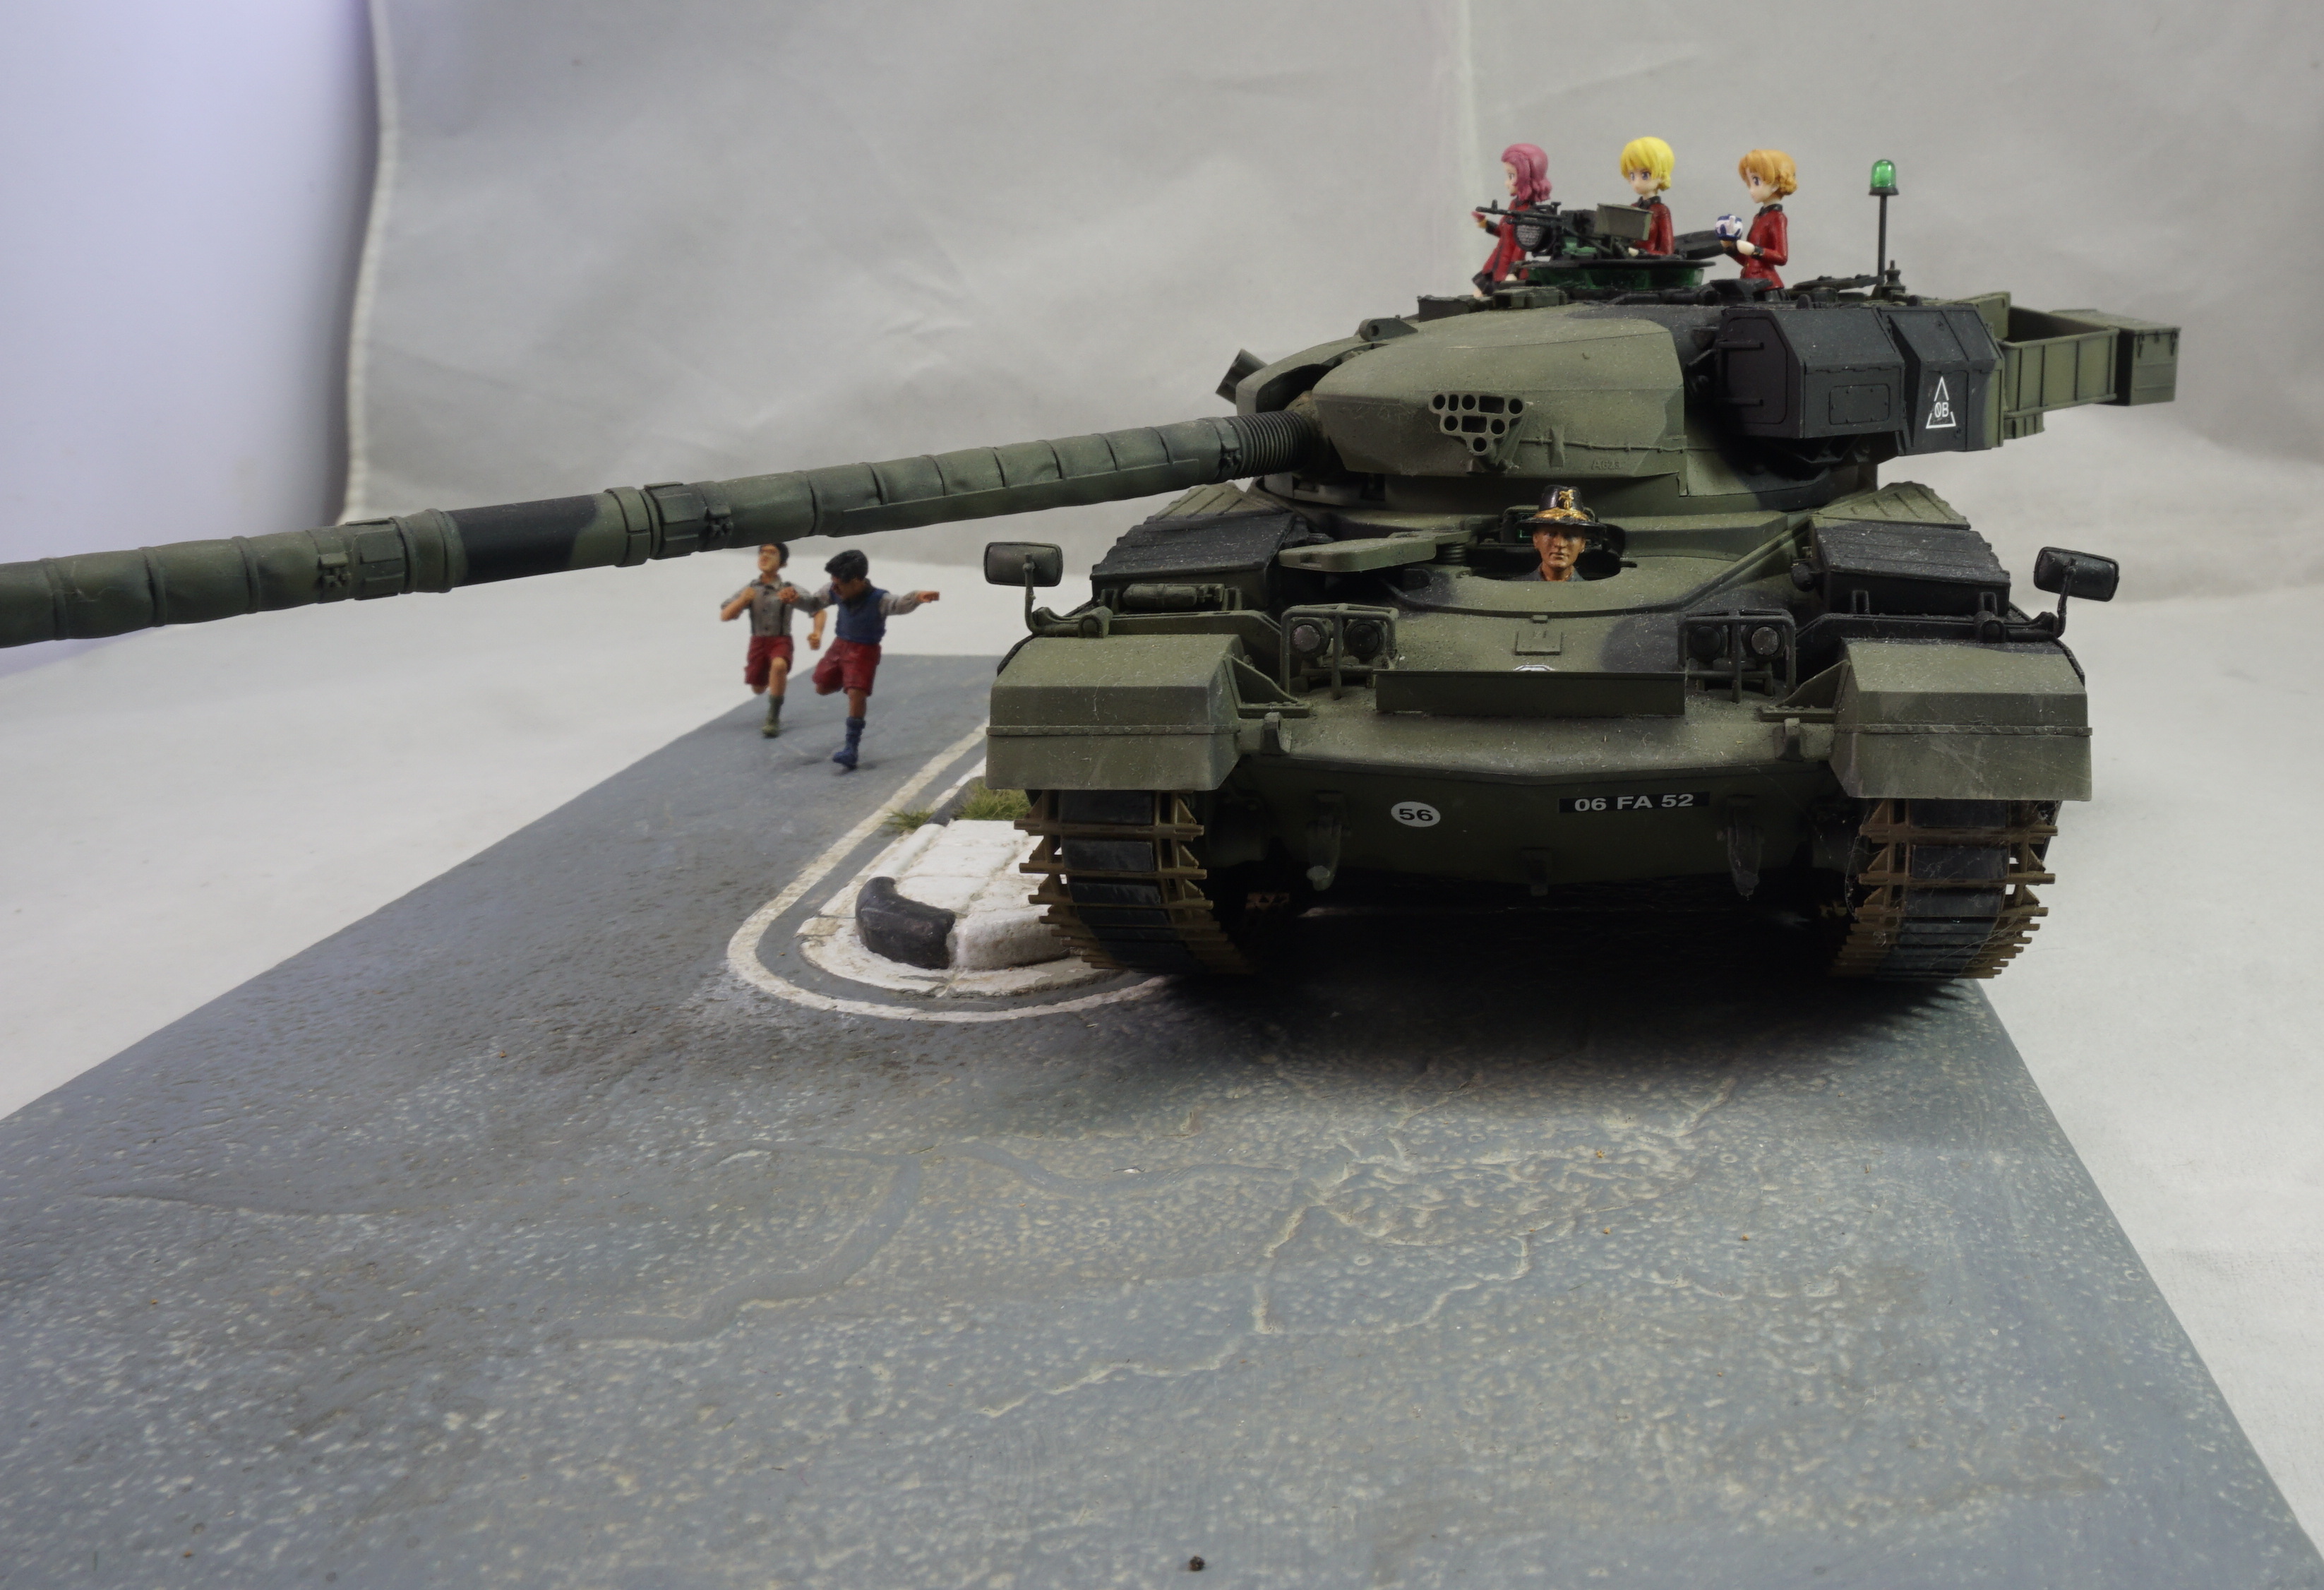
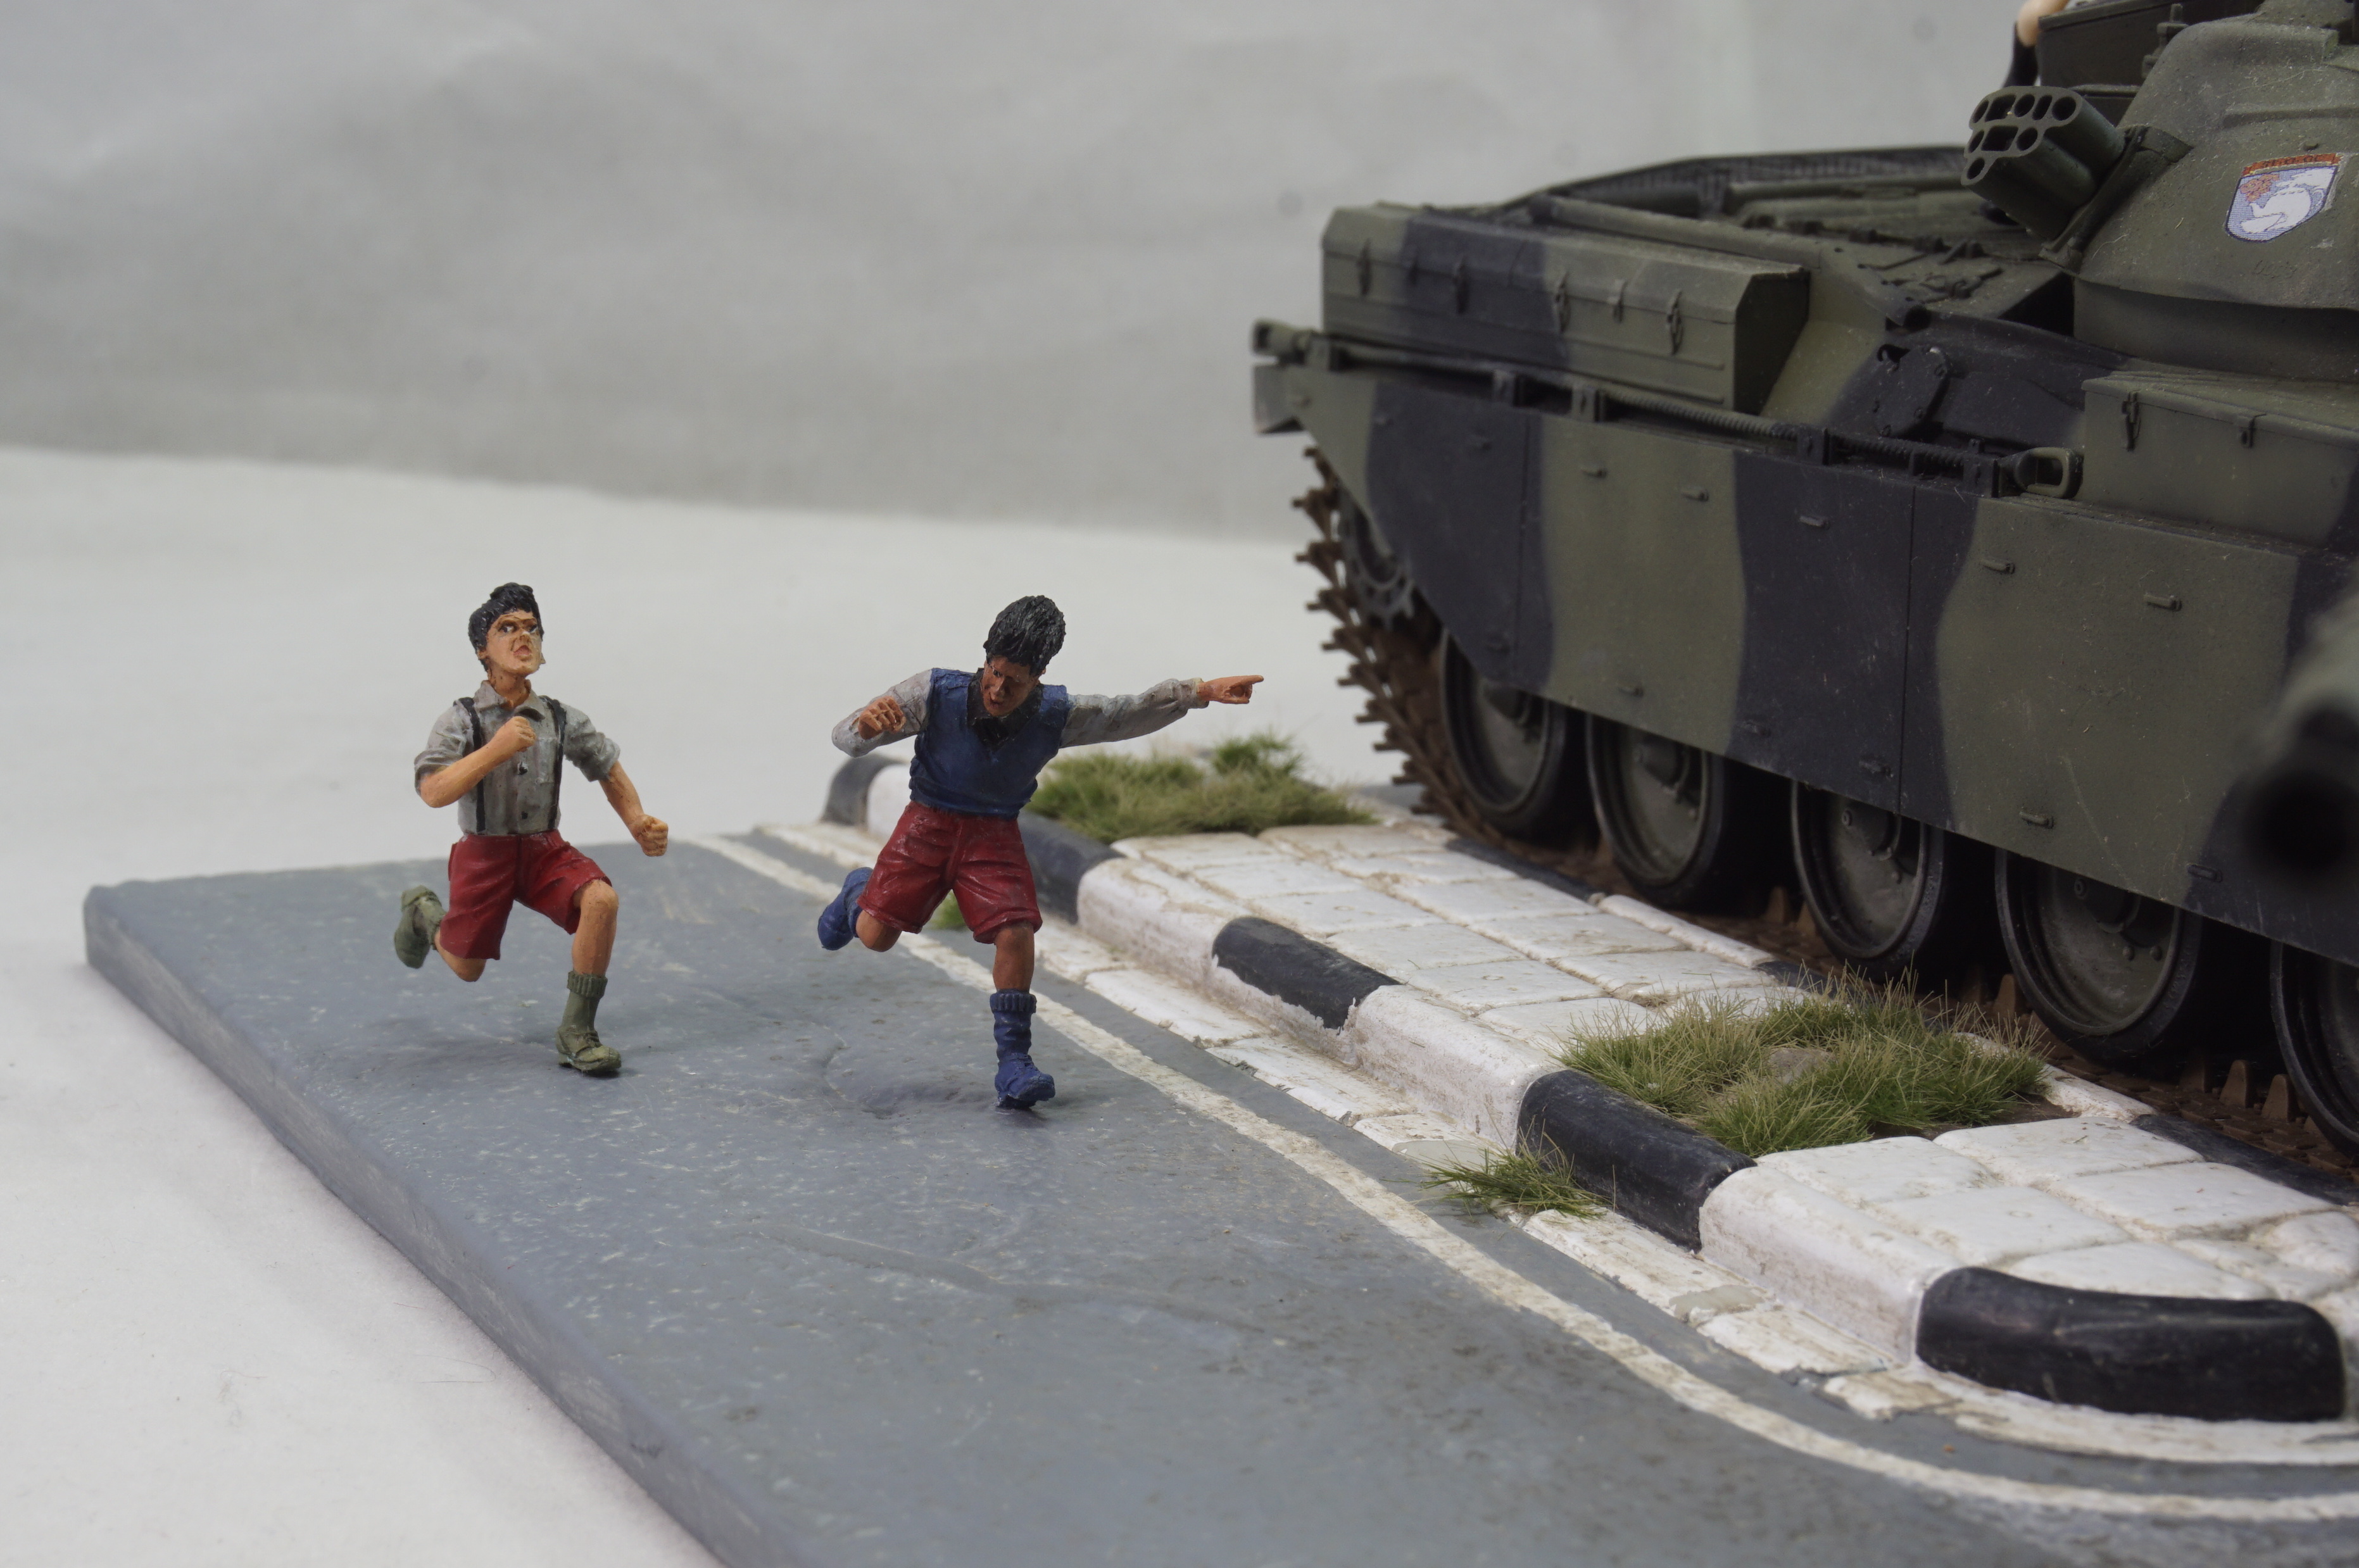
Another figure set to arrive was the two child running children which i believe was a recast which explain the low cost and detail but still go through with it because of lack of alternative.
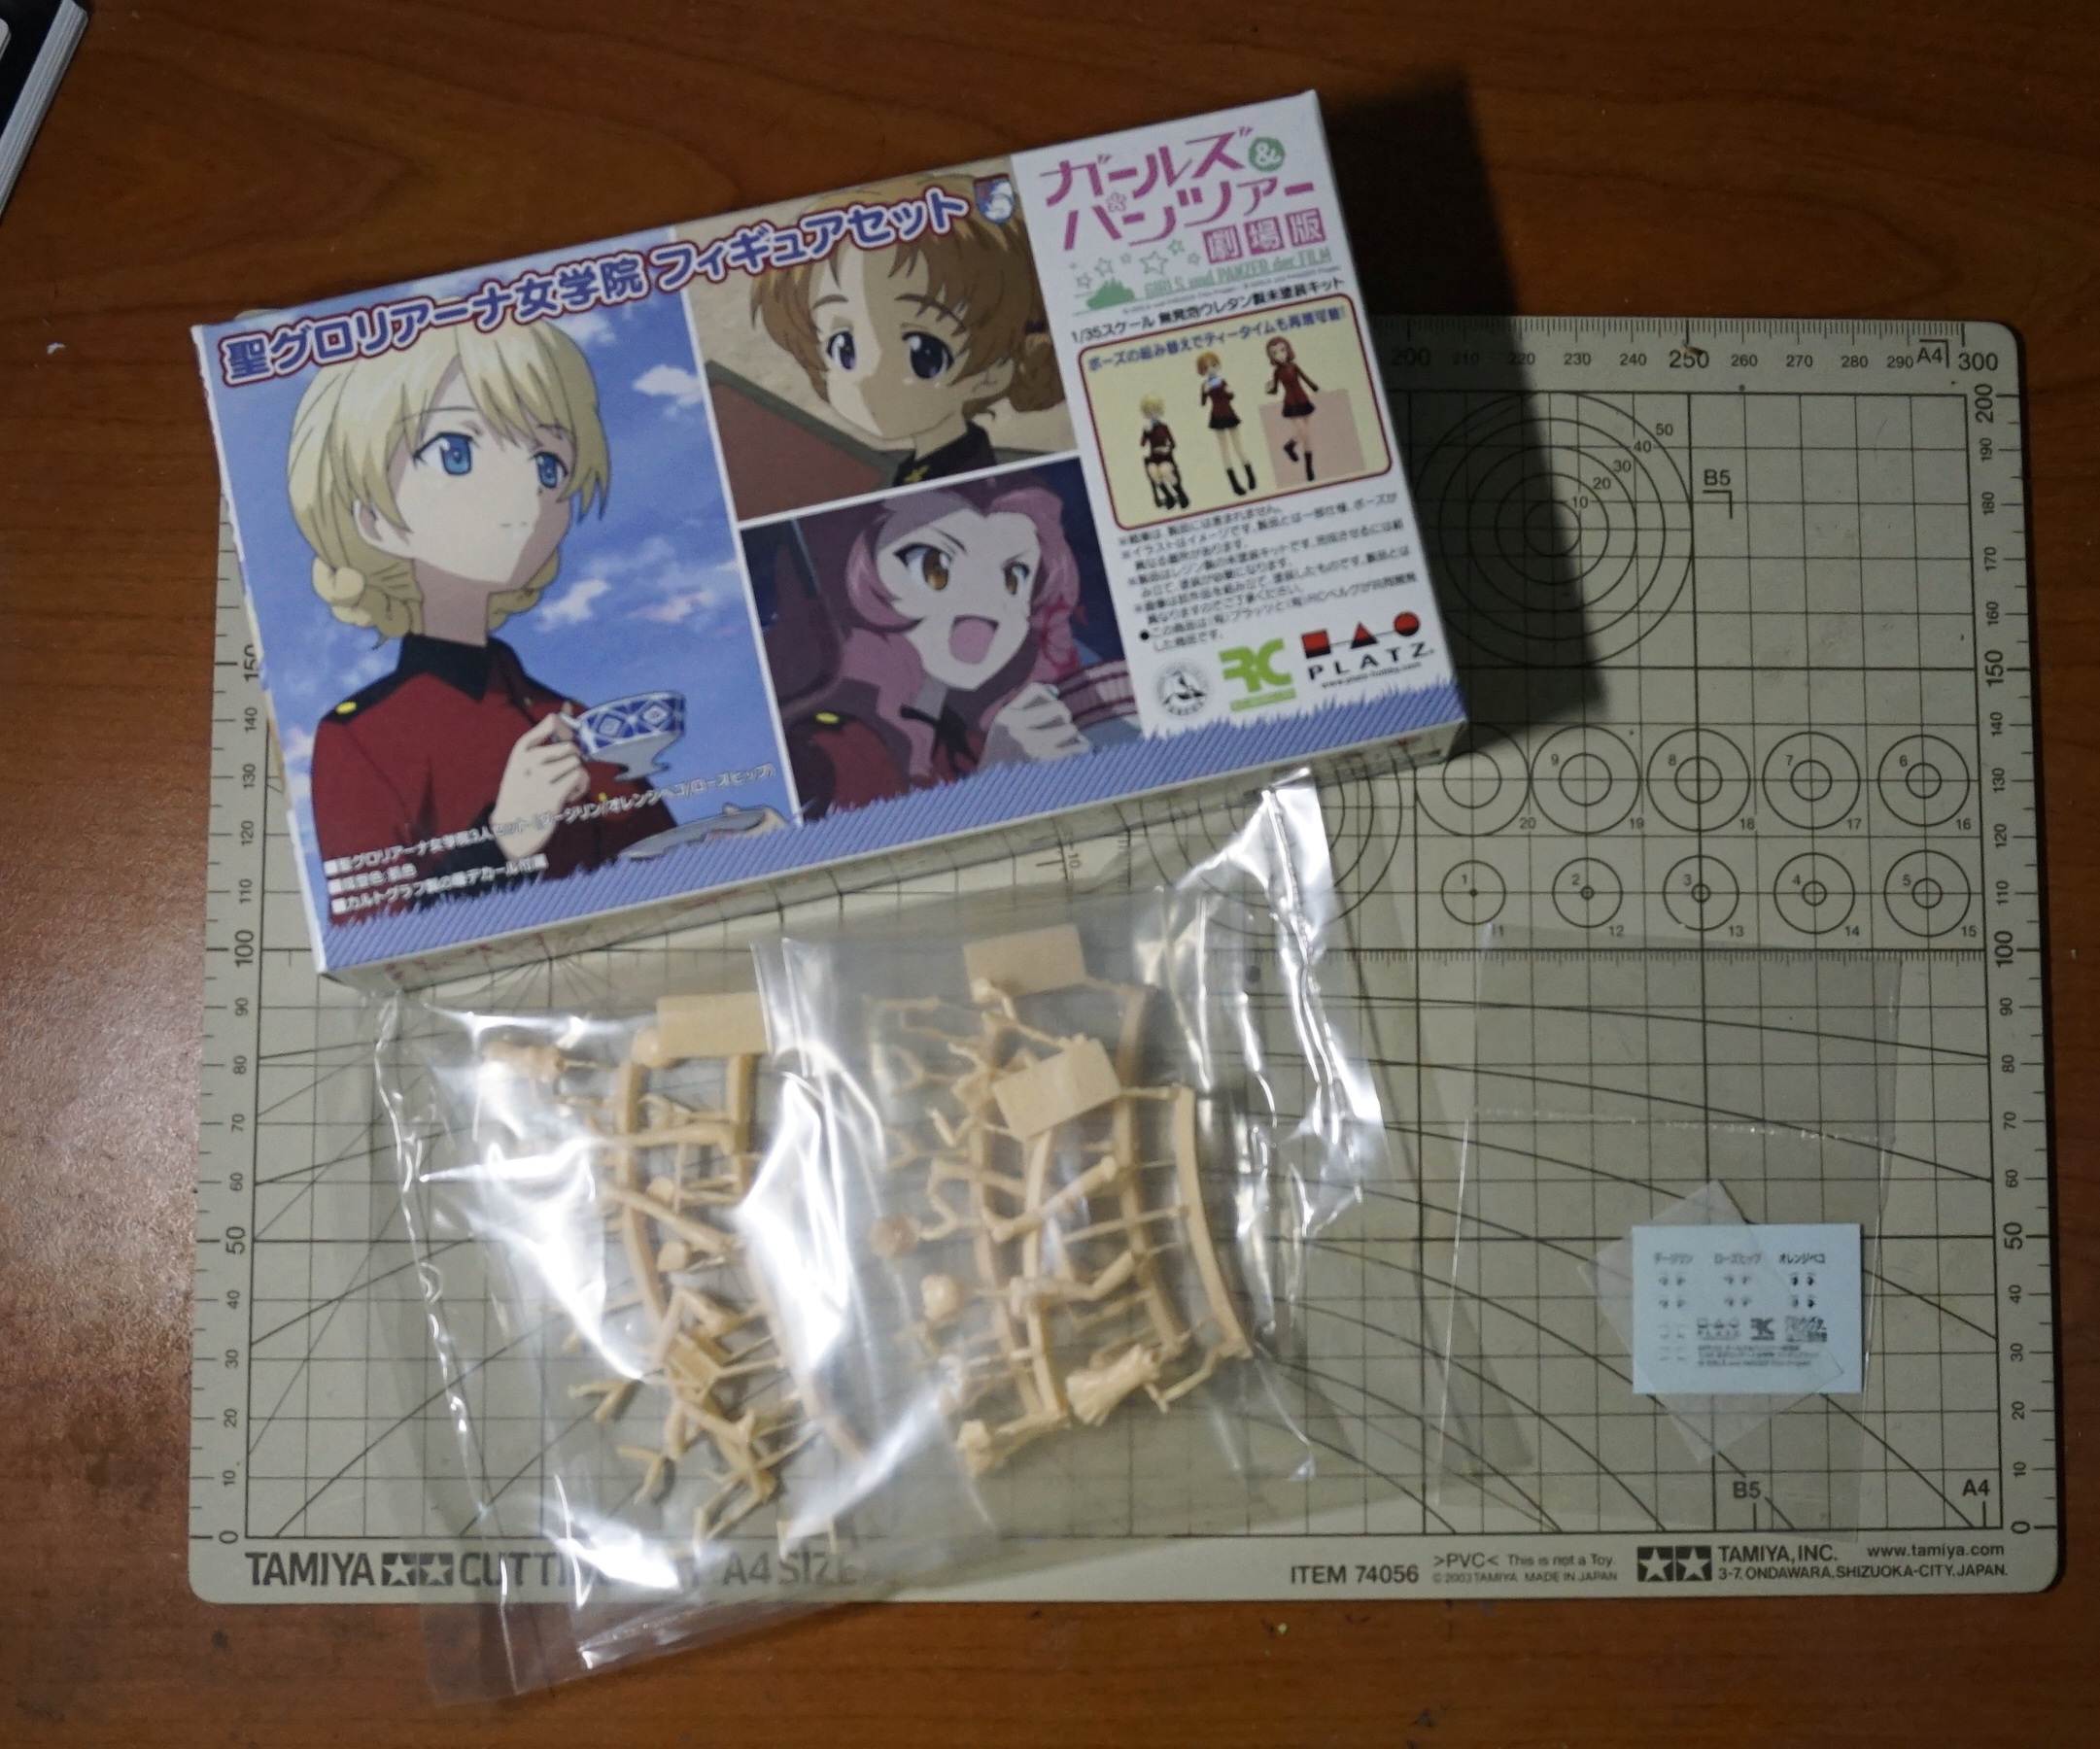

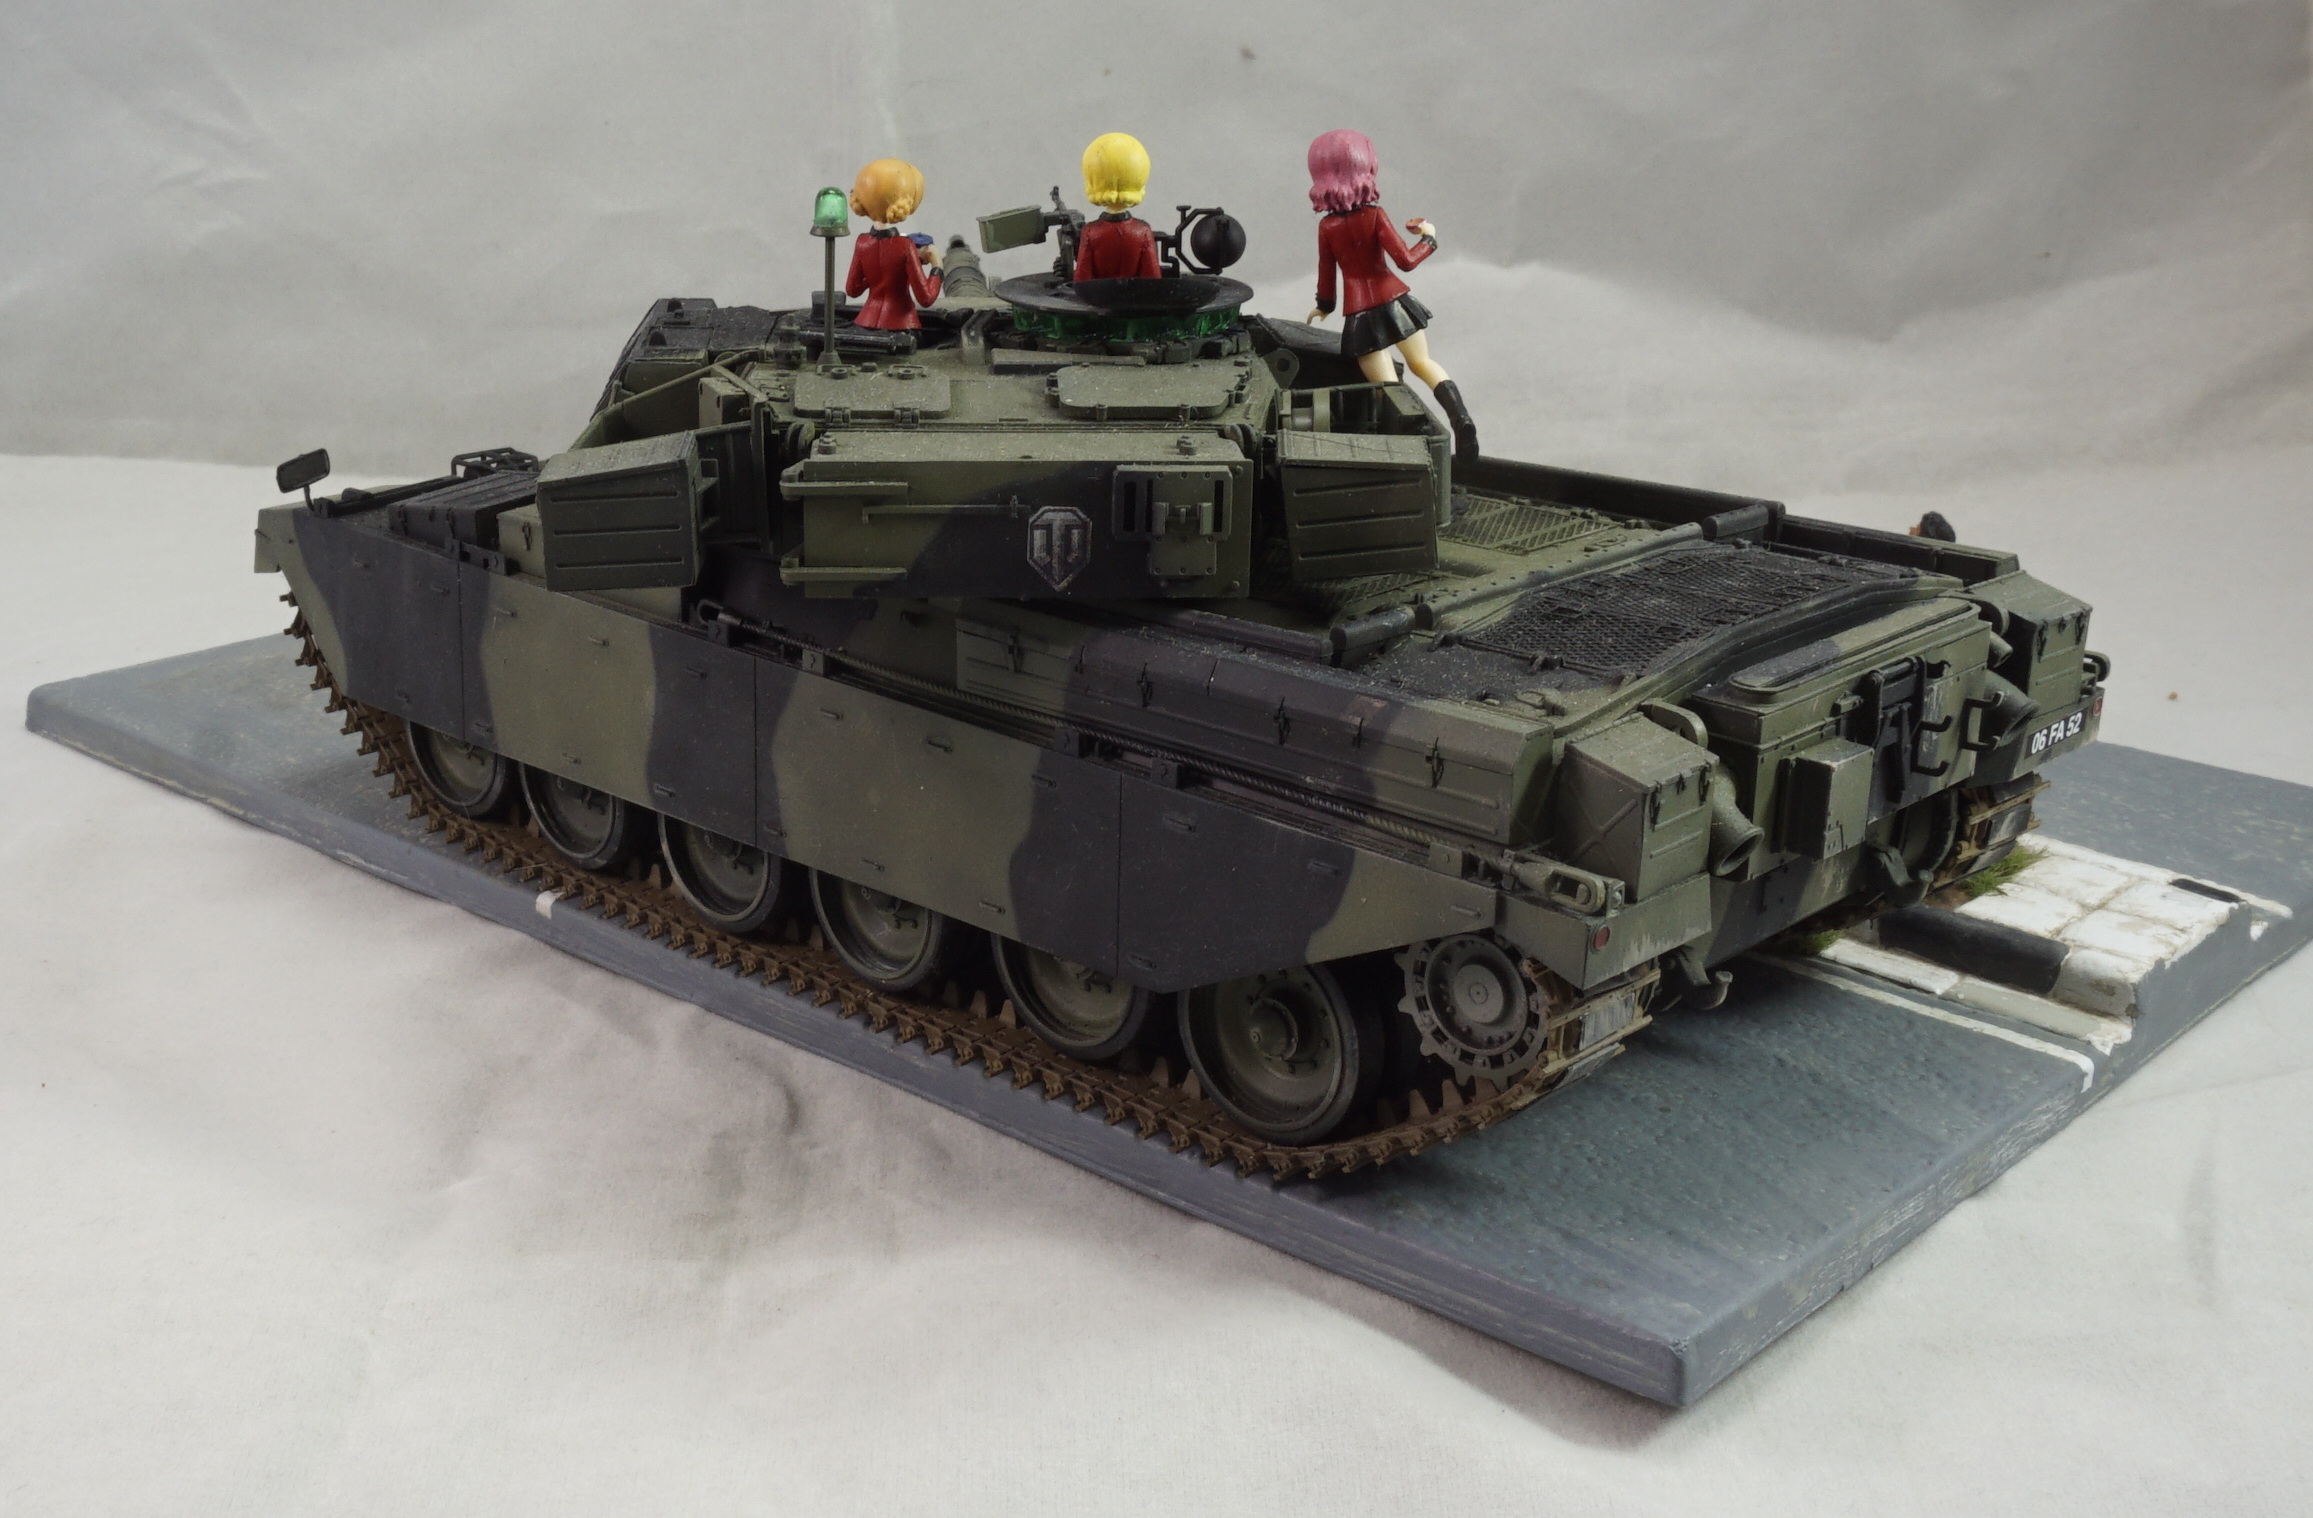
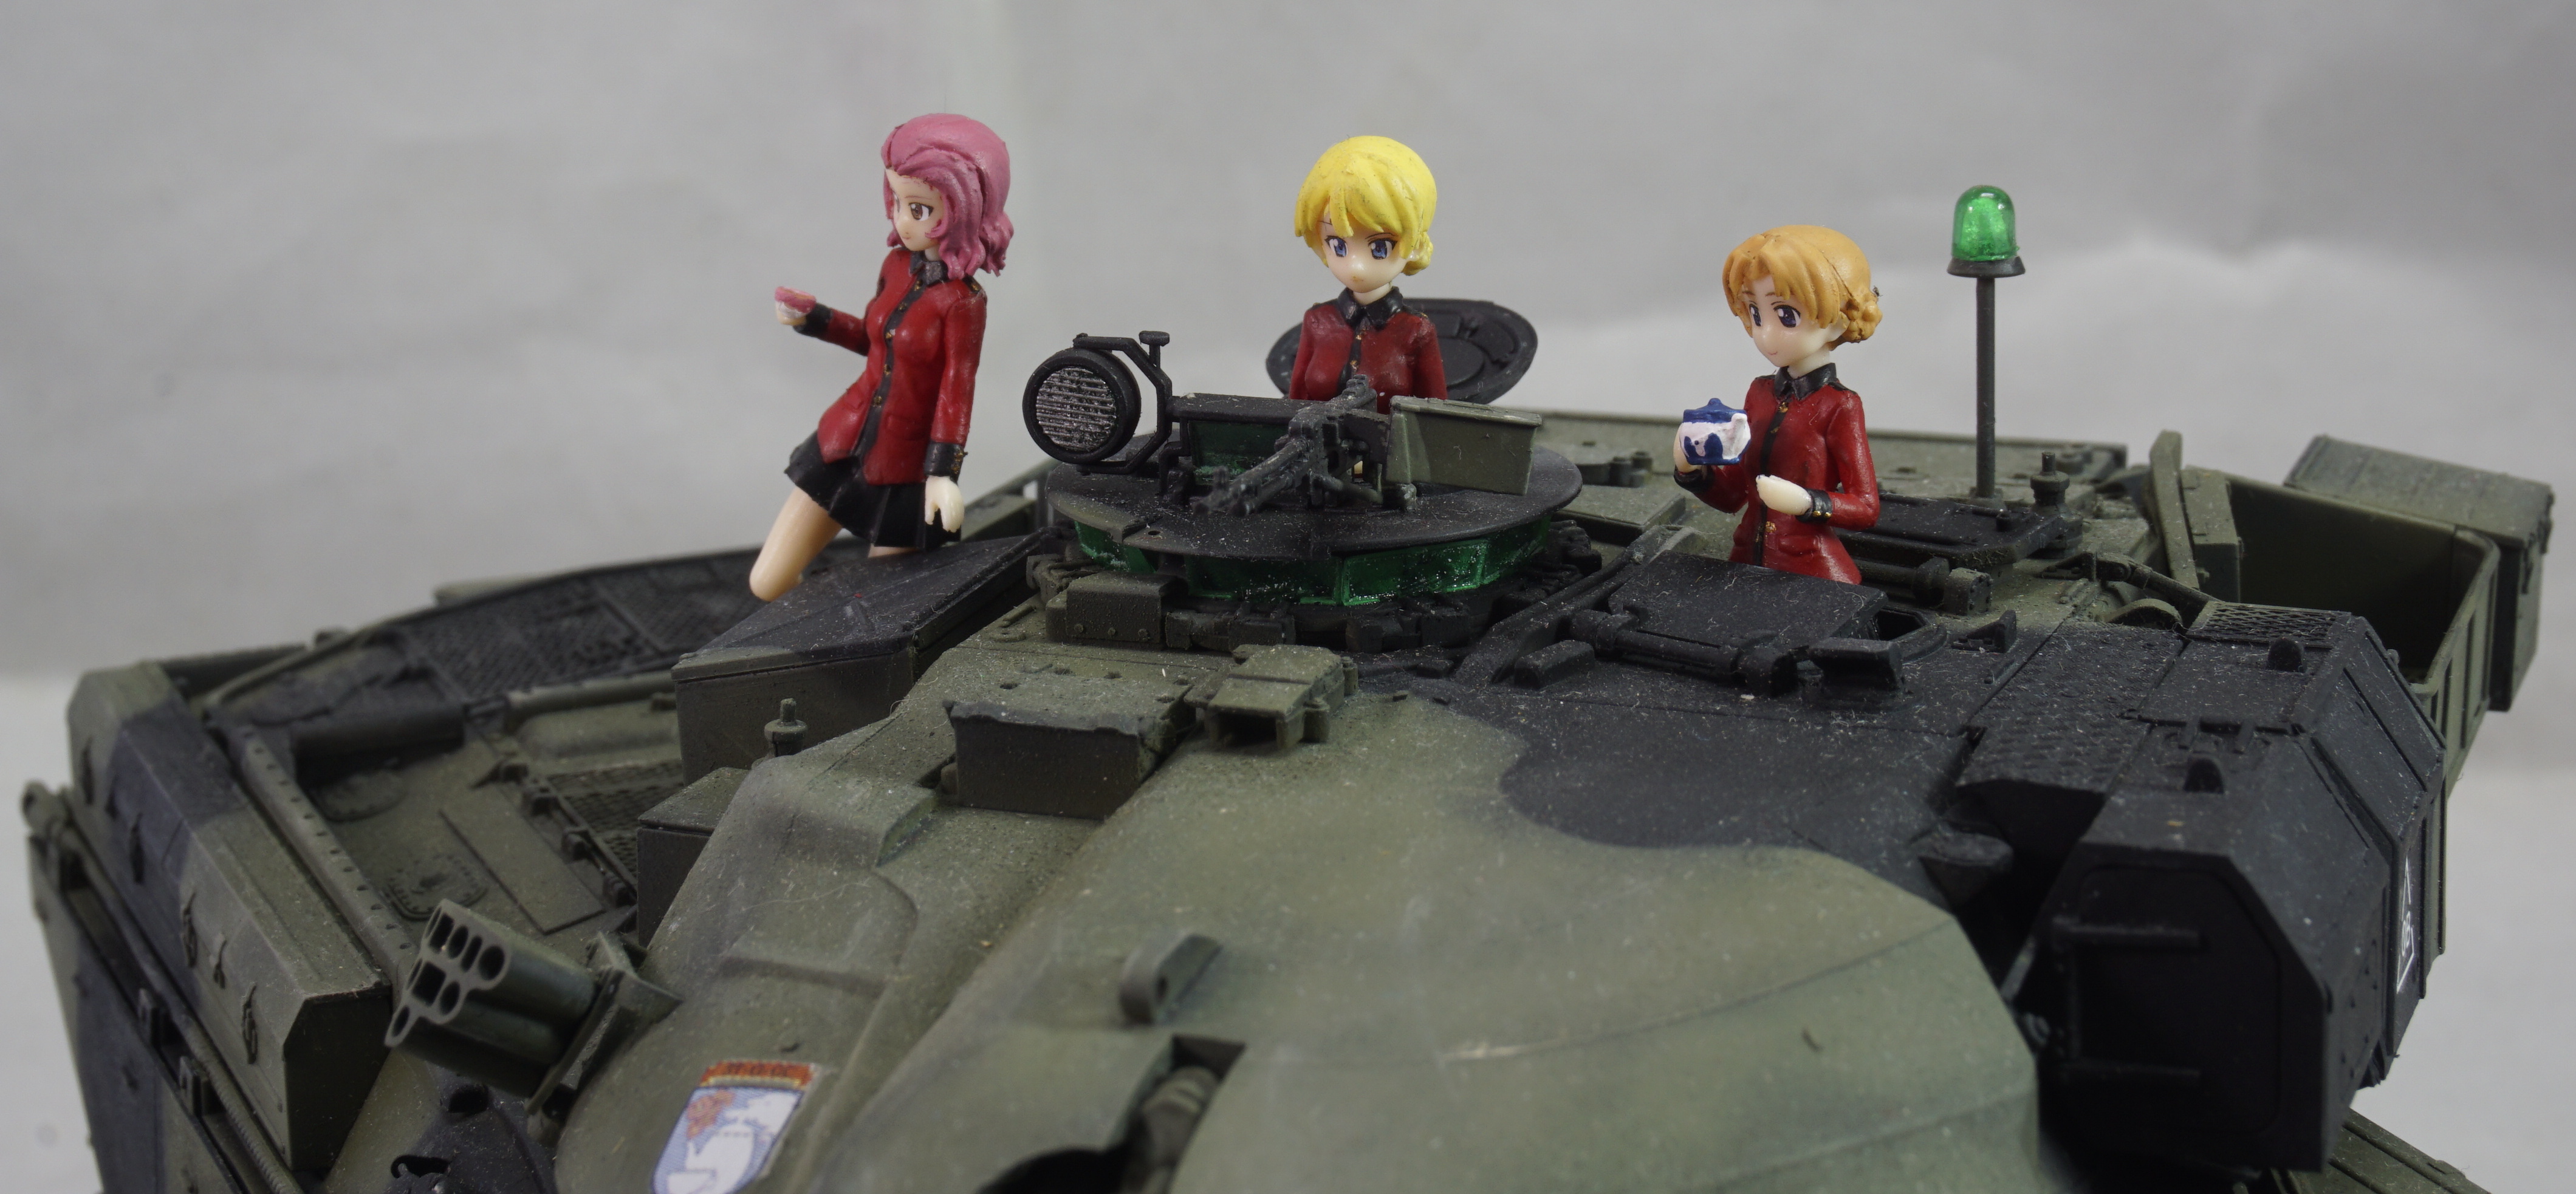
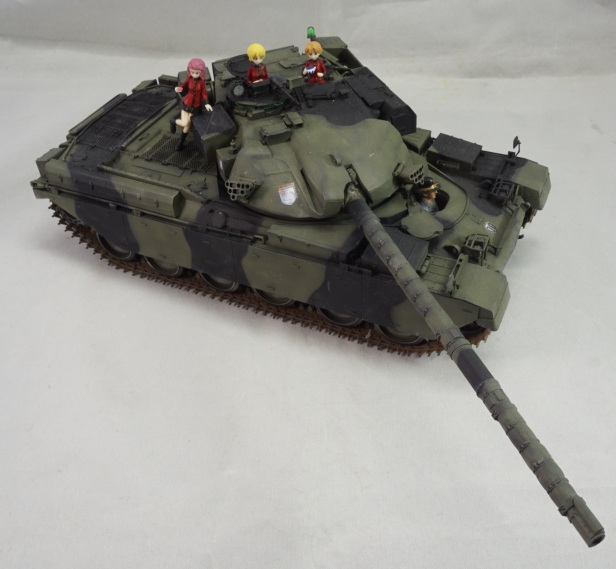
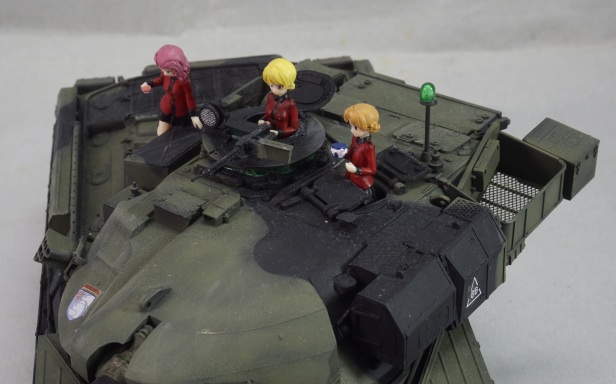
The final set of figure was the recently release 1/35 Girls und Panzer the Movie St. Gloriana Girls Academy Figure Set by Platz/RC BERG which release at February while originally it set for December last year which delay the project completion for quite a while.
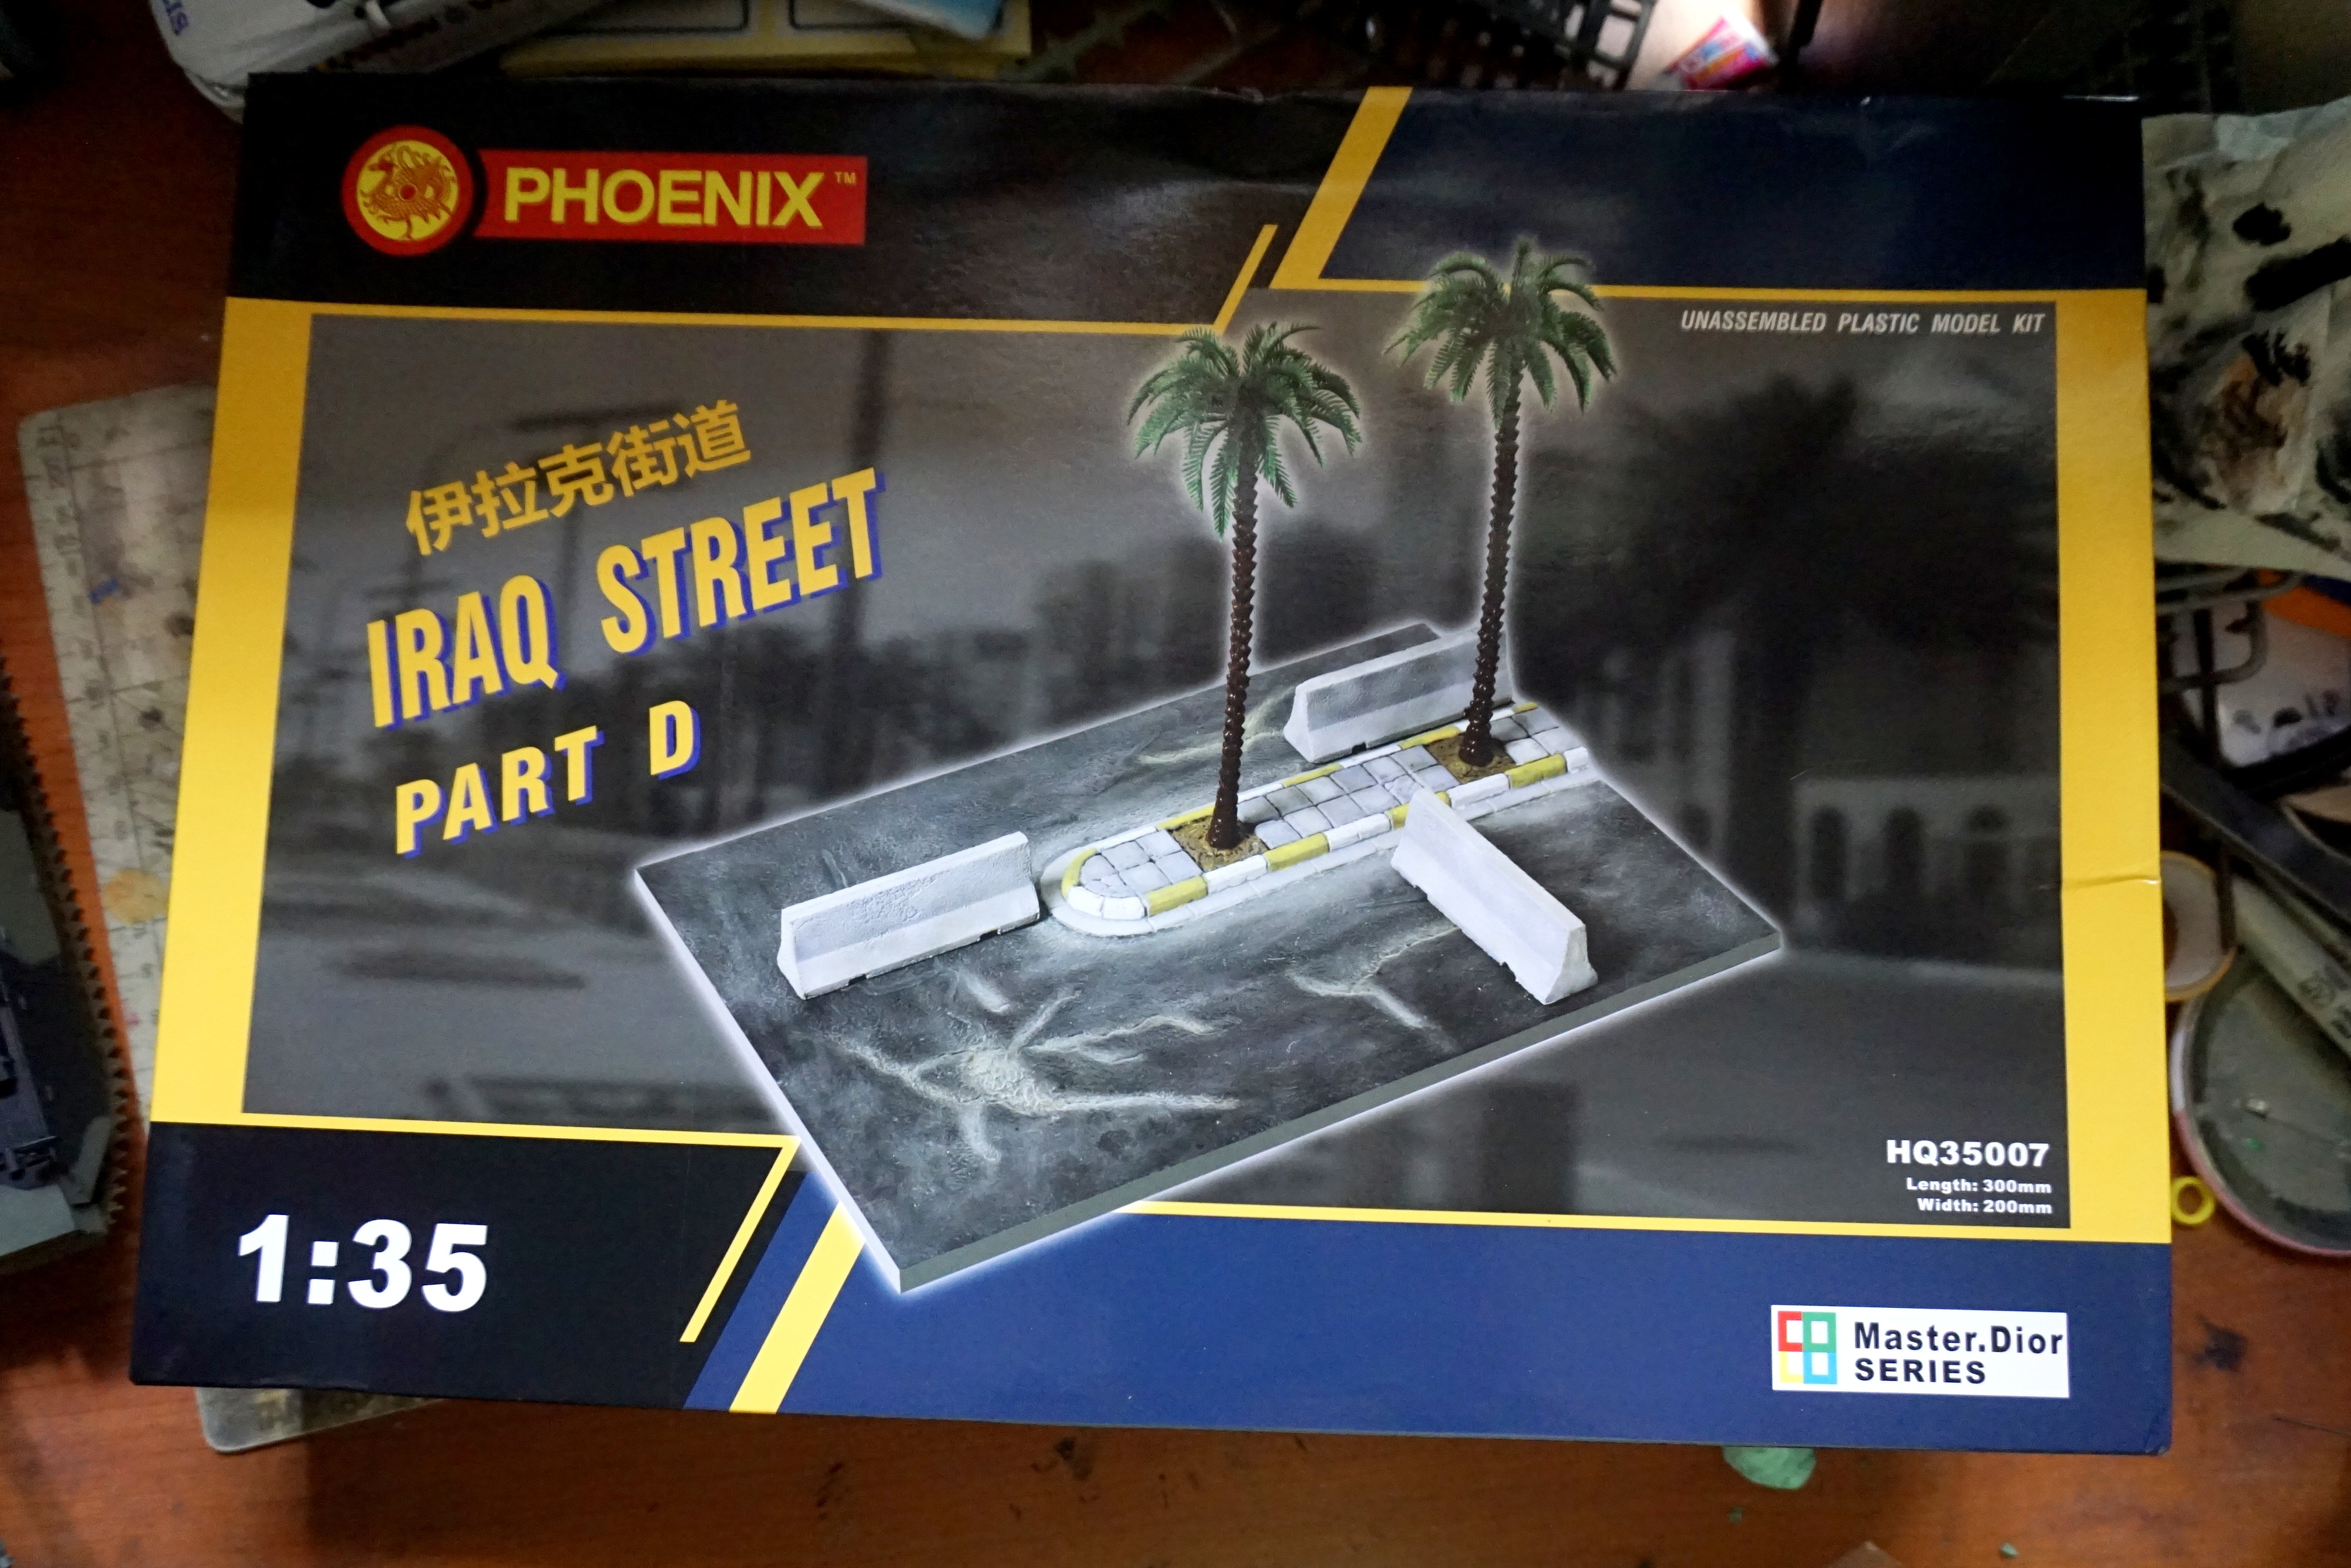
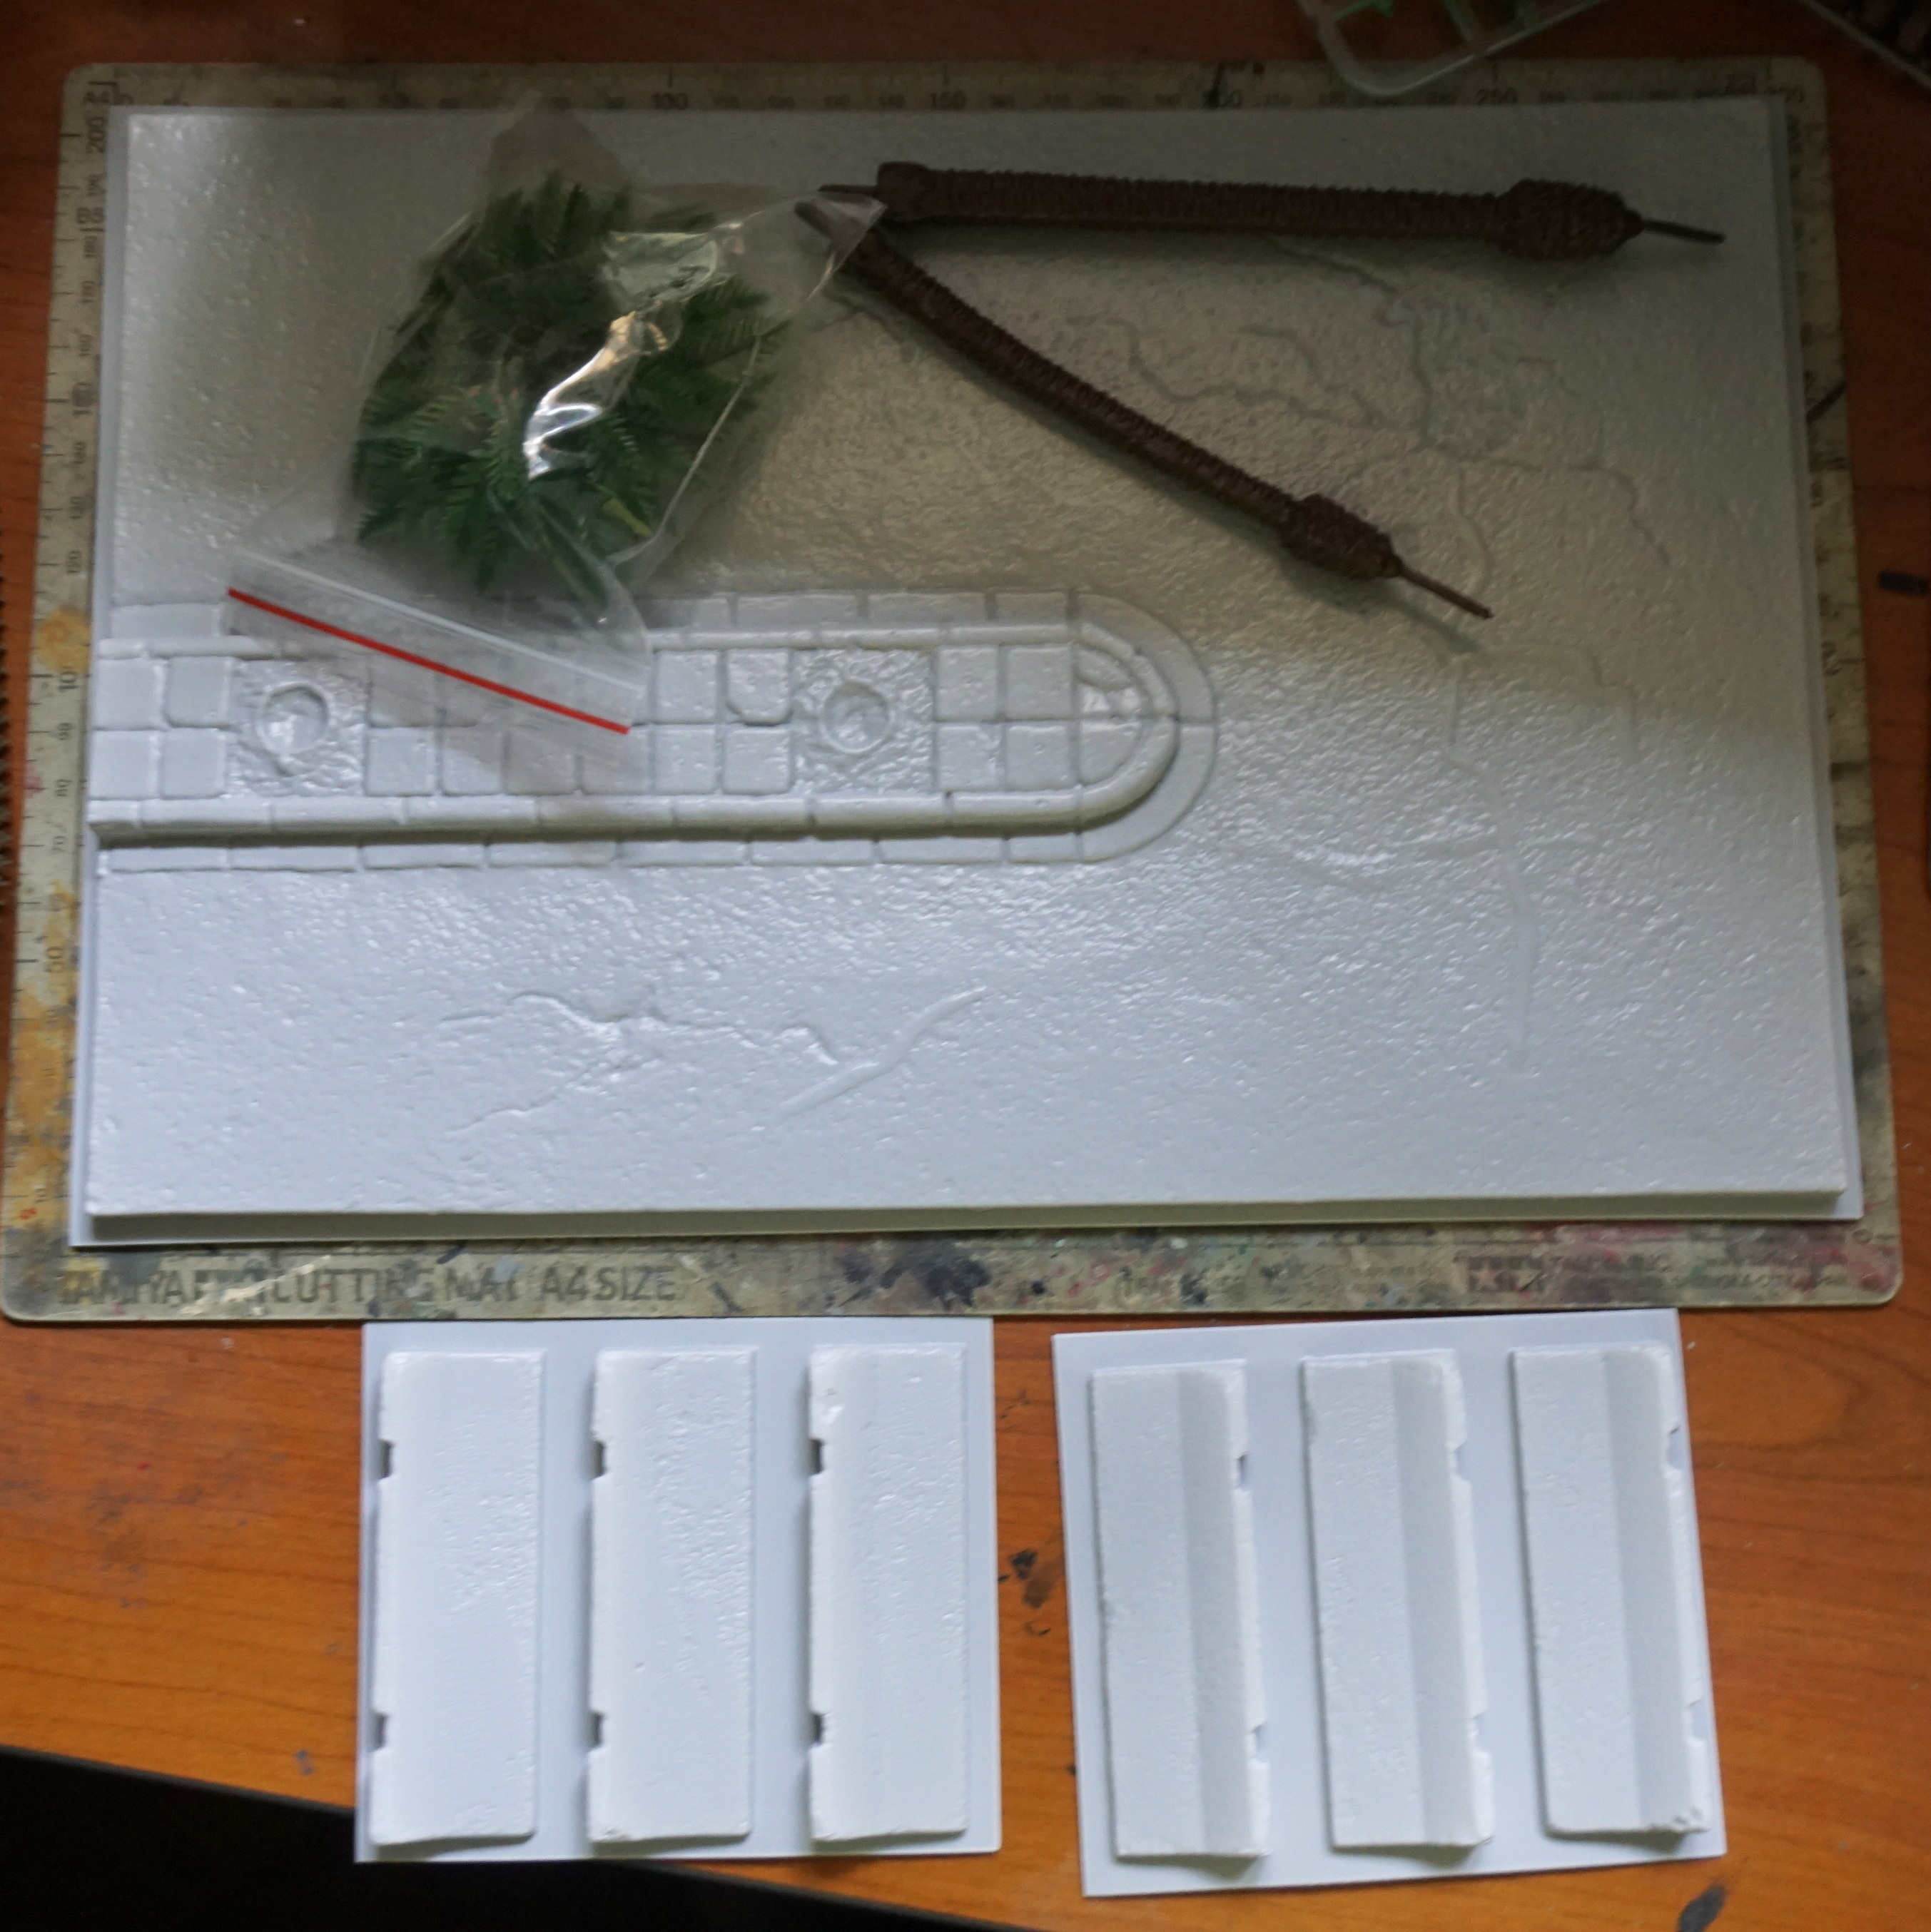
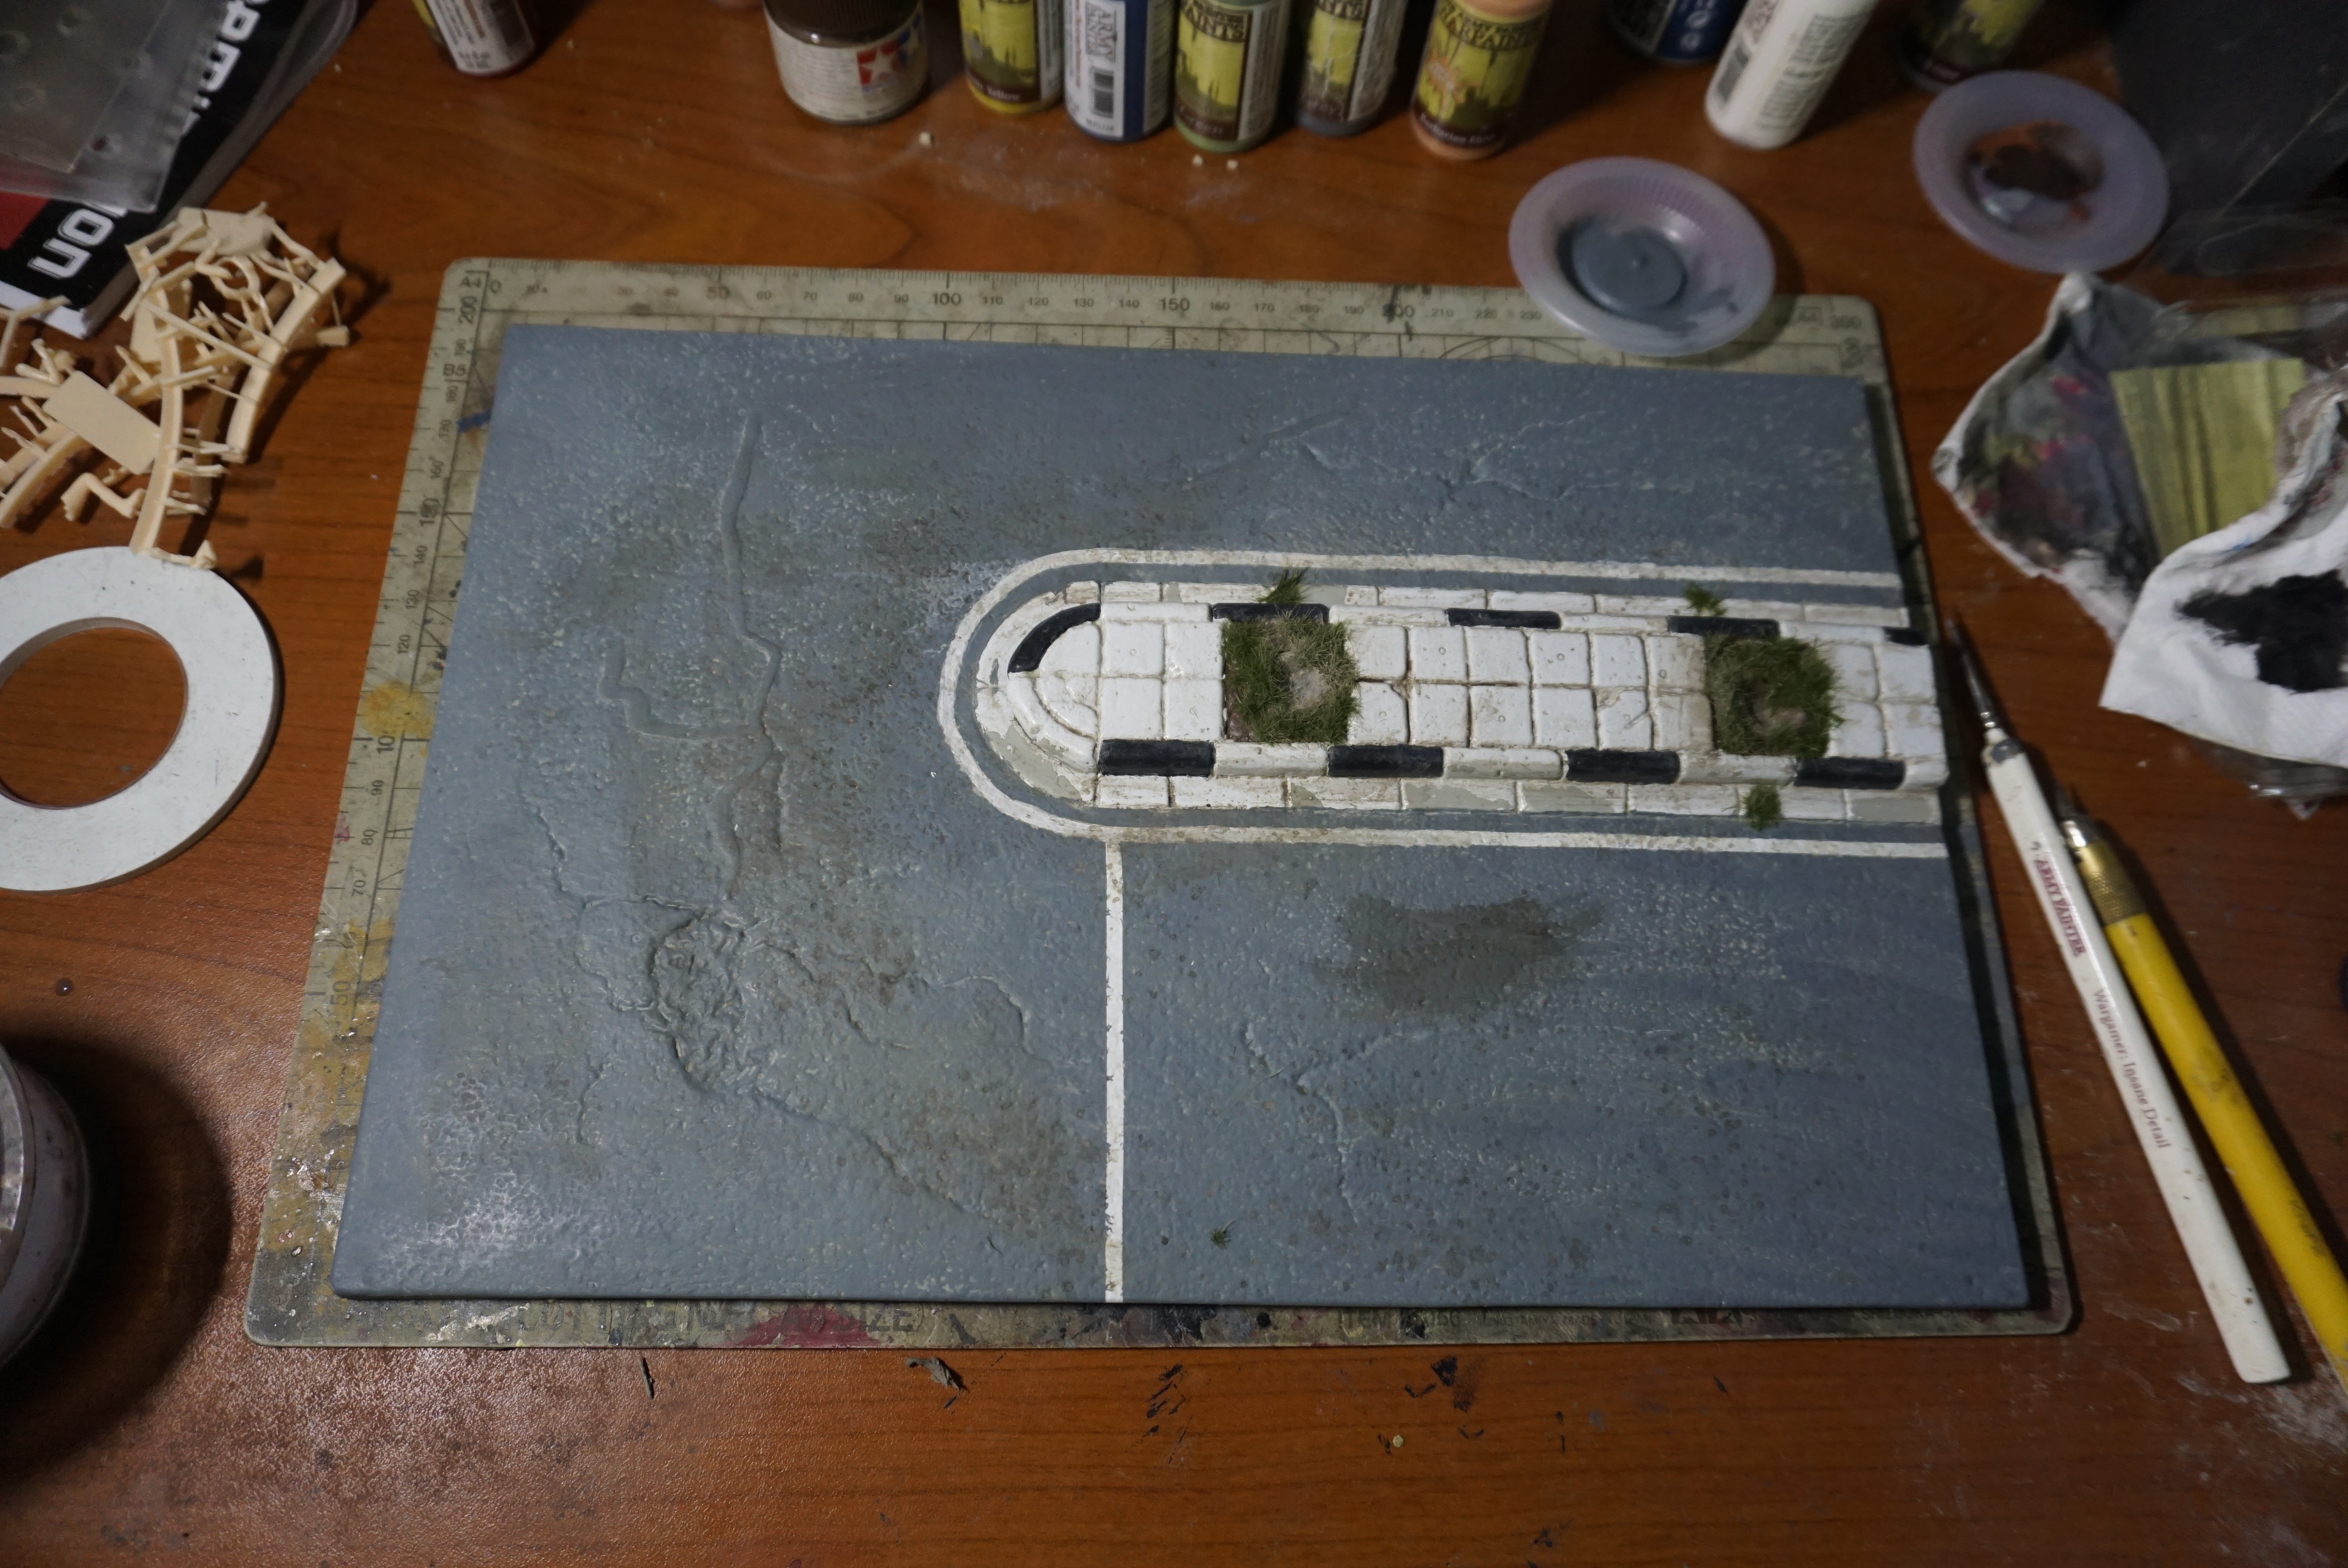
After much consideration, searching and availability, i choose the Phoenix Models *No, not that RC plane one!* Iraq Street Part D which seem fit the bill with one i have in mind for the dio. Somehow it still hard to find their dio set that even from their official E-bay store don’t even have them in stock!
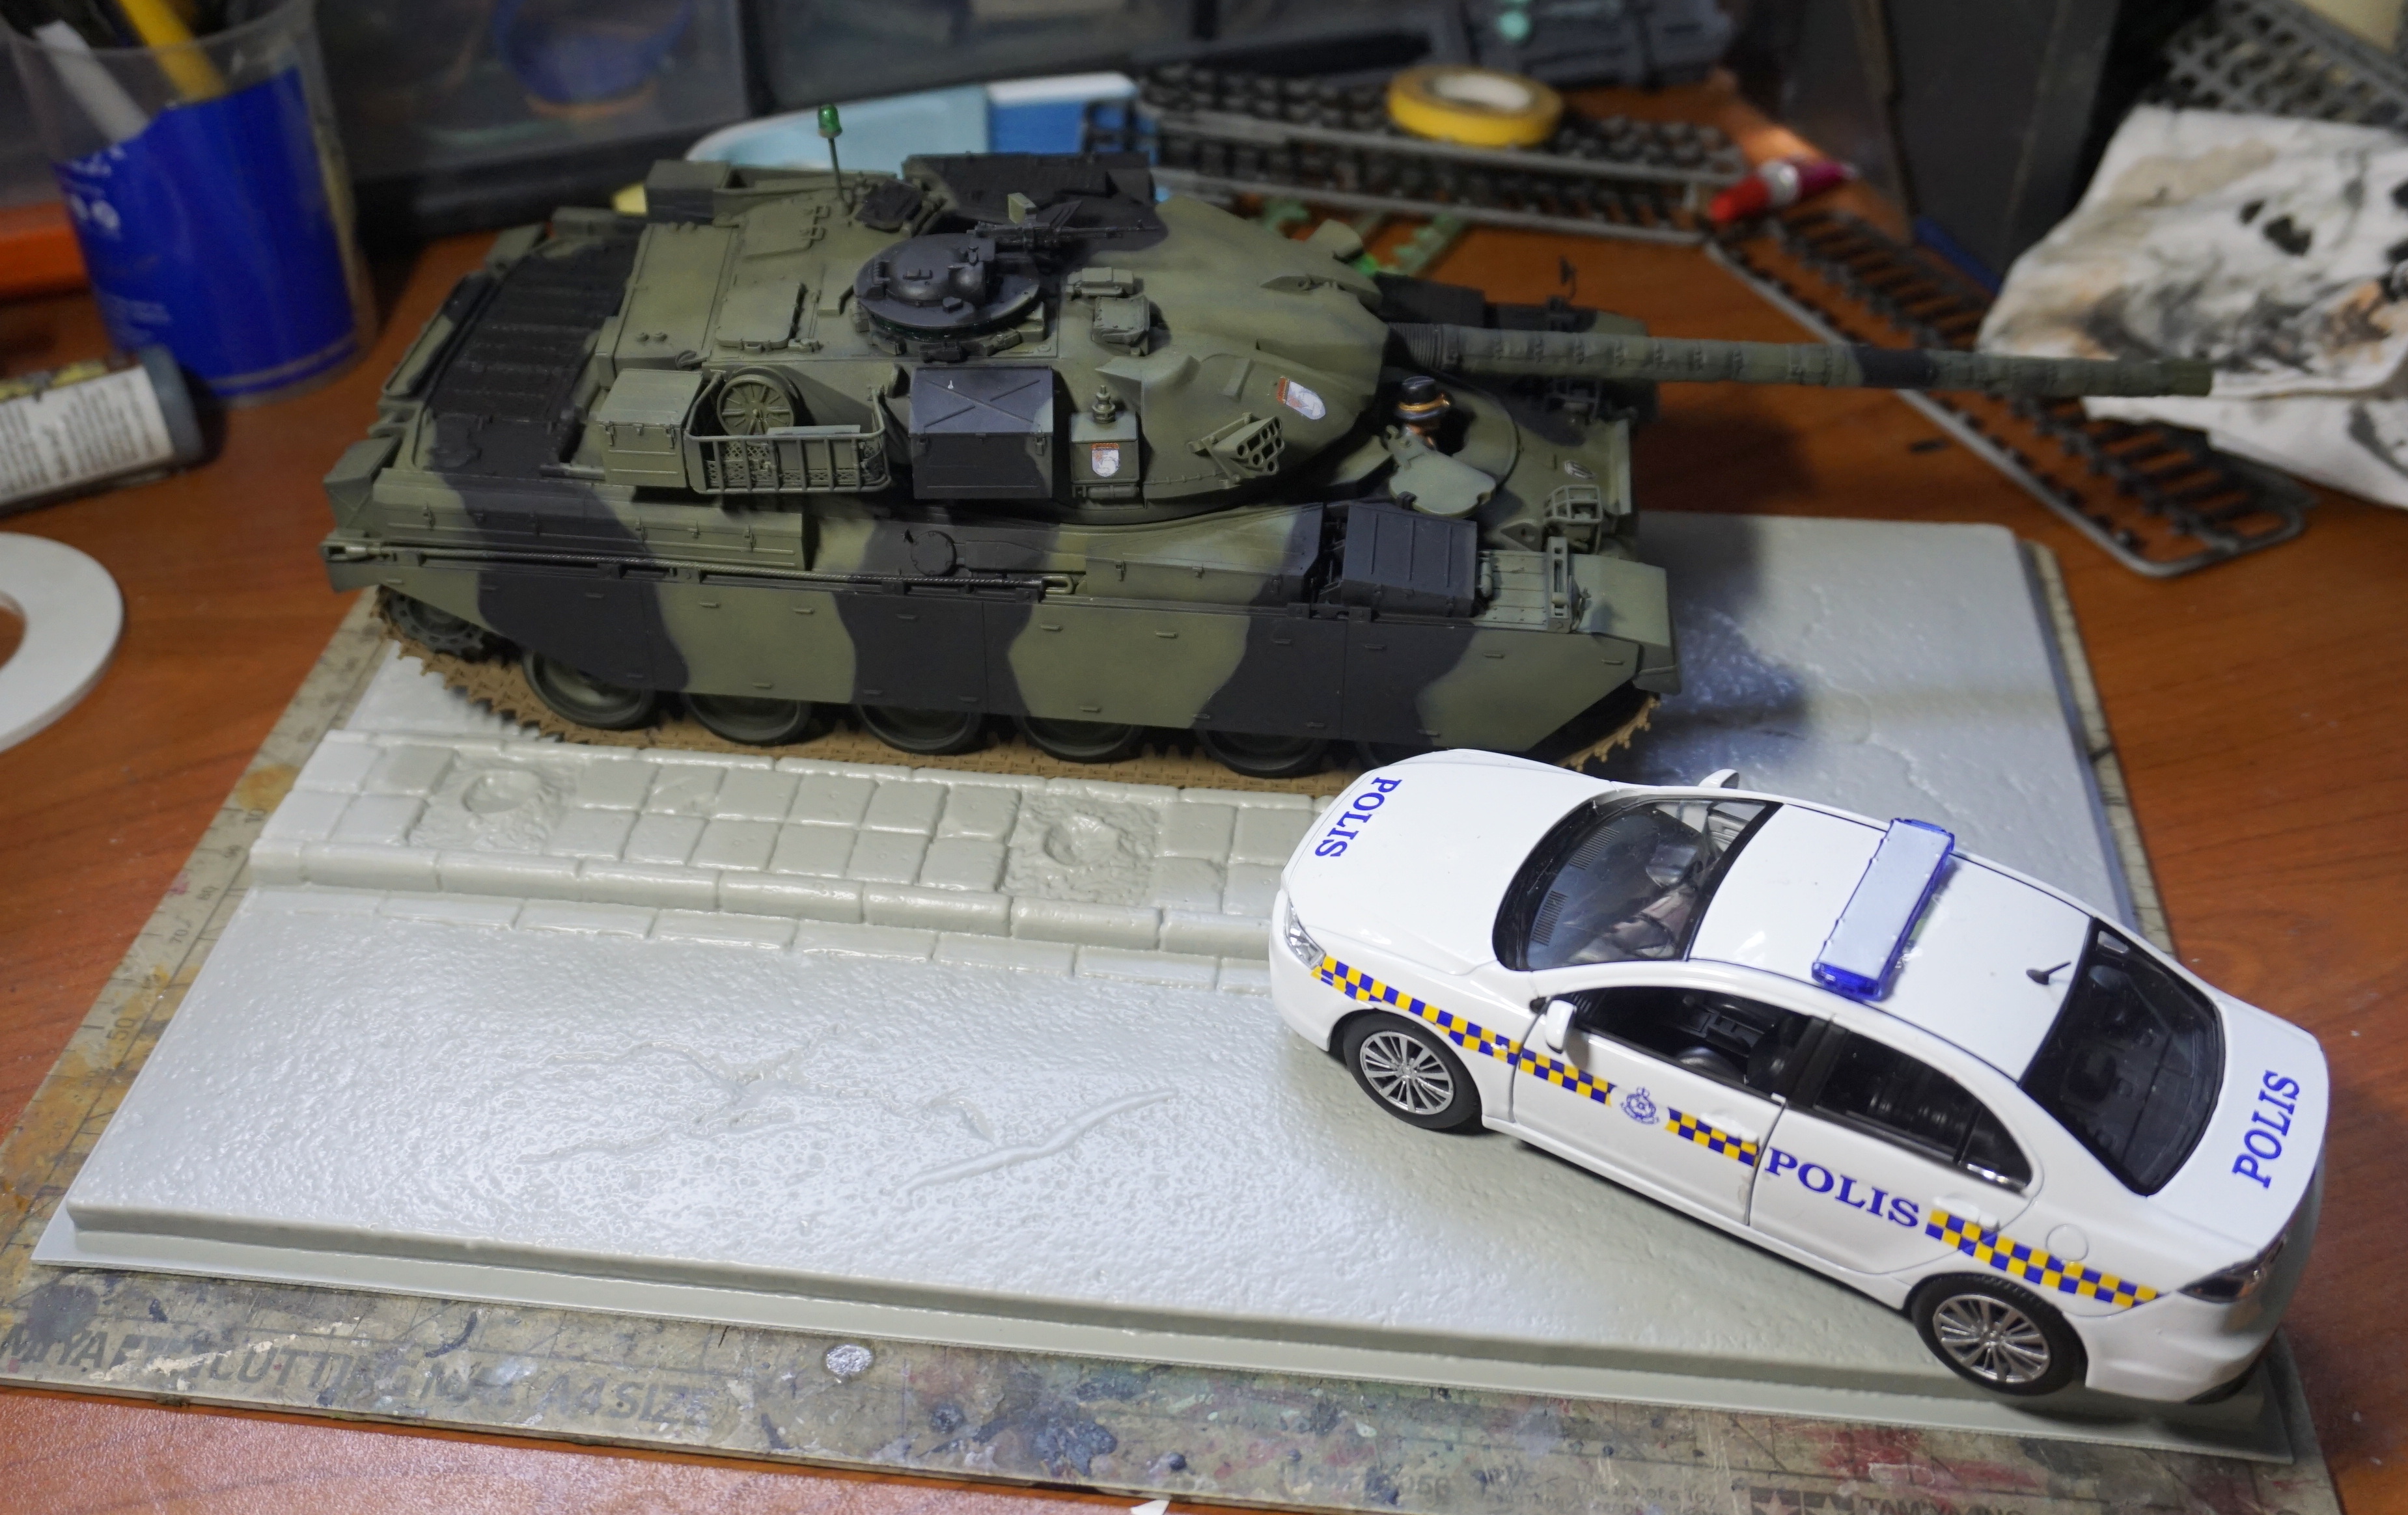
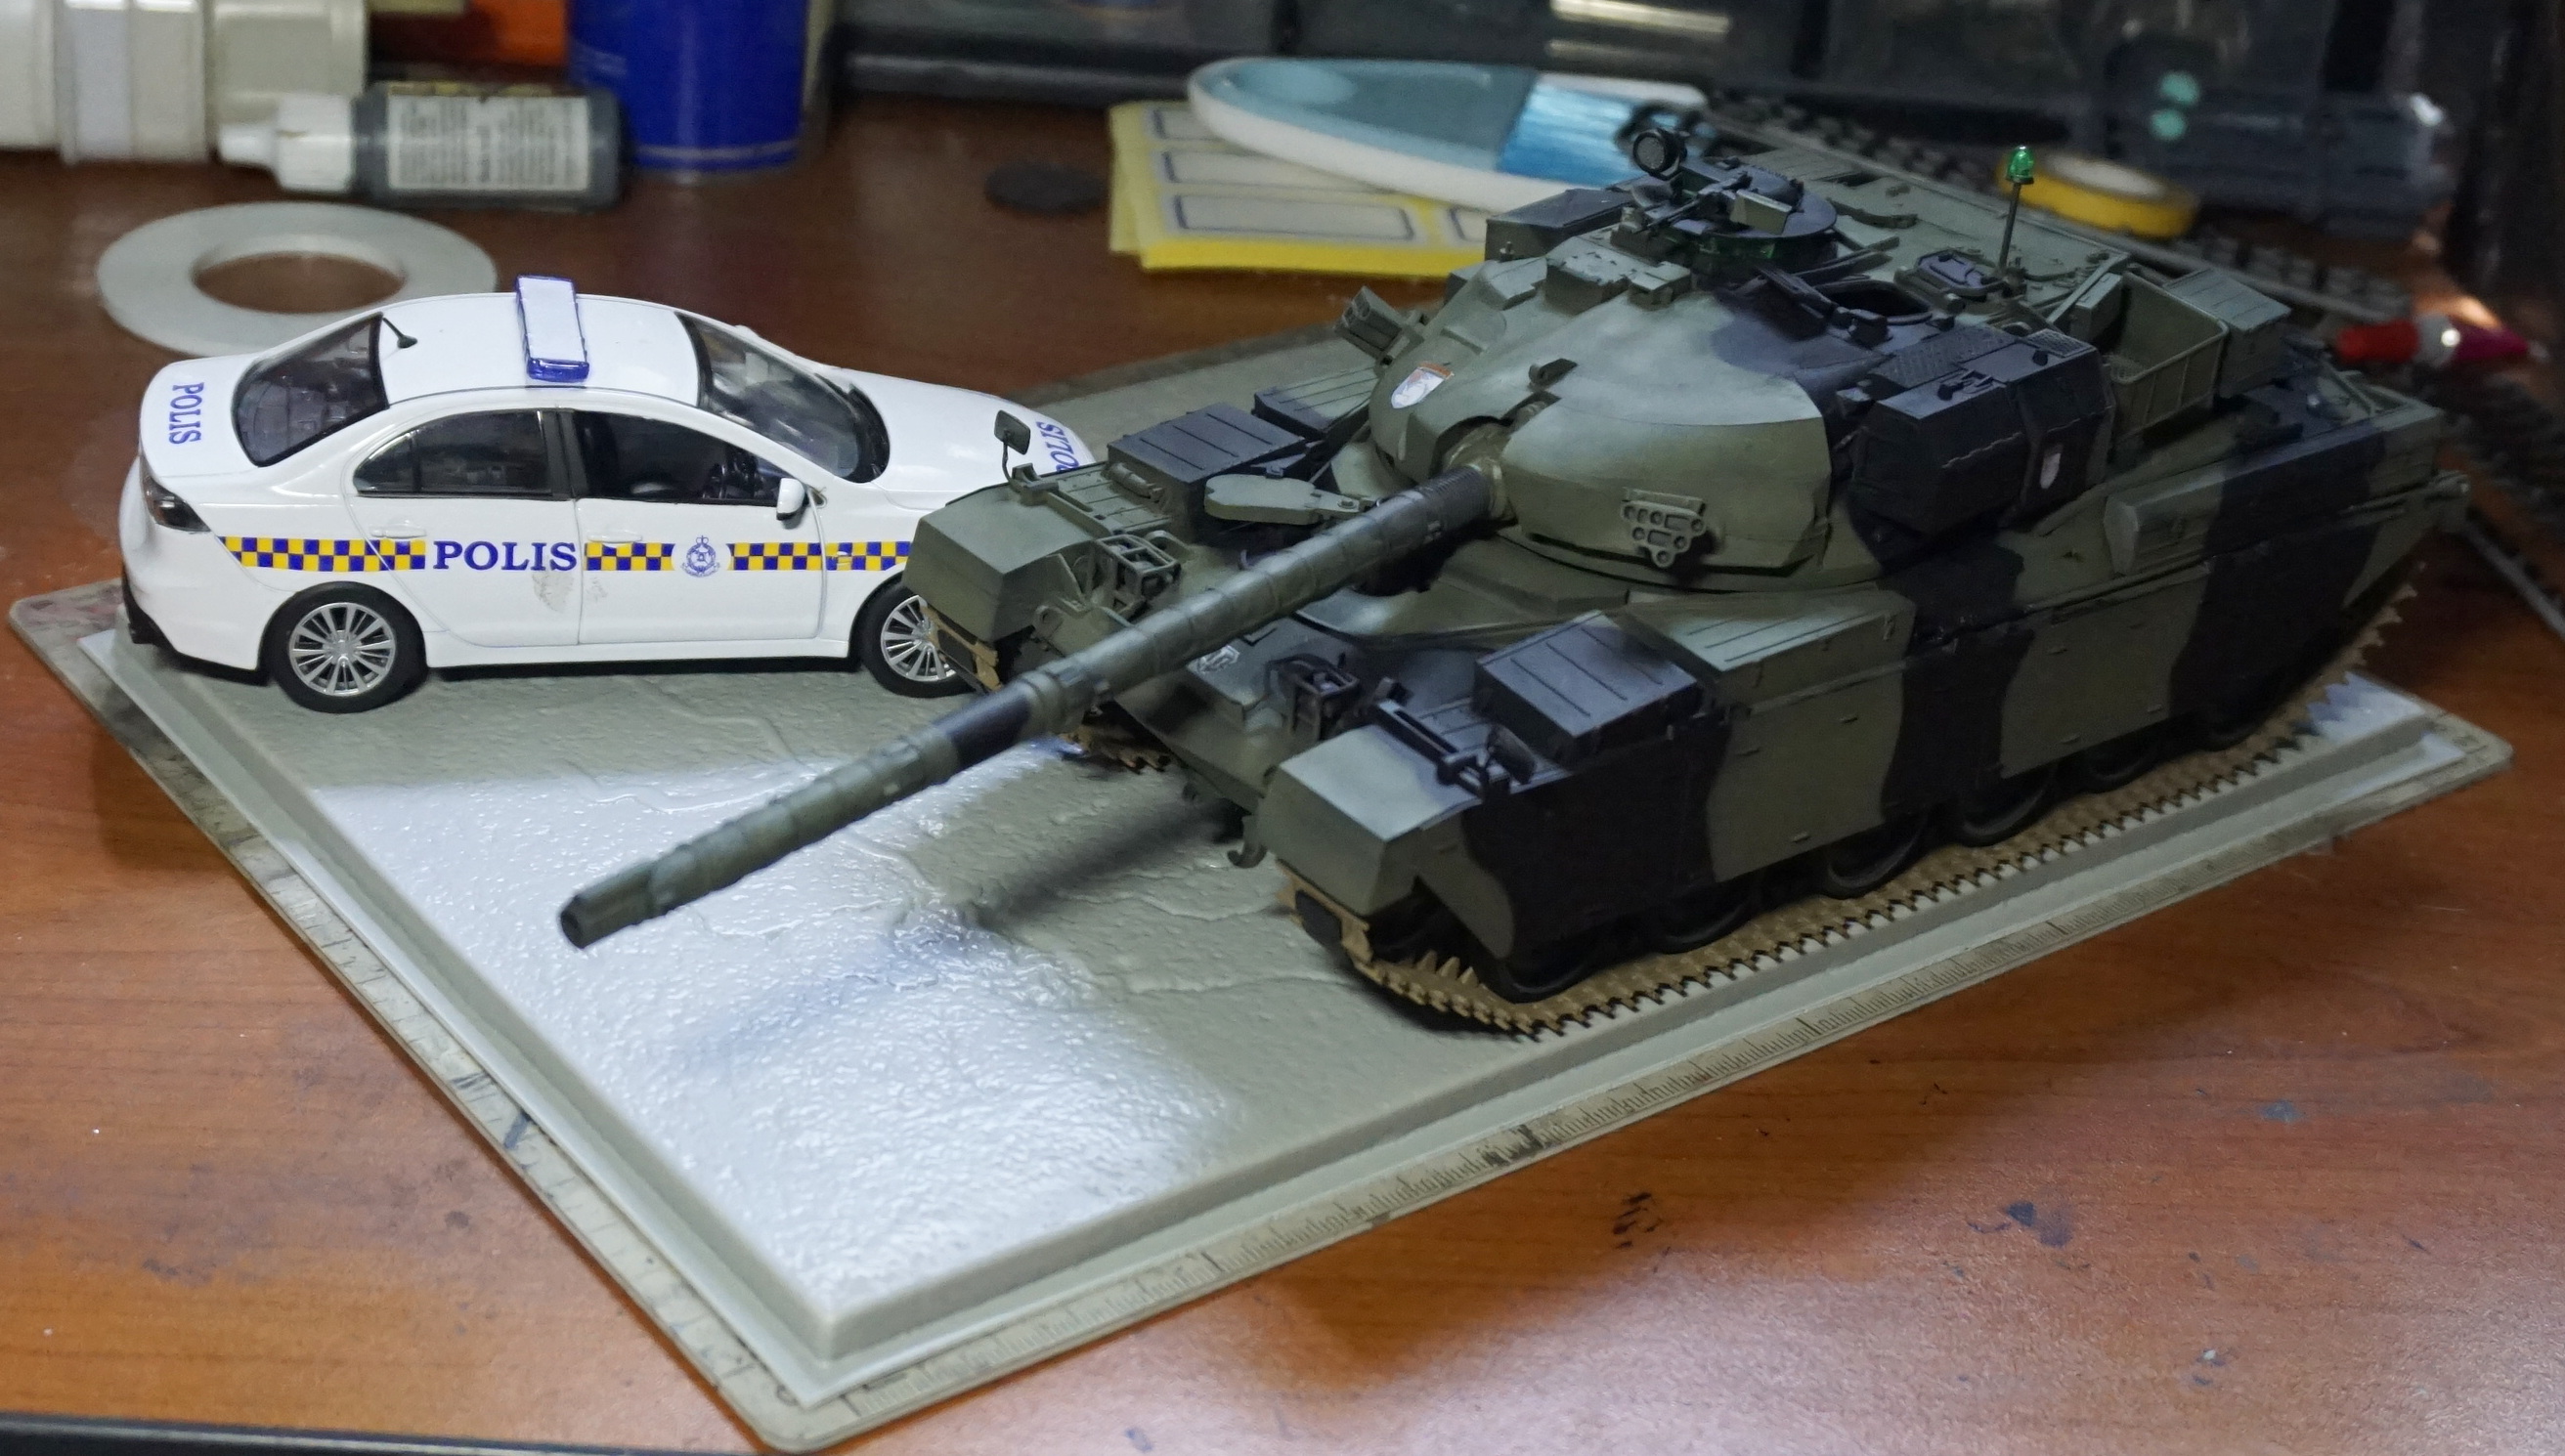
Here where more decision have been made, at first the idea was to have police escort the tank but as you can see the tank hog alot of room and that diecast police car barely fit into it so that got axed. I actually tempted to use toys signal light and sign but don’t seem to find one that can fit with the 1/35 scale well so that axed as well.
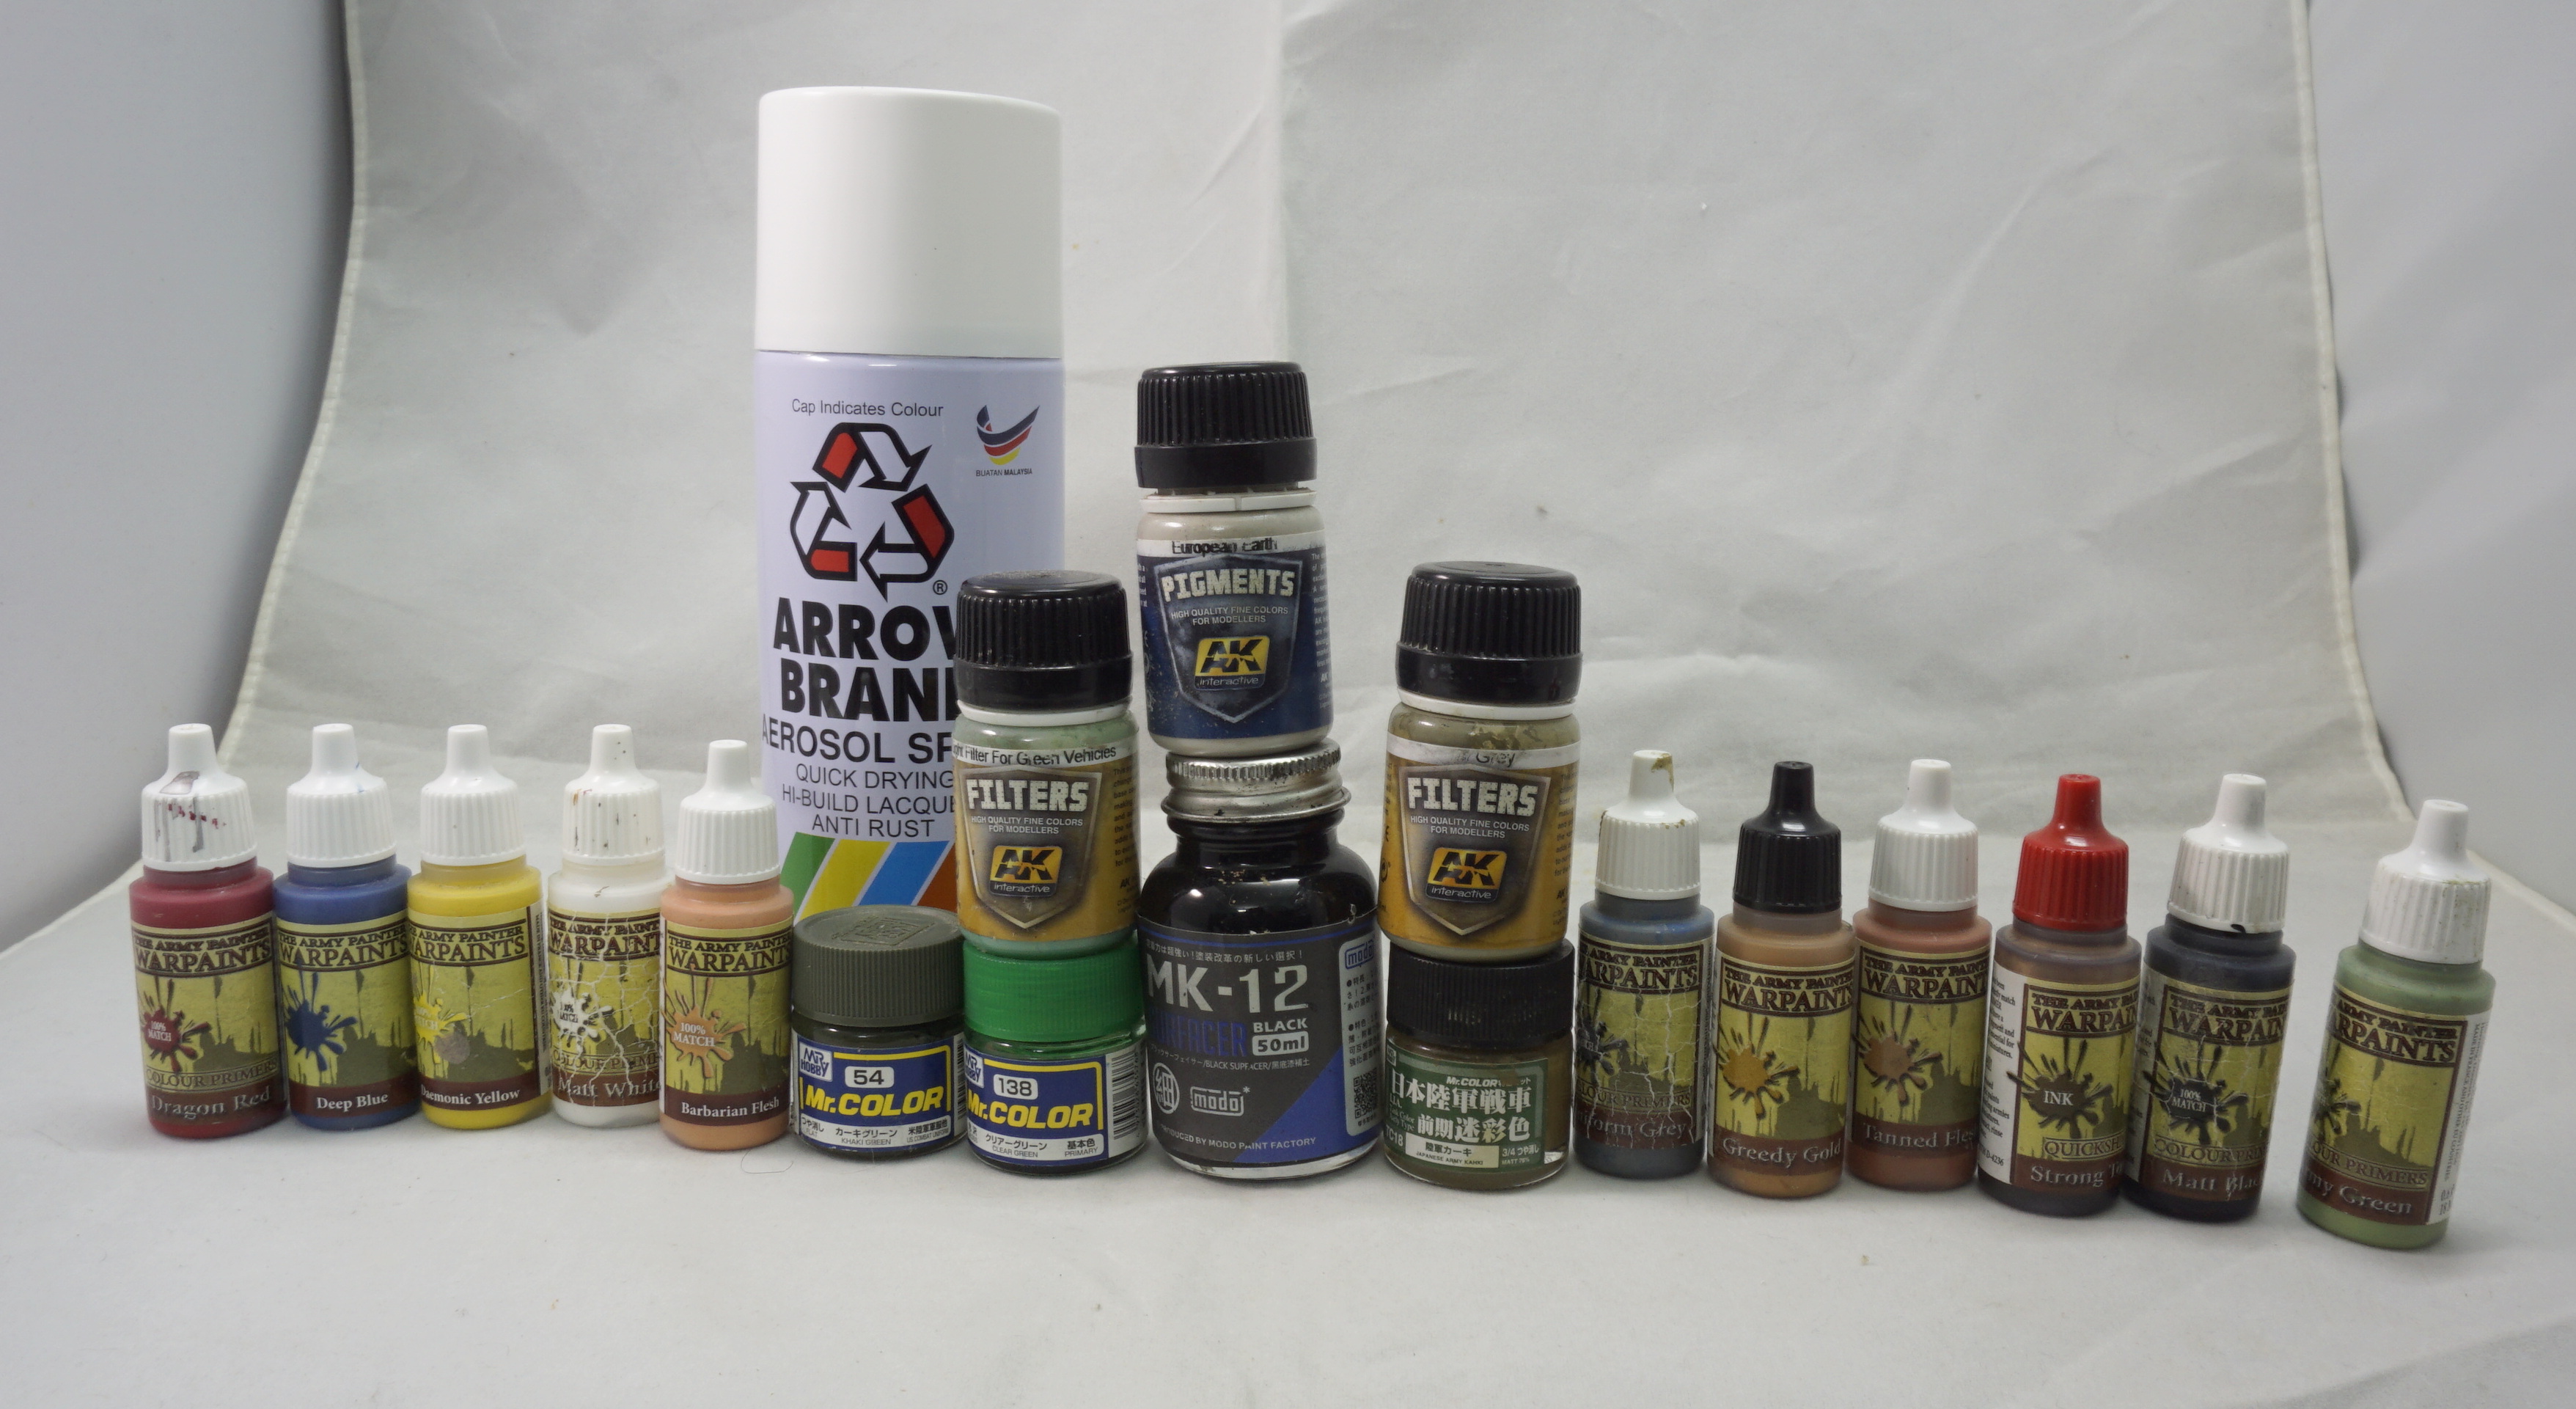
Now for the paint scheme i choose the infamous green black camo and here the list of the paint used for the tank:
- Modo MK-12 Black Surfacer – Camo (Cuz i lazy)
- Mr.Color 54 Khaki Green – Camo
- Mr.Color TC18 Japanese Army Kahki – Tracks
- Mr.Color 138 Clear Green – Lens
- Warpaints Matt Black
- Warpaints Gunmetal – Silvery bits
- Modo M-008 Flat Clear
As for the figures, i choose these instead:
The Chieftain
- Warpaints Uniform Grey
- Warpaints Greedy Gold
- Warpaints Tanned Flesh
- Warpaints Matt Black
- Warpaints Matt White
- Warpaints Strong Tone
St. Gloriana Girls
- Warpaints Daemonic Yellow + Matt White – Darjeeling Hair
- Warpaints Barbarian Flesh + Dragon Red – Orange Pekoe Hair
- Warpaints Dragon Red + Matt White – Rosehip Hair
- Warpaints Dragon Red – Uniform
- Warpaints Greedy Gold – Buttons
- Warpaints Matt White
- Warpaints Matt Black
- Warpaints Deep Blue – Cup & Kettle
- Warpaints Anti-Shine
Running Boys
- Warpaints Uniform Grey
- Warpaints Deep Blue
- Warpaints Tanned Flesh
- Warpaints Barbarian Flesh
- Warpaints Army Green
- Warpaints Matt Black
- Warpaints Matt White
- Warpaints Uniform Black
- Warpaints Strong Tone
Street
- Arrow 2 White Aerosol Can (Cuz lazy)
- Warpaints Uniform Grey
- Warpaints Matt White
- Warpaints Matt Black
- Warpaints Tanned Flesh + Matt Black – Ground
- Army Painter Wilderness Tuft for grass
The tank and street have been weathered with the combination of
- AK042 European Earth
- AK4161 Neutral Grey Filter
- AK4162 Light Filter for Green Vehicles
That some long list! As for the decal i use a mix of kit supplied decal and my own custom GuP & WoT decals.
Priming 
Camo Masking 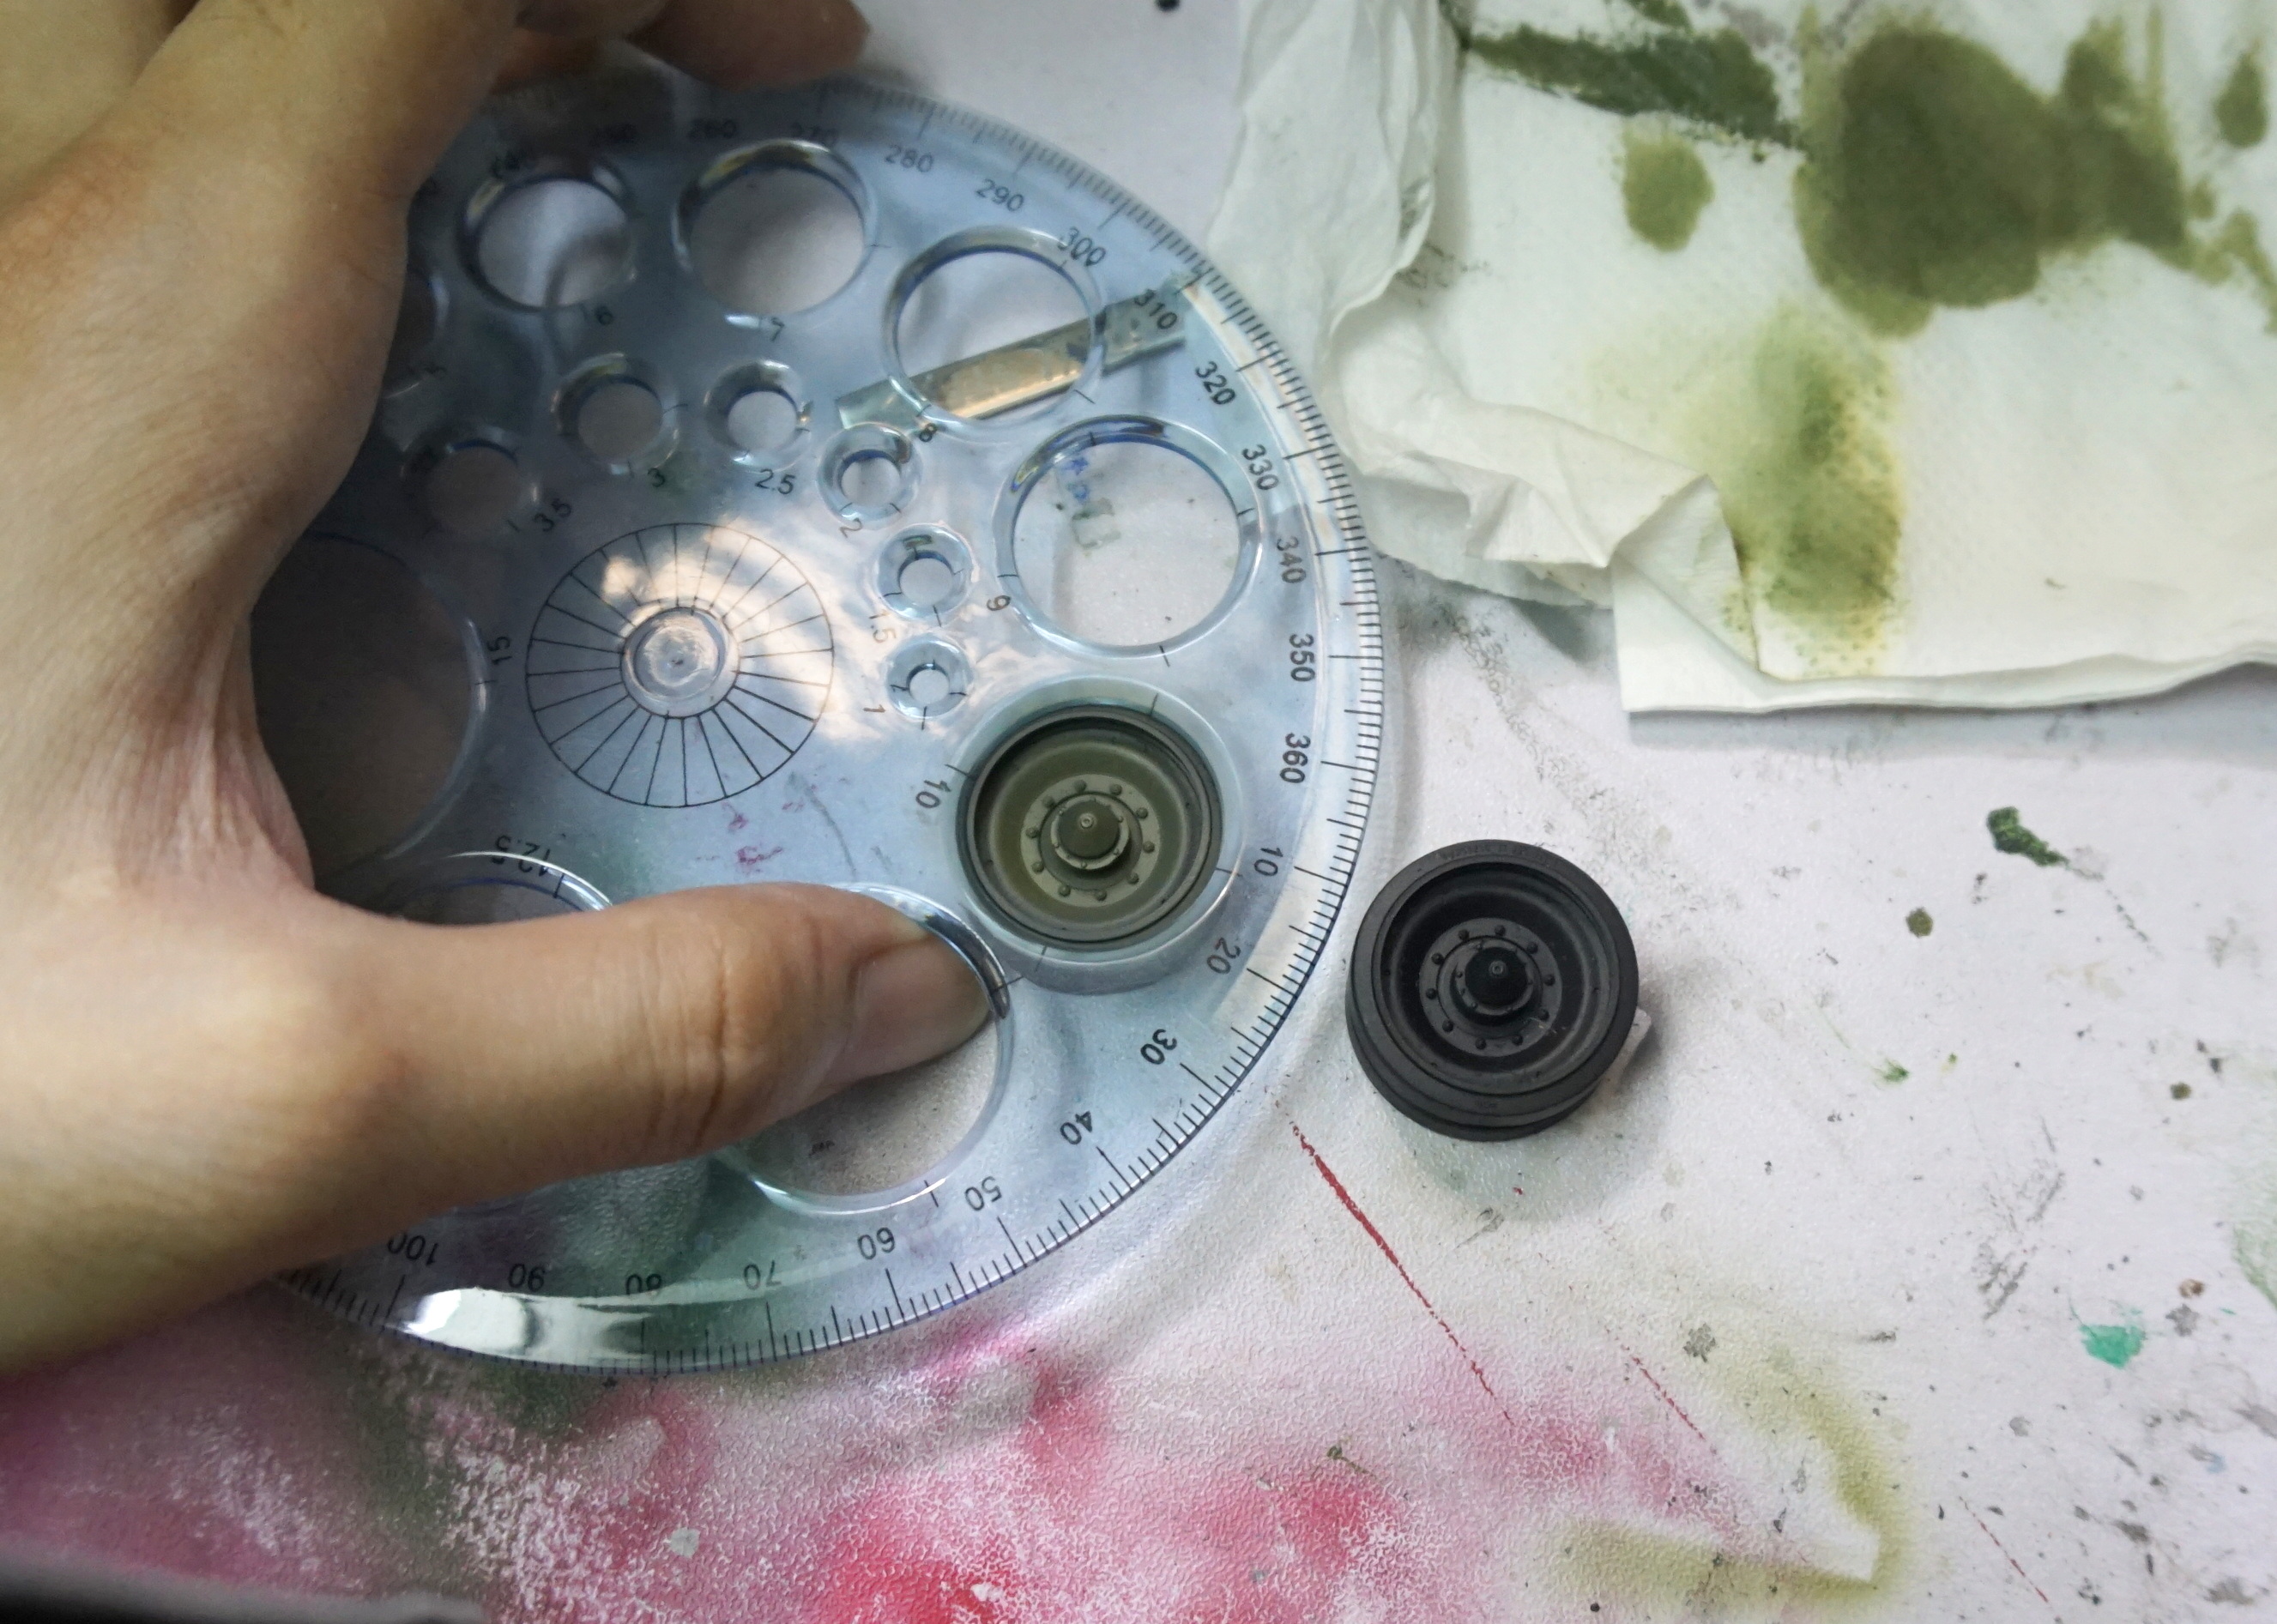
Before weathering 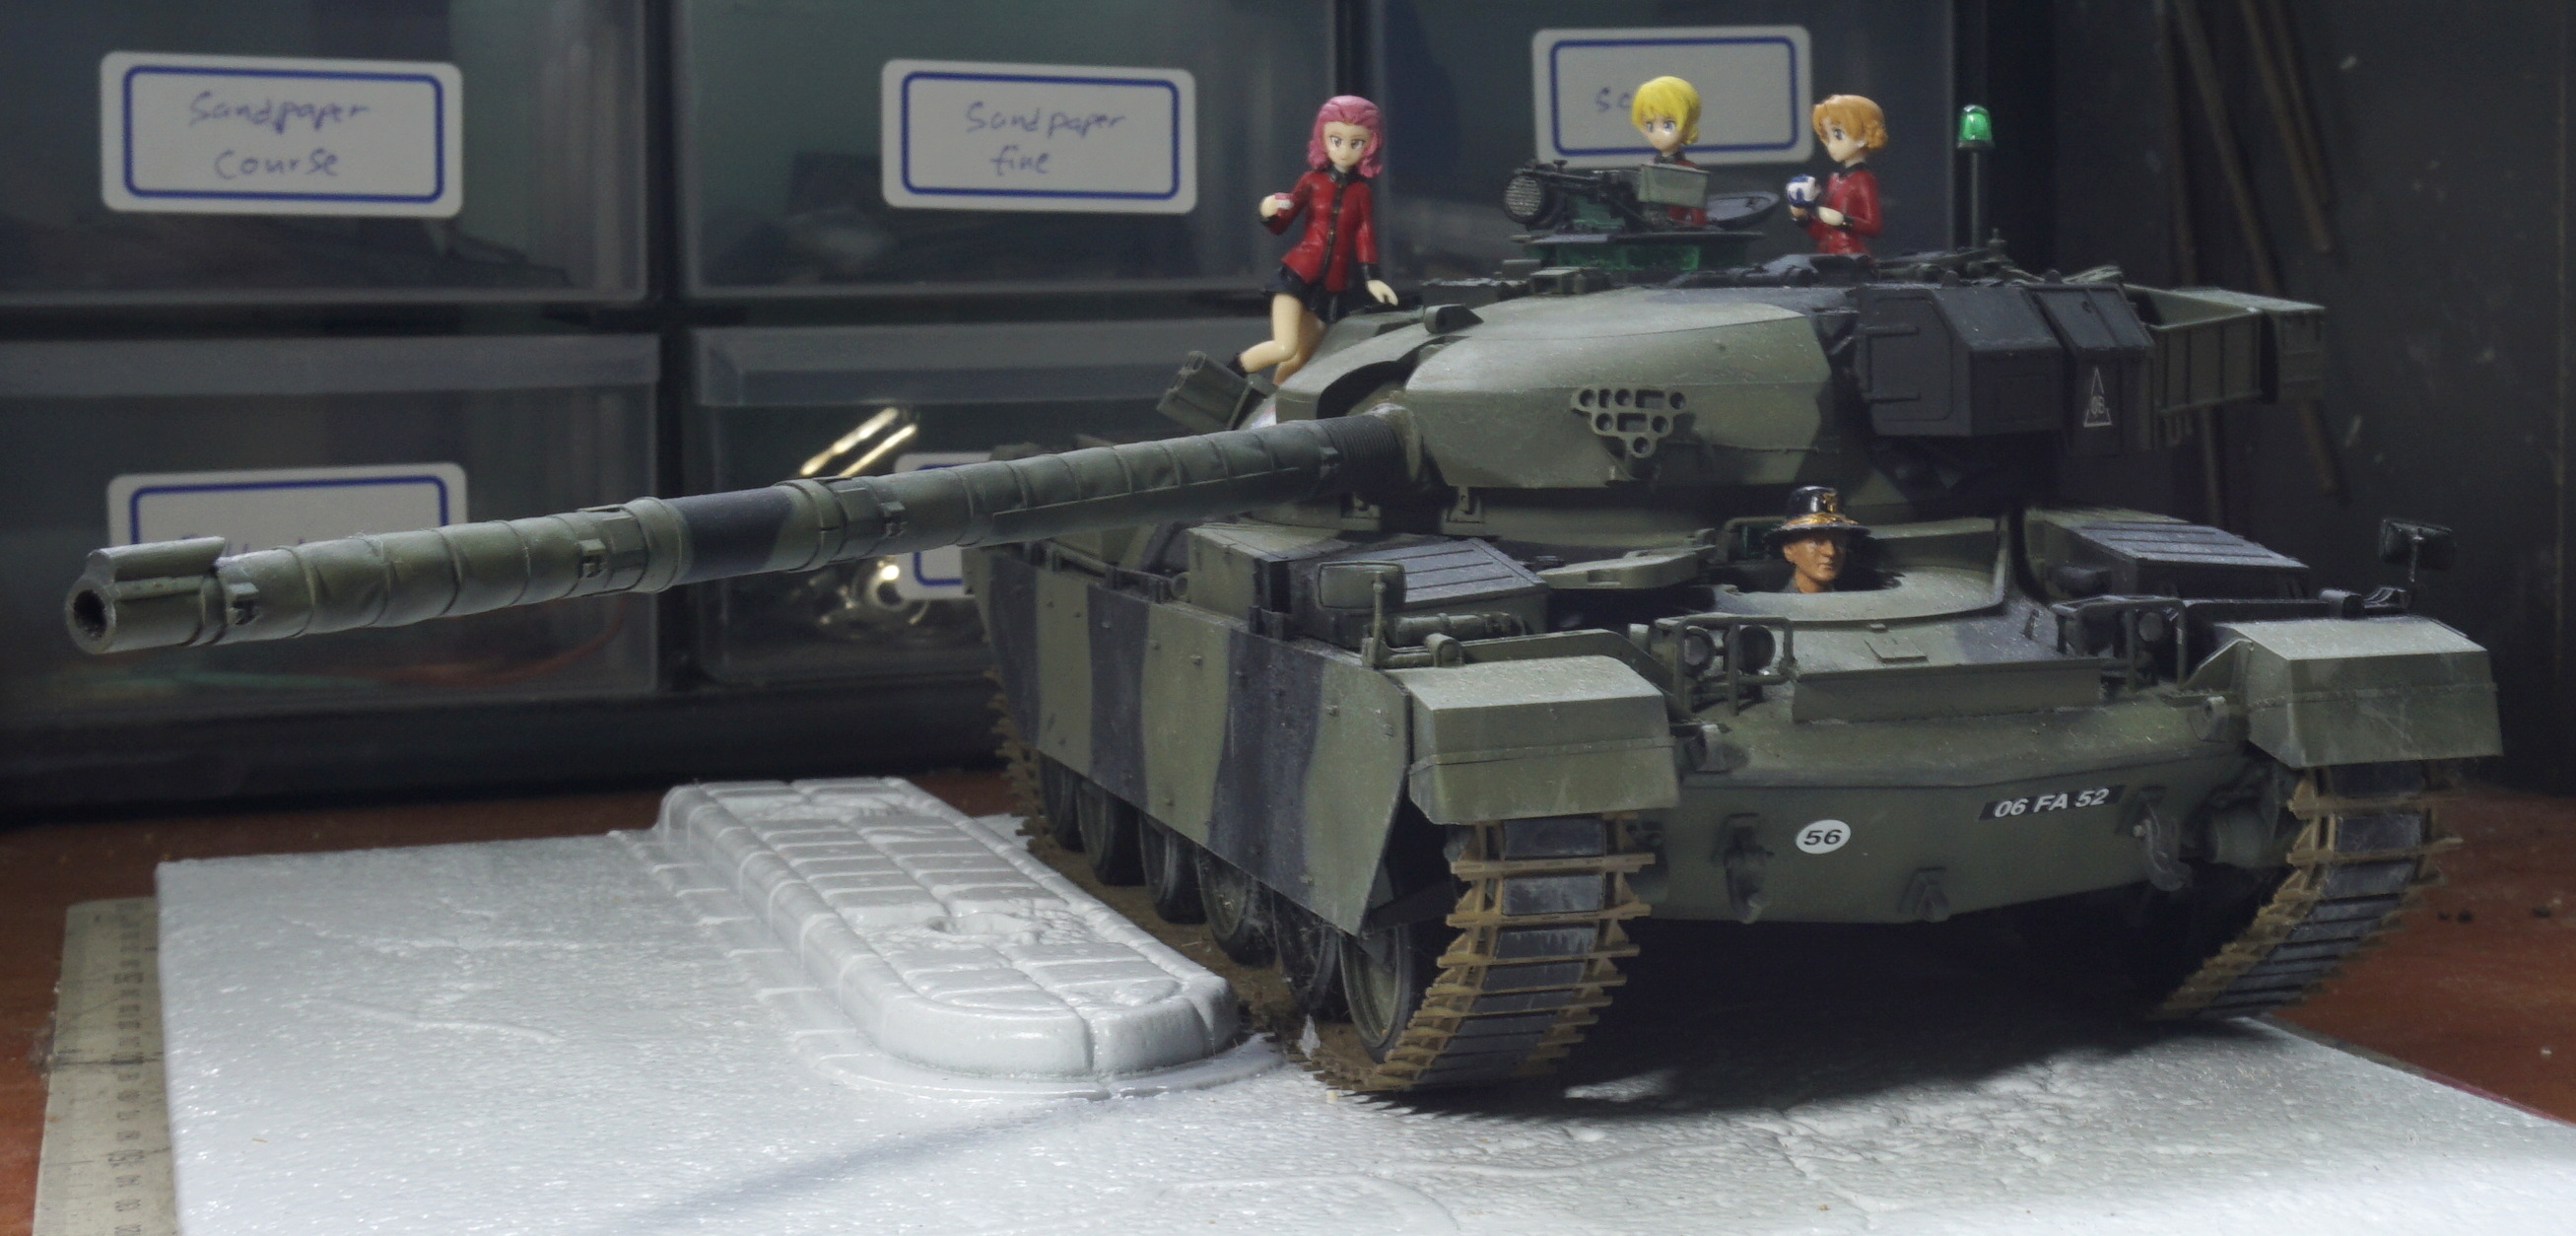
The Result
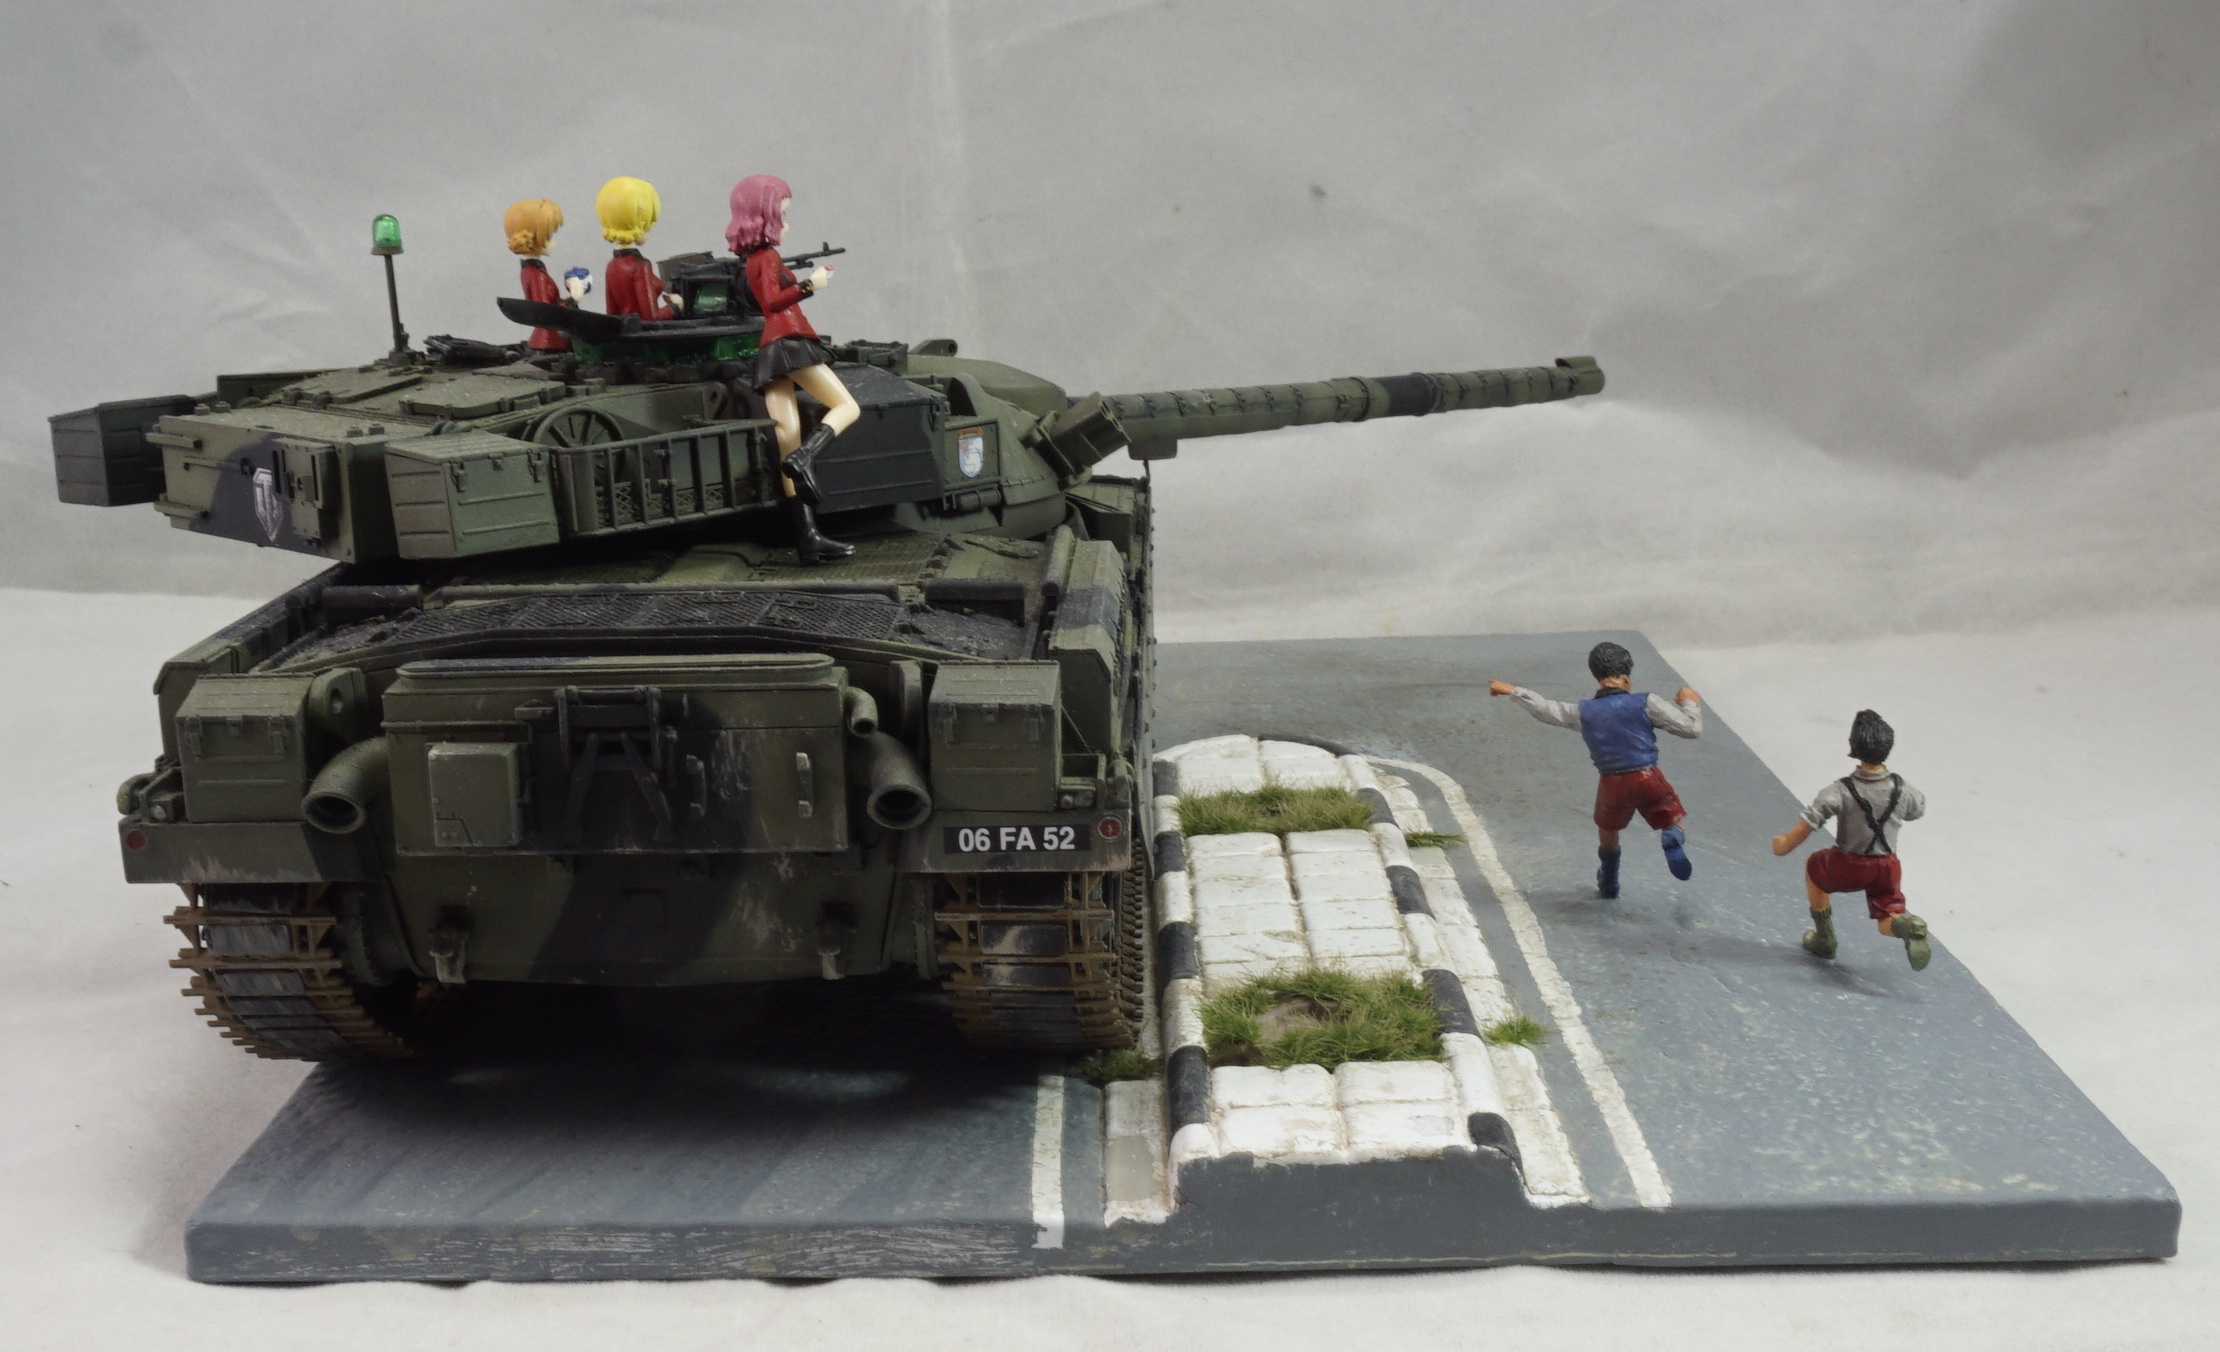
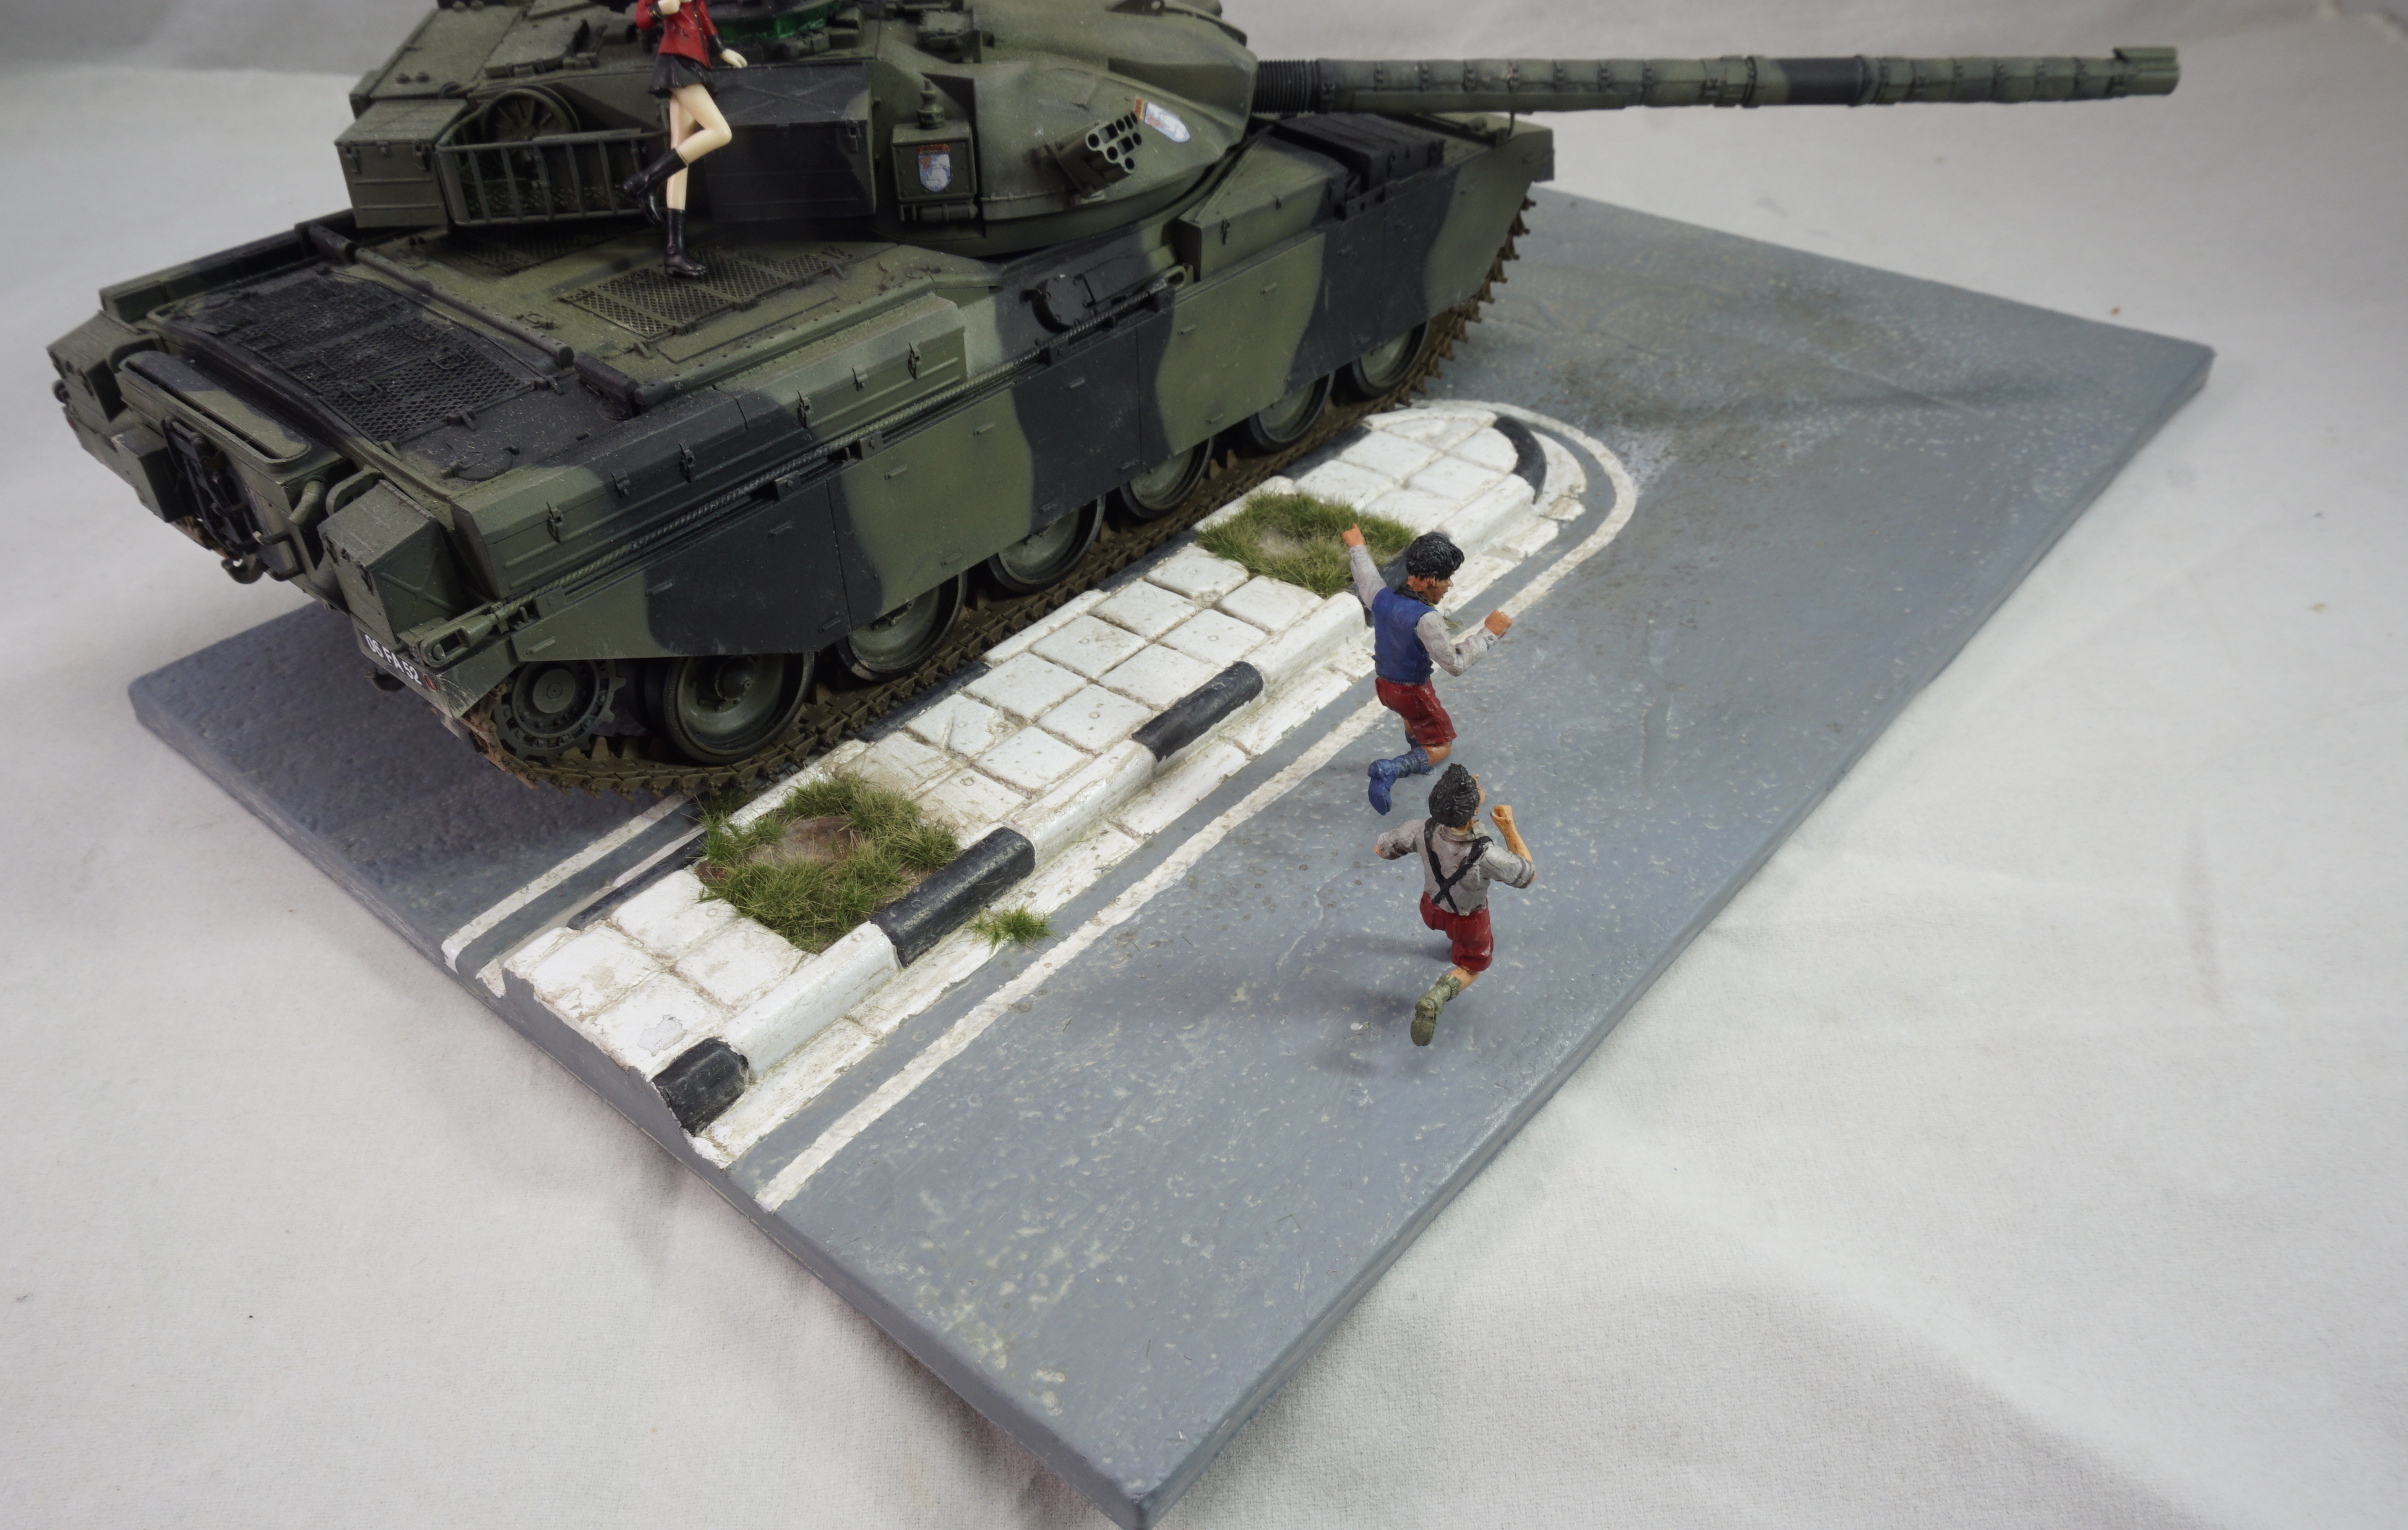
Off base


While i not done what i originally planned to do with this project, i still satisfy with the result. Probably in the future i would find a way to make use of the space infront of the tanks with probably more figure or street prop but i really want to focus on complete a whole load of backlog since i would not have alot of free time from now on.
